Check out our PowerPoint to Web-Based-Training Services!
This article originally appeared on the Texarkana Gazette, and is republished here with permission from the author.
The great Roman leader Julius Caesar is aptly credited for recording the proverb, "Experience is the best teacher." Compared to books, experience can be arguably considered as an experiential teacher of all things, the patriarch of practice, the mother of prudence, the well of wisdom, or the labyrinth of meaning. Regardless of clichés used, between theory and reality is a cycle of tangible events that inherently blends intangible assumptions with practical scenarios that function as remote "pockets of learning."
In the world of business, managers expect employees to master their skills and perform at exceedingly high levels of efficiency. This feat can be achieved through none other than experience. Experience obliges employees by acting as a by-product of gaining knowledge that has been verified through iteration and certified through legitimate results. In other words, employees gradually become subject matter experts through recurring opportunities to improve their abilities and develop understanding by solving problems.
The origin of learning stems from either hands-on learning or instructional activities. Essentially, employees learn by actively engaging in constructive methods to solve complex problems or simply achieve learning through content delivery provided by an instructor or trainer.
What is actually learned and then performing what is actually learned become critically important when assessing both opportunity and timing. Through repetitive usages, employees become increasingly qualified and empowered by the ability to approach complex situations with learned skills that reduce uncertainty and produce fruitful outcomes. Employees generate a motivation to transfer what is learned into practical situations that require tactical approaches to solving problems.
Consequently, employees become carriers of learned experiences that, when managed properly, can be aligned with personal goals when elicited for organizational gain. Specifically, employees can exercise their competencies in an autonomous manner that directly links decision-making to their daily work activities. Suffice it to say that not only does "experience teach", but "experience motivates."
Through the art of transference,
Experience becomes a currency that only appreciates in value once its supplied and expended masterfully. The underutilization of learned experiences unfortunately wastes talents that could otherwise generate healthy returns on training and circumstantial investments. What is more, the failure to utilize an employee's experiences in common or uncommon situations not only deprives learning but also limits the exposure to unseen deficits, which can be deceptive. As a result, employees will attempt to solve problems overconfidently with dismal results and, due to flunking the task, only seek manageable assignments that are easily achieved.
The adage, "practice makes perfect" rightly applies. If players fail to practice before a game, any attempt to triumph over their opponents will unmask inefficiencies and missteps that practice would have corrected. Similarly, if employees are not experienced through training and situations, complexity will expose their weaknesses, cause insecurity in their evaluation of their skills, and deter them from seeking experiential challenges. Likewise, if a coach fails to put his best players in the game, he sadly forfeits any conceivable chances of winning.
Managers who fail to maximize the expert potential of their experienced employees not only demotivate them but squander any chances to come out on the other side of any complex situation victorious. For experience to be a true motivator, it behooves managers to
---------------
ABOUT THE AUTHOR: Dr. Brian L. Matthews is a tenure-track Assistant Professor of Management at Texas A&M University-Texarkana, and is the Management Program Coordinator of TAMUT's College of Business, Engineering, and Technology (CBET).
Brian discusses this article and other topics in LIFE Edge 124. You can see that episode below:
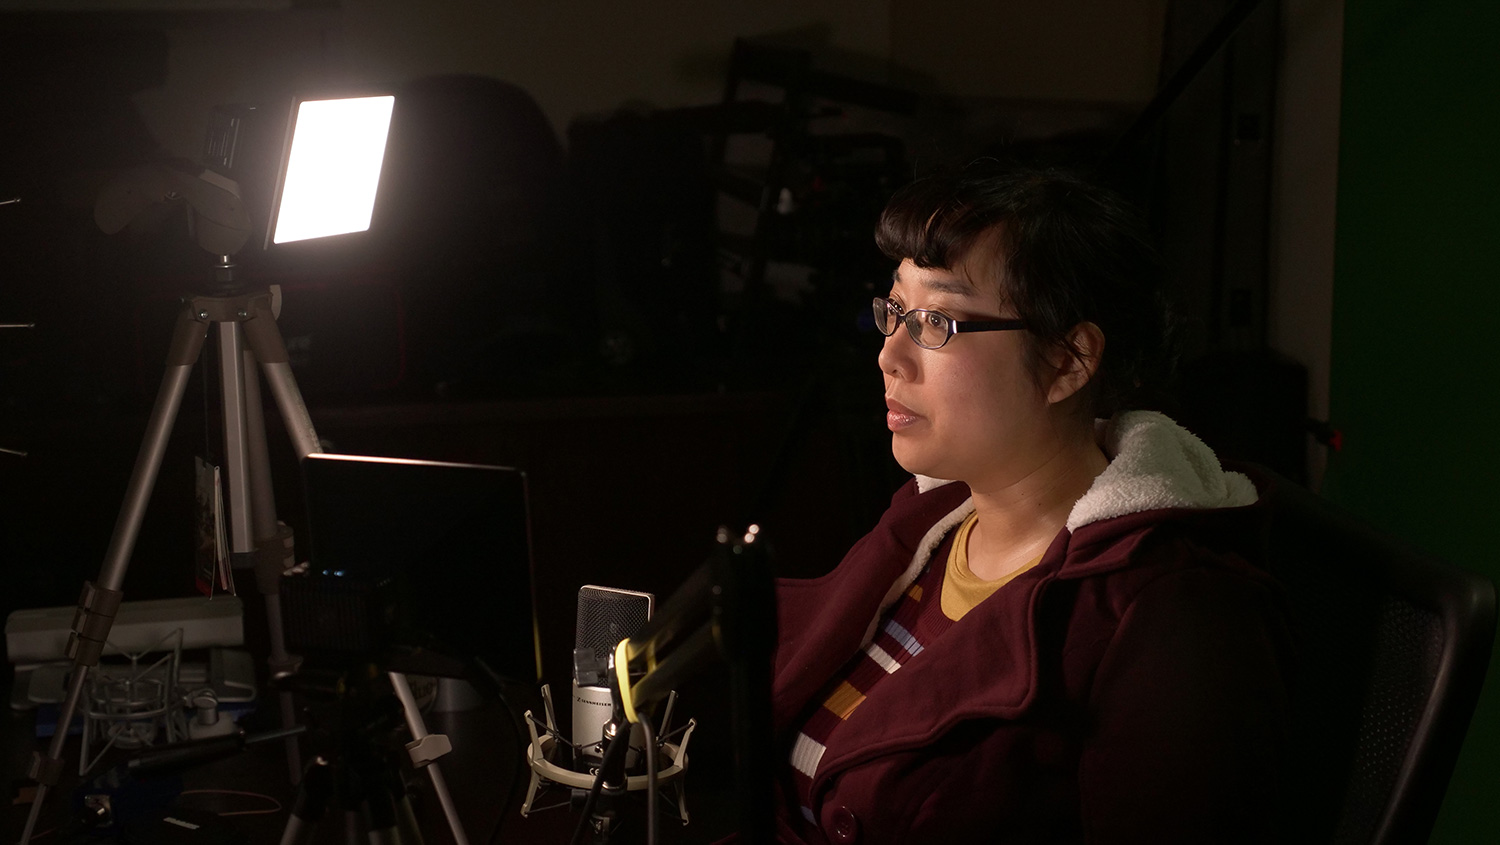
 We've had the LitraTorch portable LED light for a couple of years now, and it's proven to be a capable portable light. We've used it for event coverage, for example, or adding fill and accents in the studio.
Quick aside: this article and review is not endorsed or sponsored by Litra. As usual, we're simply giving you information on equipment we use.
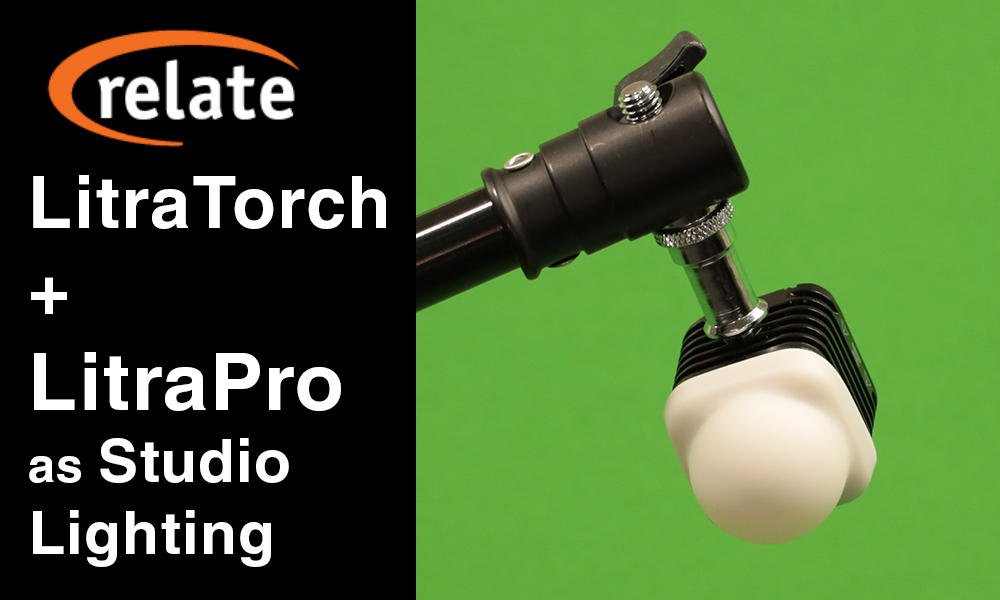
In 2019, Litra released two more lights: the LitraPro and the LitraStudio. We got two of the LitraPro lights, since we liked the LitraTorch so well. Since we have three Litra lights, we decided to try a three-point lighting setup.
We've had the LitraTorch portable LED light for a couple of years now, and it's proven to be a capable portable light. We've used it for event coverage, for example, or adding fill and accents in the studio.
Quick aside: this article and review is not endorsed or sponsored by Litra. As usual, we're simply giving you information on equipment we use.
In 2019, Litra released two more lights: the LitraPro and the LitraStudio. We got two of the LitraPro lights, since we liked the LitraTorch so well. Since we have three Litra lights, we decided to try a three-point lighting setup.
 Using this setup, we filmed a short Tech Down Over segment, which you can see here.
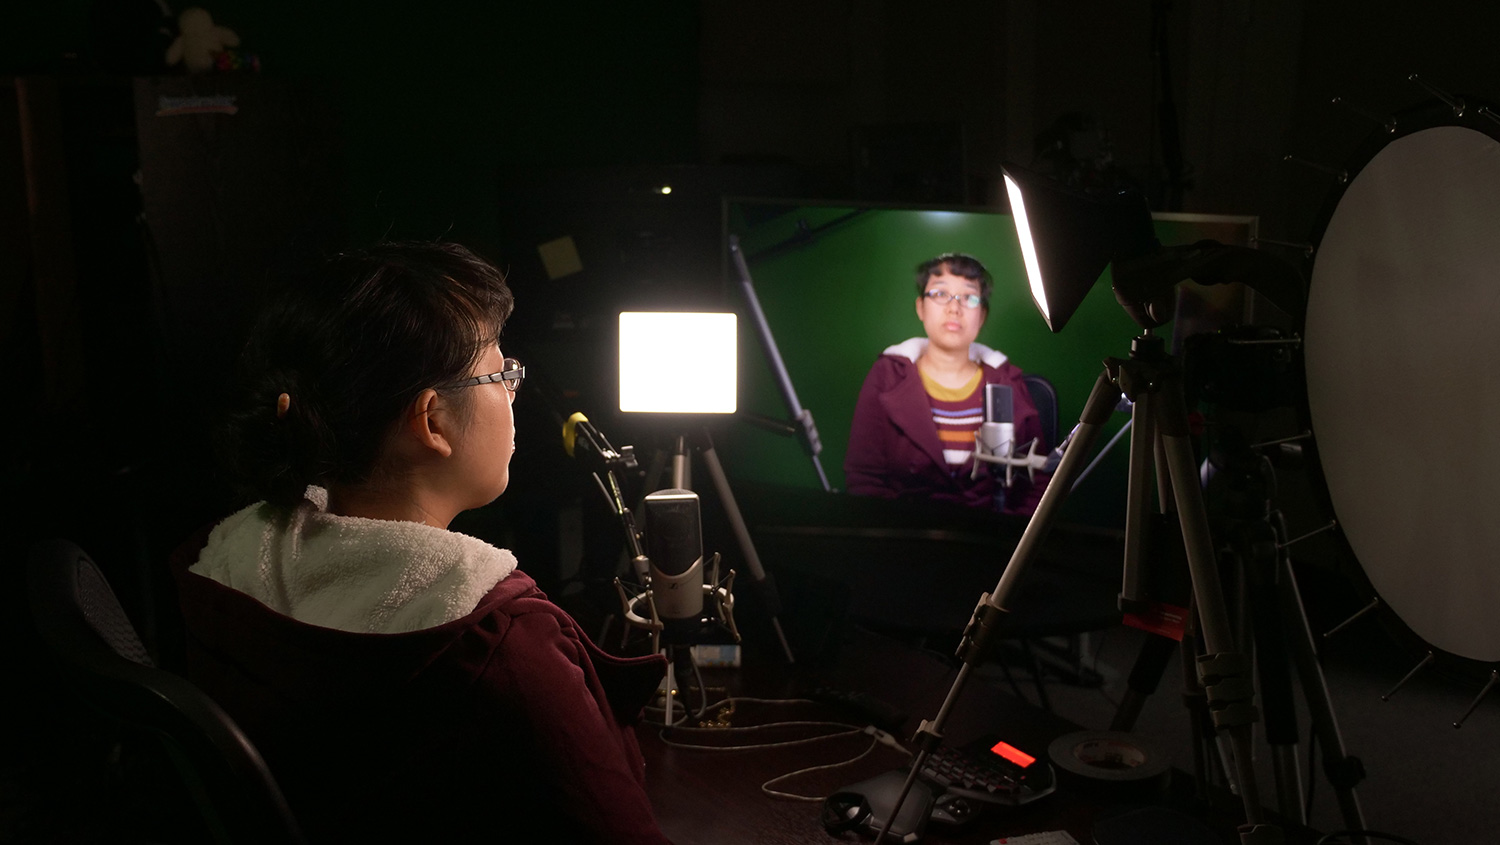
In terms of placement, these lights are versatile. With multiple 1⁄4in. threaded holes, you can attach them to tripods in a number of different configurations. The bottoms of the LitraTorch & LitraPro also have magnets, which allow you to mount them easily on any ferrous metal surface. Besides this, they come with both cold-shoe camera mounts and GoPro mounts.
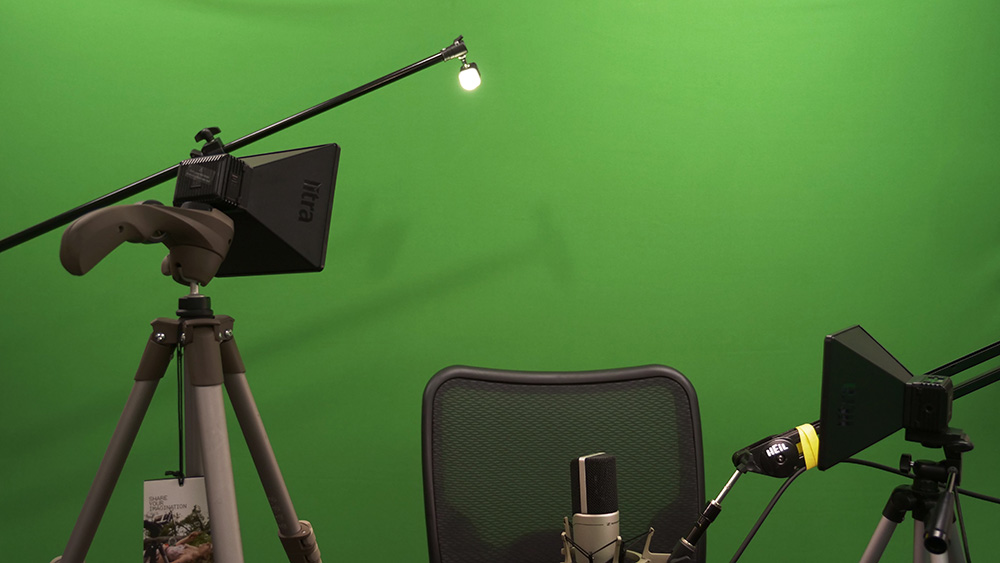
In our case, we mounted the LitraTorch on a microphone boom arm. Meanwhile, the LitraPros were on small portable tripods, which we placed on a desk.
Using this setup, we filmed a short Tech Down Over segment, which you can see here.
In terms of placement, these lights are versatile. With multiple 1⁄4in. threaded holes, you can attach them to tripods in a number of different configurations. The bottoms of the LitraTorch & LitraPro also have magnets, which allow you to mount them easily on any ferrous metal surface. Besides this, they come with both cold-shoe camera mounts and GoPro mounts.
In our case, we mounted the LitraTorch on a microphone boom arm. Meanwhile, the LitraPros were on small portable tripods, which we placed on a desk.
 With the LitraPro lights, we used the softboxes designed for them, which each cost $45 extra. We also plugged one LitraPro into a USB charging adapter, as its battery was low on charge. On that note, we recommend using these with either a long USB cable and power adapter, or USB cable and power bank. Both lights have a USB Micro-B type connection.
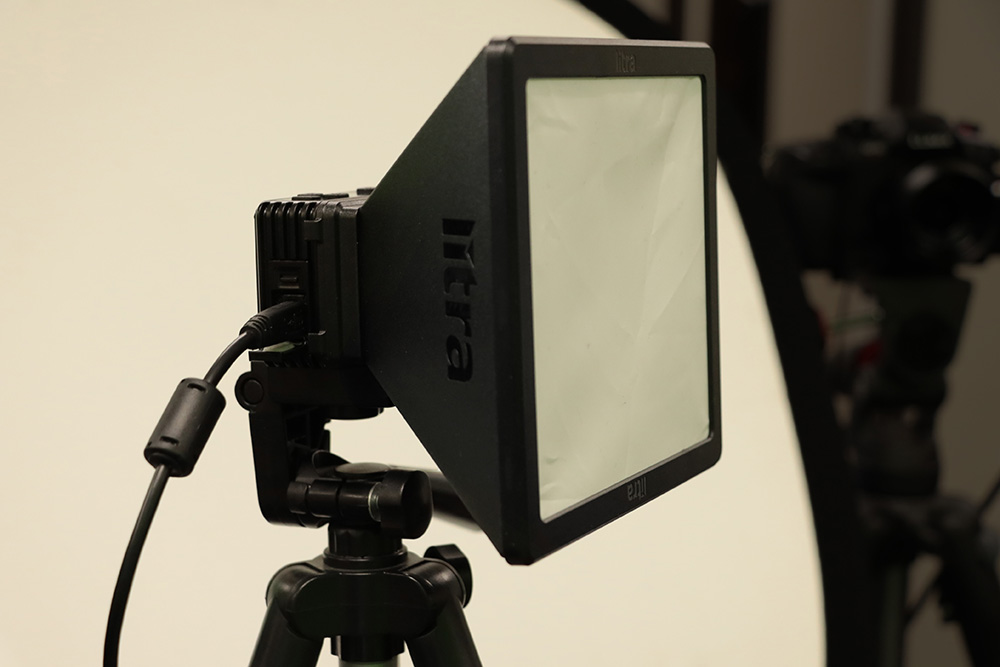
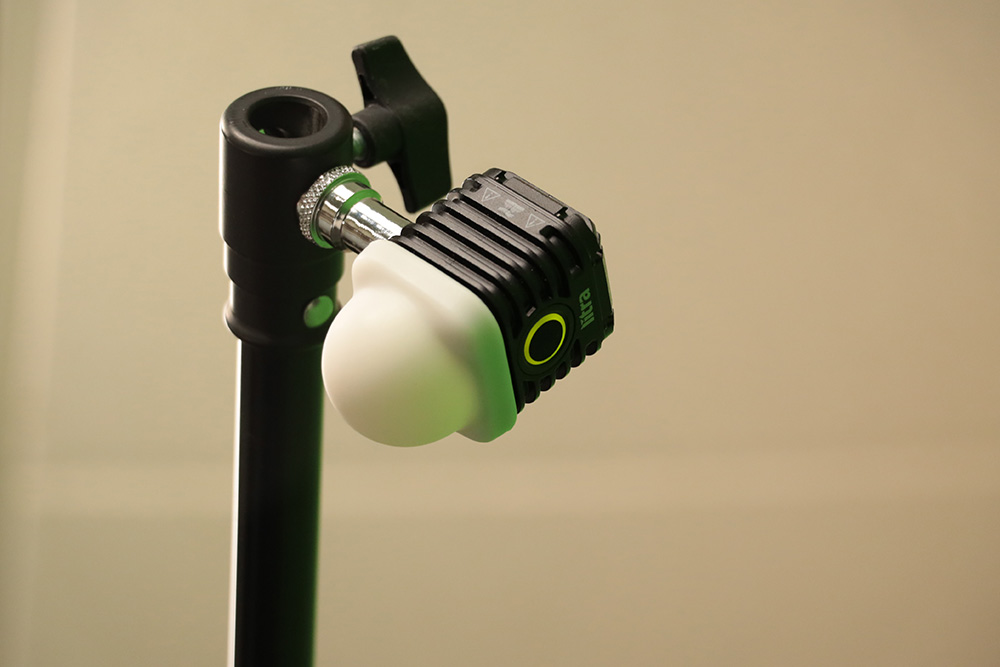 While we used the softboxes for our test, the LitraPros come with silicone diffusers similar to the one on the LitraTorch pictured above. These also provide a nice, soft light.
Below are photos of the setup in action. This gives you an idea of how soft the light is, and how well it preserves skin tones.
While we used the softboxes for our test, the LitraPros come with silicone diffusers similar to the one on the LitraTorch pictured above. These also provide a nice, soft light.
Below are photos of the setup in action. This gives you an idea of how soft the light is, and how well it preserves skin tones.
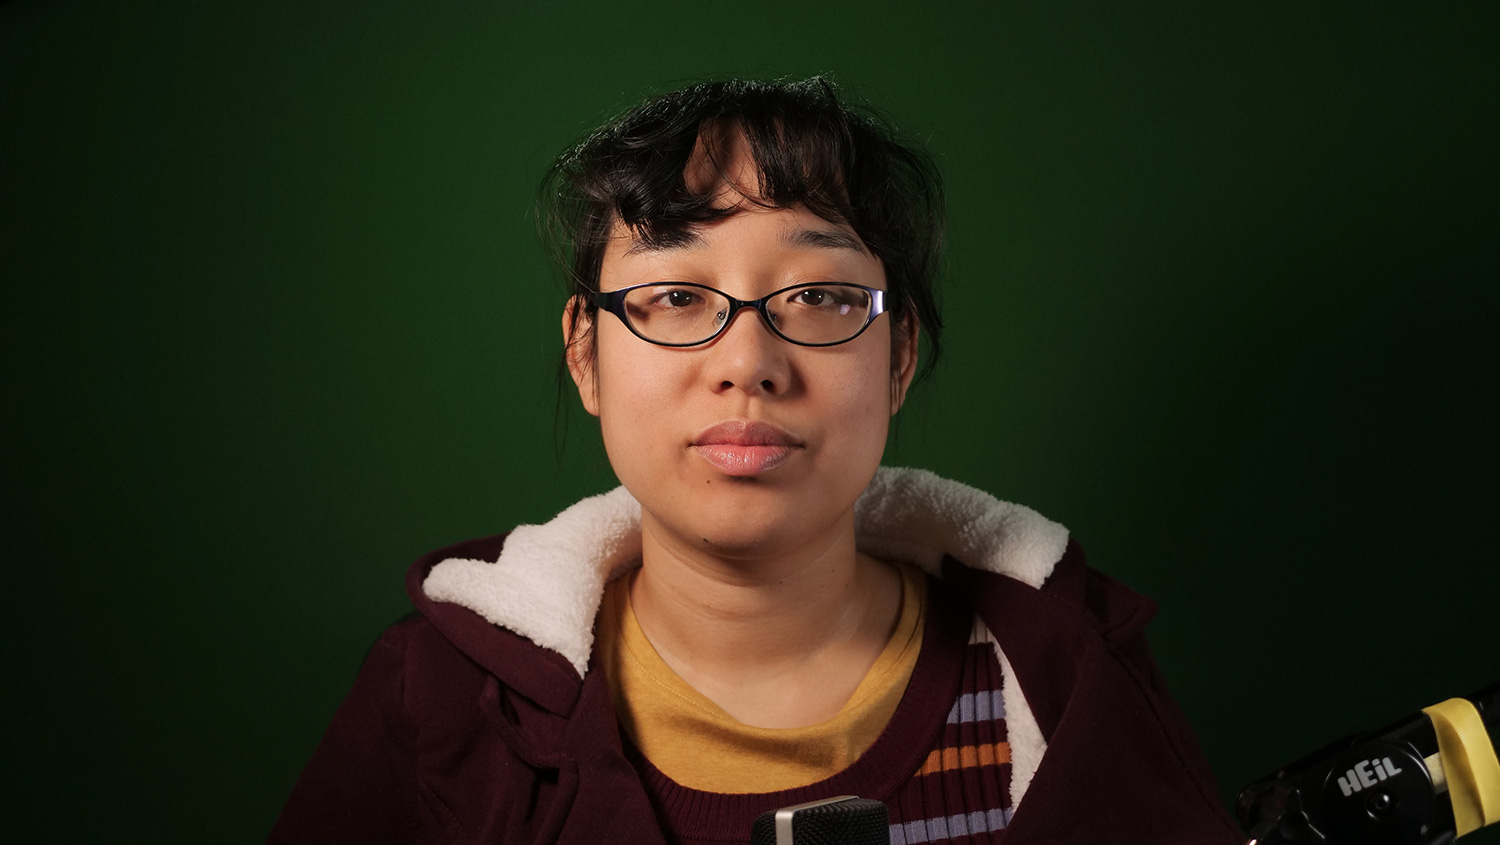
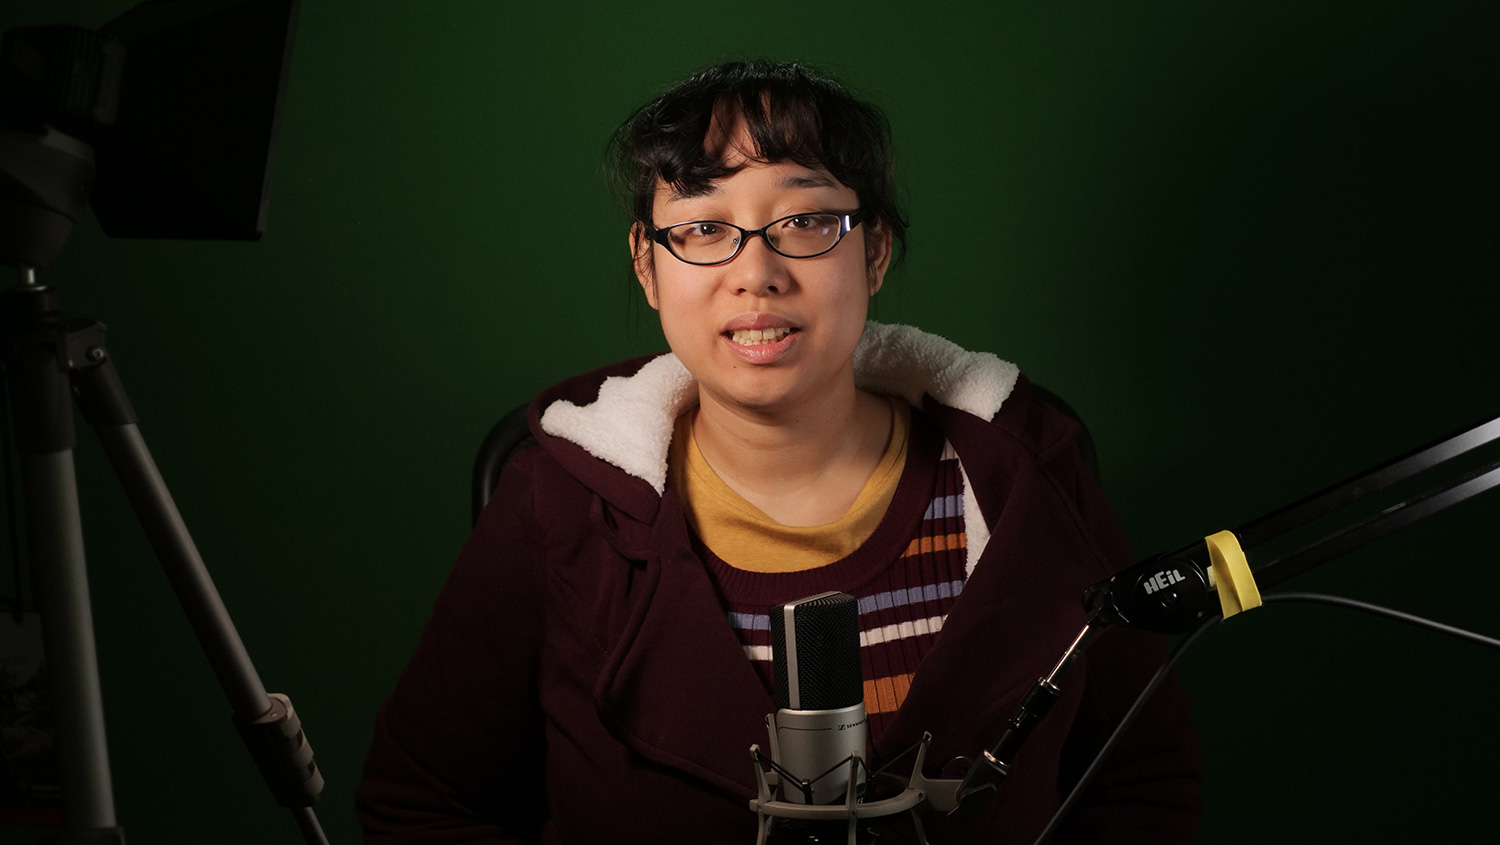
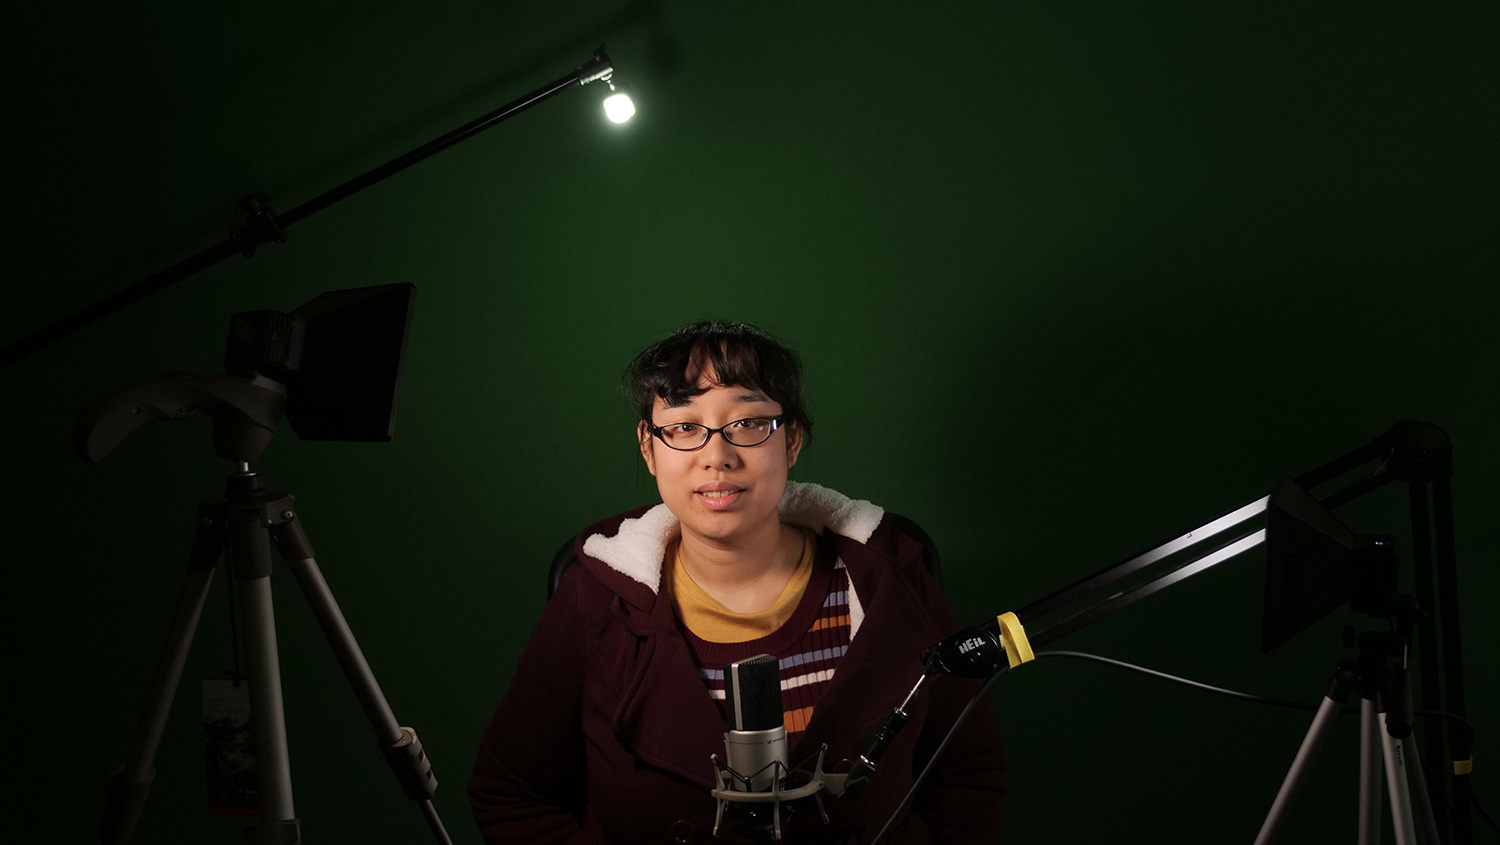
 We think these lights give an impressive result for such a small and inexpensive package, at $620 USD total for the lights and softboxes used here. Let us know your thoughts in the comments section below!If you liked this article, check out some of our other articles on photography!


 Last week on LIFE Edge, Rick Zanotti interviewed Marc Cameron, author of the Jericho Quinn series. We discussed his books, outdoor life, bikes, and more. Marc is a New York Times-bestselling author known for both his Jericho Quinn series and his books featuring Tom Clancy's Jack Ryan.
Follow this link to watch our interview, or view it below.
Last week on LIFE Edge, Rick Zanotti interviewed Marc Cameron, author of the Jericho Quinn series. We discussed his books, outdoor life, bikes, and more. Marc is a New York Times-bestselling author known for both his Jericho Quinn series and his books featuring Tom Clancy's Jack Ryan.
Follow this link to watch our interview, or view it below.
 You can find the Jericho Quinn series on Marc's Amazon author page.
 Time of Attack on Amazon
According to Marc, "I like the character of August Bowen, and I think the new series that is out, the Arliss Cutter series, is really kind of a mirror of our August Bowen. In fact, in my mind, I figure that Arliss Cutter and August Bowen probably served in the same unit."
Time of Attack on Amazon
According to Marc, "I like the character of August Bowen, and I think the new series that is out, the Arliss Cutter series, is really kind of a mirror of our August Bowen. In fact, in my mind, I figure that Arliss Cutter and August Bowen probably served in the same unit."
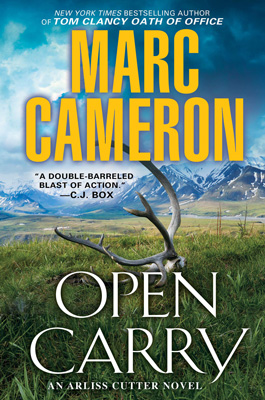 Open Carry on Amazon
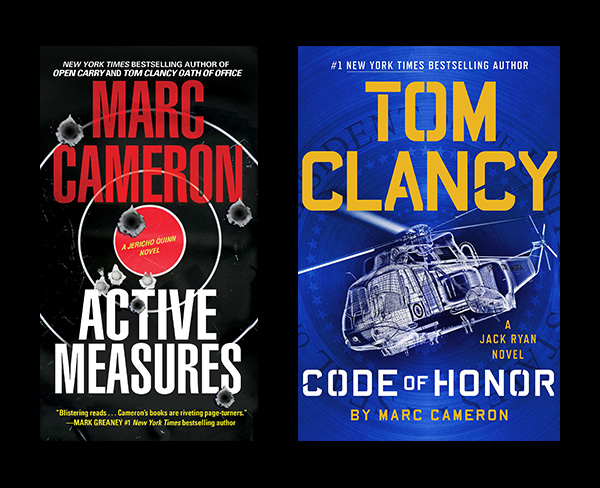 On LIFE Edge, we ask all of our guests: "What is it that gives you an edge in life?" Marc considers his edge to be a piece of advice a college professor gave him. During Marc's freshman year in college, his theater drama professor told him, "Marc, you will never amount to your full potential unless you learn to utilize those 15-minute segments of time that other people waste." Marc says, "I really took that to heart. I think a lot of people spend time thinking they don't have enough time to get anything done, so they'll play a game of Angry Birds, or whatever the fashionable game is on their phone today, or just read something on Reddit, being a consumer. I prefer to create instead of consume; I love watching shows and movies and such, but I would much rather put something out for other people to consume. And in order to do that, especially at the pace that I do now, I can't waste time—at all."
You can visit Marc's website for news on his latest books at:https://www.marccameronbooks.com
On LIFE Edge, we ask all of our guests: "What is it that gives you an edge in life?" Marc considers his edge to be a piece of advice a college professor gave him. During Marc's freshman year in college, his theater drama professor told him, "Marc, you will never amount to your full potential unless you learn to utilize those 15-minute segments of time that other people waste." Marc says, "I really took that to heart. I think a lot of people spend time thinking they don't have enough time to get anything done, so they'll play a game of Angry Birds, or whatever the fashionable game is on their phone today, or just read something on Reddit, being a consumer. I prefer to create instead of consume; I love watching shows and movies and such, but I would much rather put something out for other people to consume. And in order to do that, especially at the pace that I do now, I can't waste time—at all."
You can visit Marc's website for news on his latest books at:https://www.marccameronbooks.com
 Recently at RELATE, we were using the Canon 50mm EF f/1.4 USM and Sigma 50mm f/1.4 Art DG lenses with our EOS R and the EF-EOS R adapter. This got us thinking: are the results really that different?
Therefore, we did a small test with portraiture, which is the type of shot we typically use these lenses for. Camera settings were at 1/125 sec. shutter and ISO 1000, while both lenses were at f/1.4. We've heard that the differences between these lenses are most pronounced when wide open.
This is because the Canon has 7 lens elements, while the Sigma has 13 lens elements. The Sigma includes an aspherical element, which should reduce spherical aberration when wide open. This is the softness that many lenses suffer at large apertures. However, due to these additional elements, the Sigma is twice the size, thrice the price, and three times the weight.
Recently at RELATE, we were using the Canon 50mm EF f/1.4 USM and Sigma 50mm f/1.4 Art DG lenses with our EOS R and the EF-EOS R adapter. This got us thinking: are the results really that different?
Therefore, we did a small test with portraiture, which is the type of shot we typically use these lenses for. Camera settings were at 1/125 sec. shutter and ISO 1000, while both lenses were at f/1.4. We've heard that the differences between these lenses are most pronounced when wide open.
This is because the Canon has 7 lens elements, while the Sigma has 13 lens elements. The Sigma includes an aspherical element, which should reduce spherical aberration when wide open. This is the softness that many lenses suffer at large apertures. However, due to these additional elements, the Sigma is twice the size, thrice the price, and three times the weight.
 The Canon 50mm EF f/1.4 USM is around $325-350 USD new, while the Sigma 50mm f/1.4 Art DG is ≈$950 USD new.
Therefore, we'll take a couple photos from each lens and compare:
1. The overall look of the photos.
2. Resolution of fine details.
3. Chromatic aberration.
The Canon 50mm EF f/1.4 USM is around $325-350 USD new, while the Sigma 50mm f/1.4 Art DG is ≈$950 USD new.
Therefore, we'll take a couple photos from each lens and compare:
1. The overall look of the photos.
2. Resolution of fine details.
3. Chromatic aberration.
 Canon 50mm EF f/1.4 USM (click for full resolution)
 Sigma 50mm f/1.4 Art DG (click for full resolution)
 Canon 50mm EF f/1.4 USM (click for full resolution)
 Sigma 50mm f/1.4 Art DG (click for full resolution)
You can click the links in order to view these at full resolution, and I recommend you do so! Towards the center of the frame (which is around Rick's chin) the images are pretty similar. As you move further out, though, the effect of the Sigma's aspherical element allows it to stay sharper. I'll detail this further in the next section, and show some close-ups.
Sigma 50mm f/1.4 Art DG (click for full resolution)
You can click the links in order to view these at full resolution, and I recommend you do so! Towards the center of the frame (which is around Rick's chin) the images are pretty similar. As you move further out, though, the effect of the Sigma's aspherical element allows it to stay sharper. I'll detail this further in the next section, and show some close-ups.
 Canon 50mm EF f/1.4 USM
 Sigma 50mm f/1.4 Art DG
As we can see, at the very center of the frame, the lenses are similar, even wide open. Therefore, we'll go a bit further up in the image.
Sigma 50mm f/1.4 Art DG
As we can see, at the very center of the frame, the lenses are similar, even wide open. Therefore, we'll go a bit further up in the image.
 Canon 50mm EF f/1.4 USM
 Sigma 50mm f/1.4 Art DG
This is the eye that was slightly further from the camera. Hence, on both images, we're seeing slight blurring due to the extremely shallow depth of field at f/1.4. Still, with the Canon lens we're starting to see the effects of spherical aberration. Here, it manifests as a slight "smearing" of the image. Even so, they're not that far off from each other. The final crop will be much closer to the edge of the photo.
Sigma 50mm f/1.4 Art DG
This is the eye that was slightly further from the camera. Hence, on both images, we're seeing slight blurring due to the extremely shallow depth of field at f/1.4. Still, with the Canon lens we're starting to see the effects of spherical aberration. Here, it manifests as a slight "smearing" of the image. Even so, they're not that far off from each other. The final crop will be much closer to the edge of the photo.
 Canon 50mm EF f/1.4 USM
 Sigma 50mm f/1.4 Art DG
Here, the difference is most pronounced. On the Sigma shot, the hair towards the foreground is quite sharp, and blurs further back due to shallow DoF. On the Canon lens shot, though, the whole thing is noticeably blurry.
Sigma 50mm f/1.4 Art DG
Here, the difference is most pronounced. On the Sigma shot, the hair towards the foreground is quite sharp, and blurs further back due to shallow DoF. On the Canon lens shot, though, the whole thing is noticeably blurry.
 Canon 50mm EF f/1.4 USM
 Sigma 50mm f/1.4 Art DG
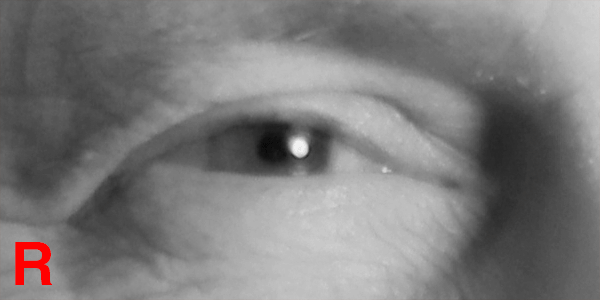
Chromatic aberration is probably more evident here than anywhere else in the picture. Even so, it's not obvious. The eye glint looks like a white disc with several faint colored discs slightly overlapping. Separating the channels, I found that in this area of the image, blues shifted lower-left, while reds shifted slightly upwards.
The animations below show this crop in each color channel.
Sigma 50mm f/1.4 Art DG
Chromatic aberration is probably more evident here than anywhere else in the picture. Even so, it's not obvious. The eye glint looks like a white disc with several faint colored discs slightly overlapping. Separating the channels, I found that in this area of the image, blues shifted lower-left, while reds shifted slightly upwards.
The animations below show this crop in each color channel.
 Canon 50mm EF f/1.4 USM
 Sigma 50mm f/1.4 Art DG
As you can see, the highlight shifts slightly more on the Canon shot, while the Sigma's highlight stays in place. There is a slight amount of chromatic aberration on the blue channel even with the Sigma, though.
Our next chromatic aberration test is on the edges of shapes. As we mentioned earlier, this will be less noticeable on a portrait. This is because the edges of a face will blur more at a larger aperture. Meanwhile, chromatic aberration is less pronounced at smaller apertures.
Sigma 50mm f/1.4 Art DG
As you can see, the highlight shifts slightly more on the Canon shot, while the Sigma's highlight stays in place. There is a slight amount of chromatic aberration on the blue channel even with the Sigma, though.
Our next chromatic aberration test is on the edges of shapes. As we mentioned earlier, this will be less noticeable on a portrait. This is because the edges of a face will blur more at a larger aperture. Meanwhile, chromatic aberration is less pronounced at smaller apertures.
 Canon 50mm EF f/1.4 USM
 Sigma 50mm f/1.4 Art DG
While a slight shift of the green channel is visible in this area of the Canon photo, it's relatively mild. Towards the edges of the picture, spherical aberration dwarfs the chromatic aberration effect, so it's harder to tell how pronounced it is.
Therefore, I don't think the difference in chromatic aberration will be a major problem for the majority of photo types. Only specific types of shots would highlight the difference here. For example, if you photographed a stark black-and-white polka dot pattern wide open, it may become noticeable.
After all these tests, we come back to the question: is the difference noticeable? Although I didn't notice much difference at first, after closer examination, it's somewhat obvious. However, keep in mind that these were shot at conditions where an aspherical lens element would make significant difference. At smaller aperture values, the differences between the lenses become less and less pronounced.
Overall, your best bet is to compare these lenses and their potential differences against your needs. Do you shoot at large apertures often, and are fine details and sharp edges all throughout the frame essential? If so, does this outweigh the big differences in price, weight, and size?
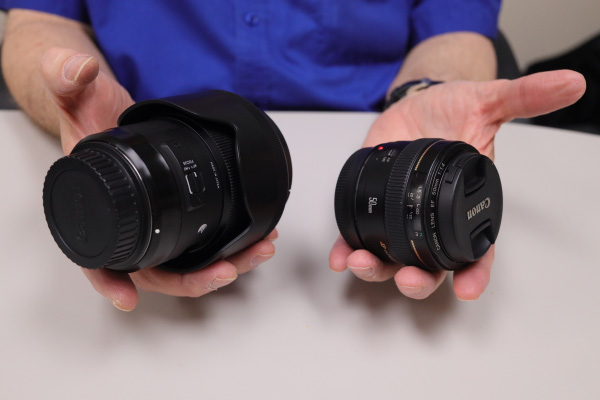
If you often travel with your camera, weight and size could be a major consideration. One lens is slightly over half a pound, the other is nearly two, the Canon at 290g and Sigma at 815g.
Sigma 50mm f/1.4 Art DG
While a slight shift of the green channel is visible in this area of the Canon photo, it's relatively mild. Towards the edges of the picture, spherical aberration dwarfs the chromatic aberration effect, so it's harder to tell how pronounced it is.
Therefore, I don't think the difference in chromatic aberration will be a major problem for the majority of photo types. Only specific types of shots would highlight the difference here. For example, if you photographed a stark black-and-white polka dot pattern wide open, it may become noticeable.
After all these tests, we come back to the question: is the difference noticeable? Although I didn't notice much difference at first, after closer examination, it's somewhat obvious. However, keep in mind that these were shot at conditions where an aspherical lens element would make significant difference. At smaller aperture values, the differences between the lenses become less and less pronounced.
Overall, your best bet is to compare these lenses and their potential differences against your needs. Do you shoot at large apertures often, and are fine details and sharp edges all throughout the frame essential? If so, does this outweigh the big differences in price, weight, and size?
If you often travel with your camera, weight and size could be a major consideration. One lens is slightly over half a pound, the other is nearly two, the Canon at 290g and Sigma at 815g.
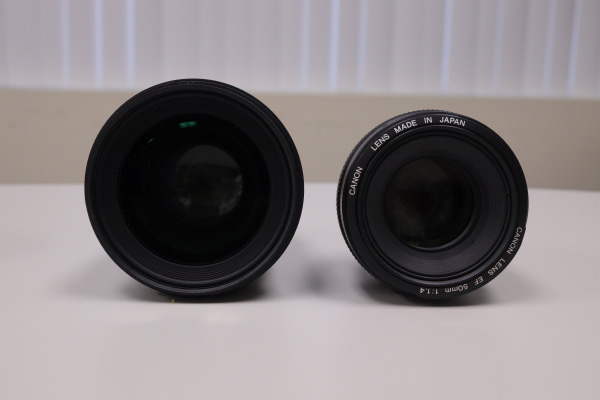 Note the difference in size of each lens' front element.
In terms of dimensions, the Canon is 2.9" x 2" dia. or 73.8mm x 50.5mm dia. Meanwhile, the Sigma is 3.9" x 3.4" dia. or 99.9mm x 85.4mm dia. This means that the Canon lens takes three-quarters of the volume in your camera bag. This doesn't include lens hoods. The Canon 50mm doesn't come with a lens hood, while the Sigma does. While hoods add bulk to your kit, they're a good idea if you're going traveling. Of course, lens flares can be quite trendy in photography nowadays when used consciously!
We tend to take the Canon lens on trips, but the Sigma is an excellent studio lens with crisp resolution of details.
Hopefully this article, though somewhat limited in scope, was helpful to you!
If you found it useful, you can find my other articles on photography and design here.For our articles on photography topics only, follow this link.
Note the difference in size of each lens' front element.
In terms of dimensions, the Canon is 2.9" x 2" dia. or 73.8mm x 50.5mm dia. Meanwhile, the Sigma is 3.9" x 3.4" dia. or 99.9mm x 85.4mm dia. This means that the Canon lens takes three-quarters of the volume in your camera bag. This doesn't include lens hoods. The Canon 50mm doesn't come with a lens hood, while the Sigma does. While hoods add bulk to your kit, they're a good idea if you're going traveling. Of course, lens flares can be quite trendy in photography nowadays when used consciously!
We tend to take the Canon lens on trips, but the Sigma is an excellent studio lens with crisp resolution of details.
Hopefully this article, though somewhat limited in scope, was helpful to you!
If you found it useful, you can find my other articles on photography and design here.For our articles on photography topics only, follow this link.

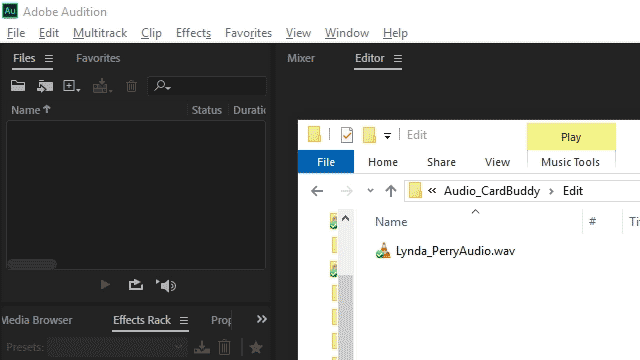

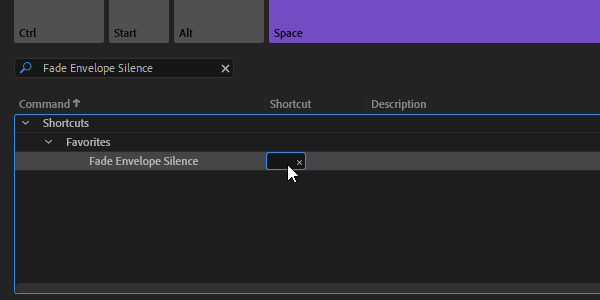
 Sometimes, you'll want to remove a part of the audio clip, but you want the time it occupies to remain. A cough or breath, for example, may need to be removed, but you find that simply deleting it makes the sentence sound awkward.
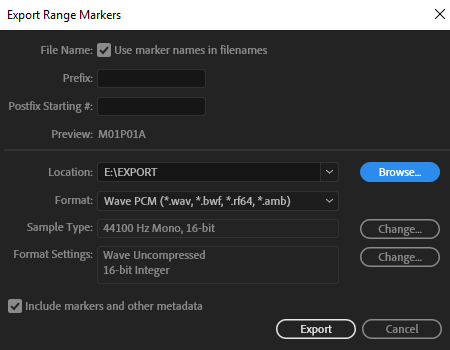
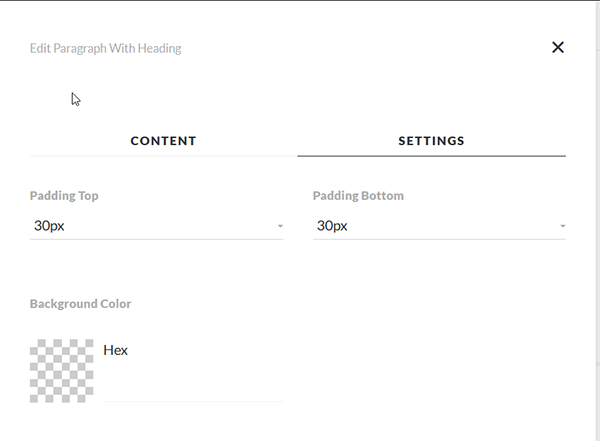
 to export them. It's the fifth from the left in the upper left of the Markers panel, which I have pointed out with an arrow below. A dialog will come up, and there are a few options here.