Monday, February 12, 2018

Are Canon EF to Sony E Lens Adapters Worth It? (Part 3)

Part three of our Canon EF to Sony E Mount Lens Adapter comparison. Click here for Part 1, and click here for Part 2.


How Well Did The E Mount Adapters Perform?


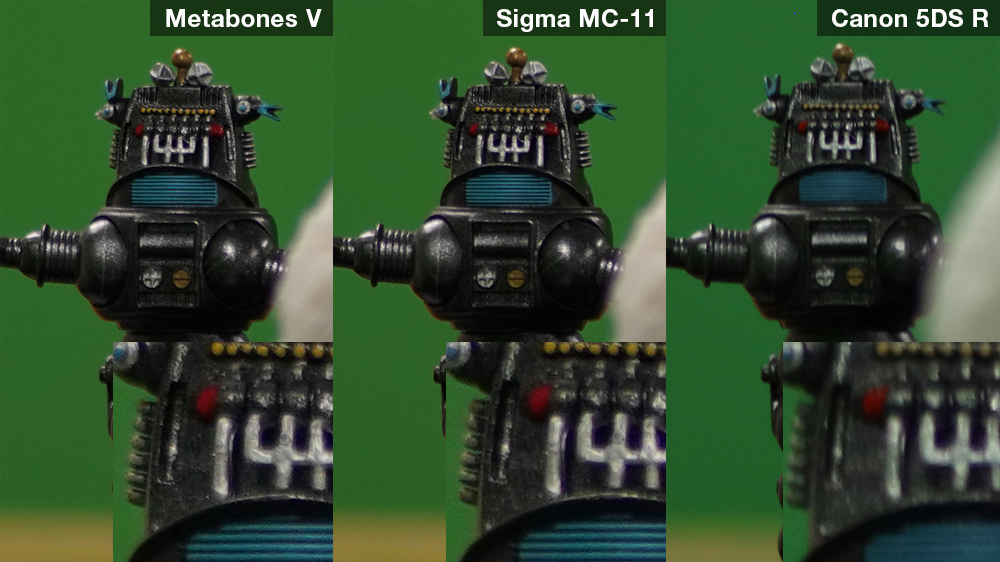
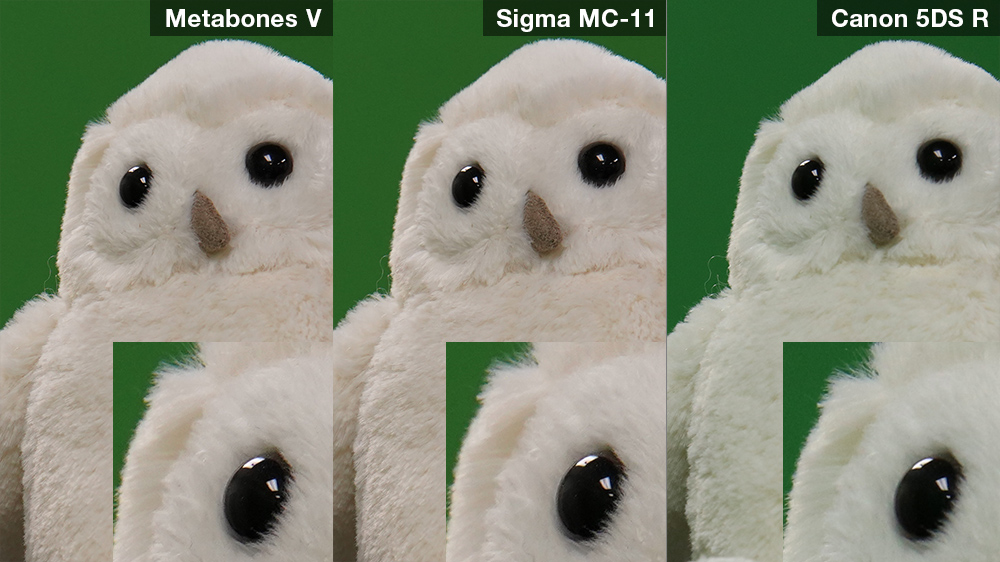
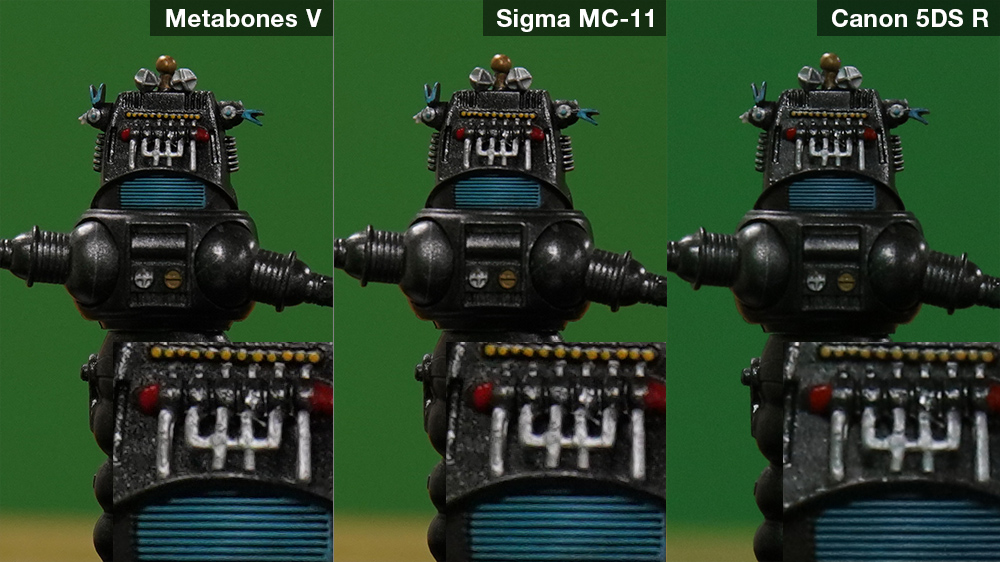
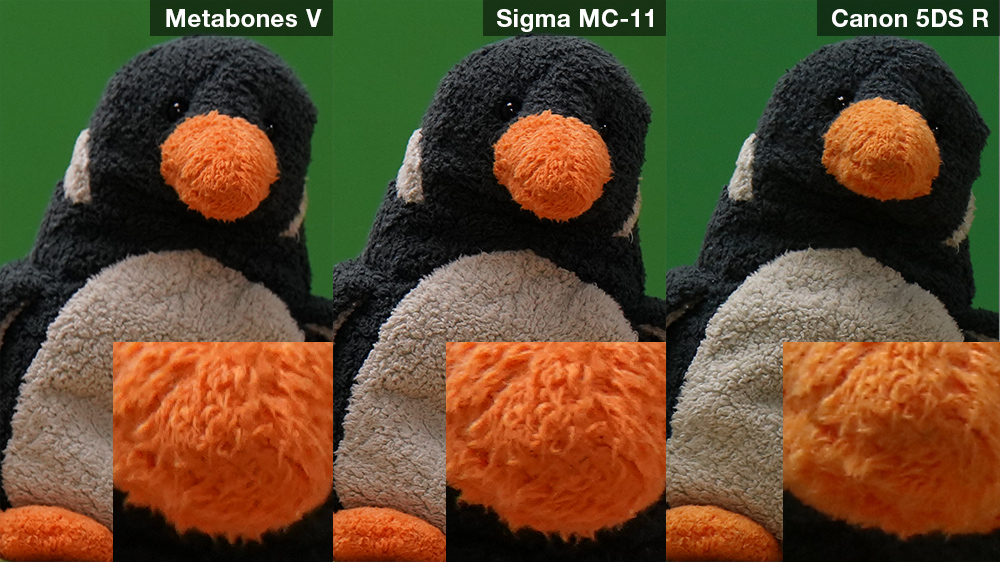
As mentioned previously, for each lens, we’ve set up similar shots with three different focal areas.


6. Sigma 50mm f/1.4 DG ø77 HSM Art


Each shot is 1/100 sec, f/4, ISO-1000, tripod mount with 2 second timer.


(Click on thumbnails to view side-by-side comparisons)
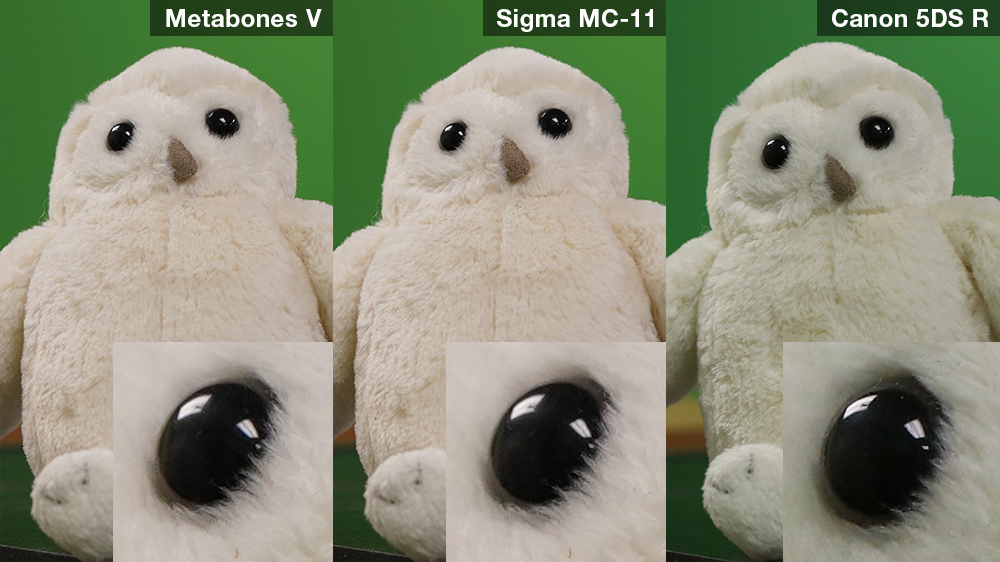


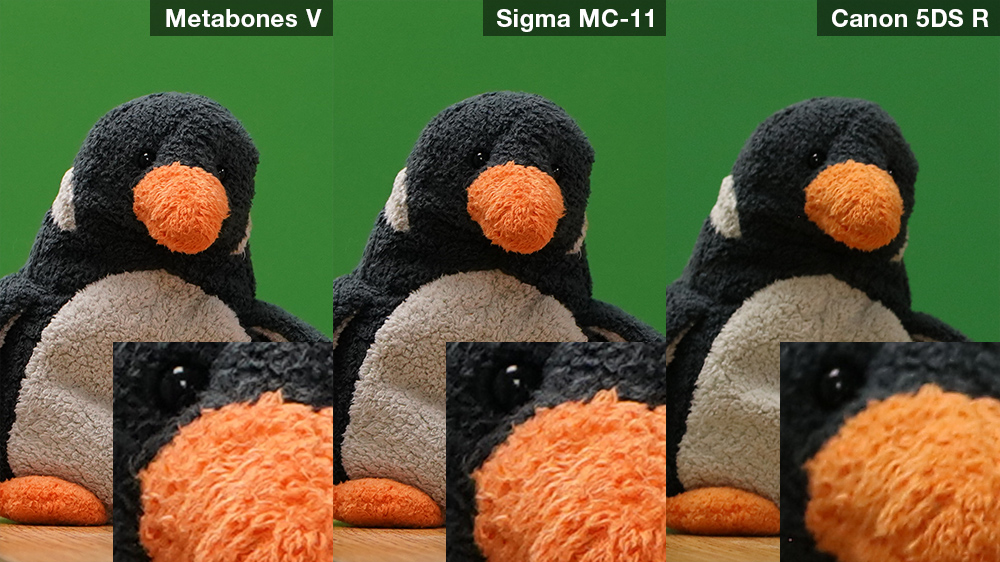
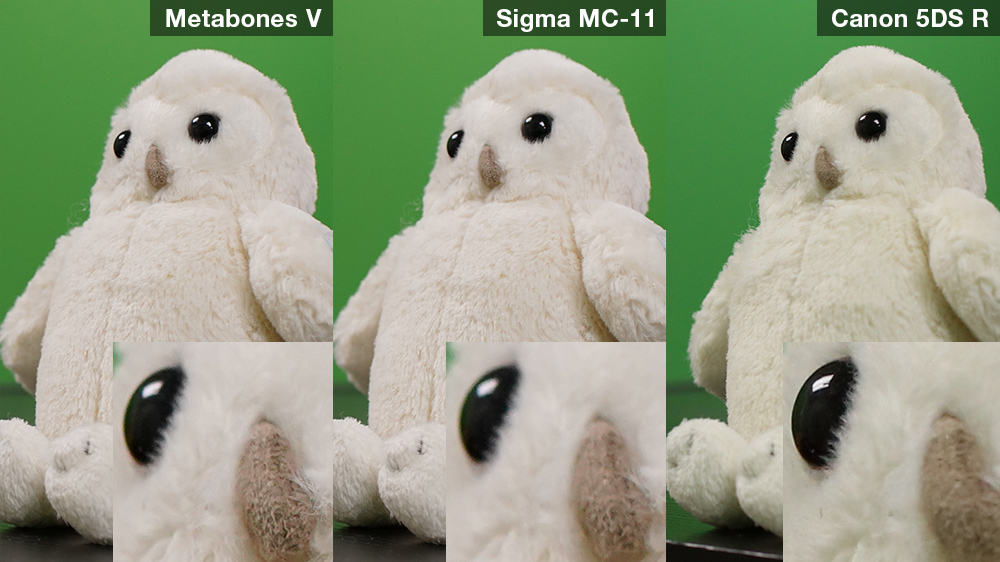
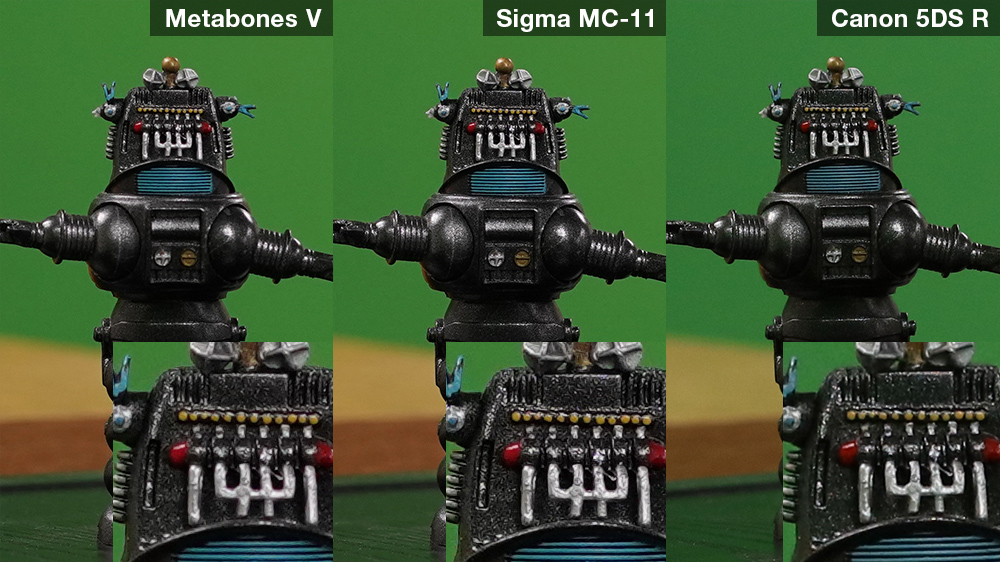
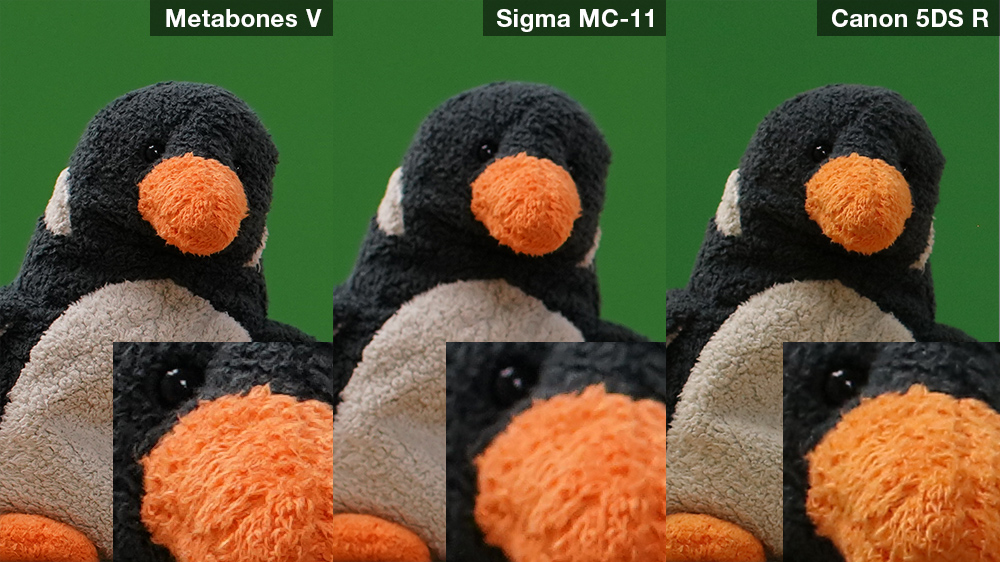
This Sigma is a top-of-the-line 50mm, and it shows—both cameras and both adapters focused quickly and captured impressively crisp, clear shots.


The picture quality seen in all combinations was equivalent, though showing the typical differences in color and contrast between the a7R III and the 5DS R.


7. Canon 18-135mm f/3.5-5.6 EFS IS Nano USM


Each shot is 1/60 sec, f/5.6, ISO-1000, tripod mount with 10 second timer.


(Click on thumbnails to view side-by-side comparisons)


This zoom lens performed relatively well on the a7R III with the Metabones V, giving us sharp and clear shots. However, it took a long time to gain focus, especially on the farthest target (the penguin).


Despite of our best efforts, we couldn’t get this 18-135mm lens to fit on the Sigma MC-11 adapter, and as an EFS lens, it did not fit the 5DS R. Therefore, we don’t have a comparison for this lens, unfortunately.


8. Canon 75-300mm f/4-5.6 III EF


Each shot is 1/60 sec, f/5.6, ISO-1000, tripod mount with 10 second timer.


(Click on thumbnails to view side-by-side comparisons)


This lens worked with both cameras and adapters, however there was a vast difference in the focusing time between the Sony a7R III with either adapter and the Canon 5DS R. The 5DS R acquired focus in 2-3 seconds, while we had to fiddle with the a7R III for minutes trying to get it to focus on anything with this lens. We weren't able to focus on the farthest target (the penguin) at all with either adapter, though the 5DS R was able to catch it in 1-2 seconds.


Once the Sony a7R III did focus on something, it definitely got a clearer picture than the 5DS R through this lens. In general, this lens is soft and blurry on the long end, but it is a budget lens, at about $200 new. Because of the unreasonably lengthy focus time, we don’t recommend this lens for use with an adapter.


9. Tamron SP 70-200mm f/2.8 Di VC USD


Each shot is 1/60 sec, f/5.6, ISO-1000, tripod mount with 10 second timer.


(Click on thumbnails to view side-by-side comparisons)


This Tamron did a superb job on all adapter-camera combinations we tested here. This is a high-end lens, and it definitely shows in the sharp, clean images we got with it.


Our Conclusions


The Metabones V and Sigma MC-11 both gave us very good photos, comparable to the lenses in native mount on a Canon camera, with no discernible quality loss. For photography, we would definitely recommend either of these if you have EF or EF-S Mount lenses that you want to use on a Sony E Mount camera. The only lens we had significant trouble with when using the adapters was the Canon 75-300mm III lens, and we suspect it may be because that is a relatively old lens, released in 1999.


The primary shortcoming we found was that, with either adapter and any lens, AF-C Face Tracking did not seem to work in video mode on our Sony A7R III. This severely limits the types of videography you could do with these adapters.


You could still shoot sitting interviews where the subject is relatively still (and AF-S could be used), timelapse video, or anything involving manual focus, but most other types of video would be much more difficult or impossible without access to AF-C.


Back to Part 1


Back to Part 2

Are Canon EF to Sony E Lens Adapters Worth It? (Part 2)

Part two of our Canon EF to Sony E Mount Lens Adapter comparison. Click here for Part 1, and here for Part 3.


How Well Did The E Mount Adapters Perform?


As mentioned previously, for each lens, we’ve set up similar shots with three different focal areas.


1. Sigma 24-105mm f/4 DG ø82 HSM Art


Using this lens, we shot on the longest end (105mm). Each shot is 1/100 sec, f/4, ISO-1000, tripod mount with 2 second timer.


(Click on thumbnails to view side-by-side comparisons)
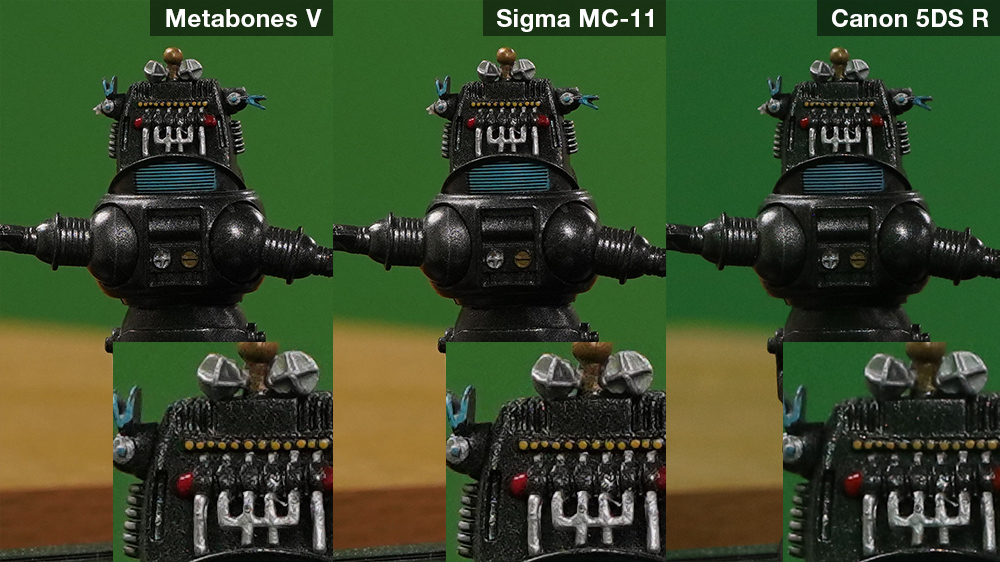


With the same settings as the Canon, the Sony A7 RIII performed better with the lens on both adapters than the Canon 5DS R did with the lens mounted natively.


We suspect this is not because of a difference in lenses, but rather because of how focusing works in each camera's firmware and, to a lesser extent, difference in camera sensors.


Somewhat less suprising (given that this is a Sigma lens) was that the Sigma adapter gave slightly cleaner shots with this Sigma lens than the Metabones did.


2. Sigma 18-35mm f/1.8 DC ø72 HSM Art


This is an EFS mount lens (DC mount in Sigma terminology), so we only tested this on the Sony A7 RIII to compare the adapters. Each shot is 1/100 sec, f/4, ISO-1000, at the short end (18mm), tripod mount with 2 second timer.


(Click on thumbnails to view side-by-side comparisons)


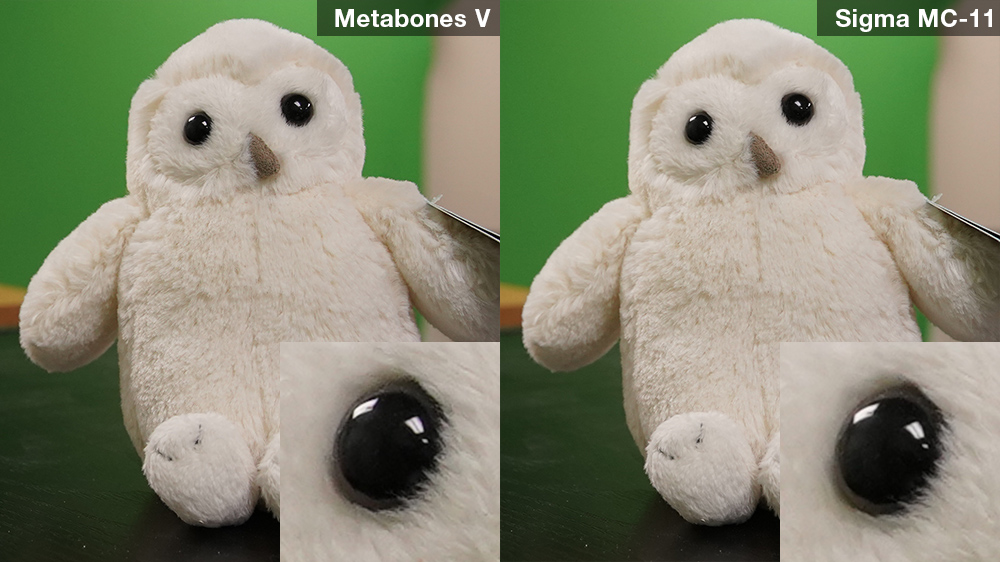
Overall, we didn’t notice any significant quality difference between the two adapters in the shots we took.


3. Tamron 85mm f/1.8 Di VC USD


Each shot is 1/100 sec, f/4, ISO-1000, tripod mount with 2 second timer.


(Click on thumbnails to view side-by-side comparisons)
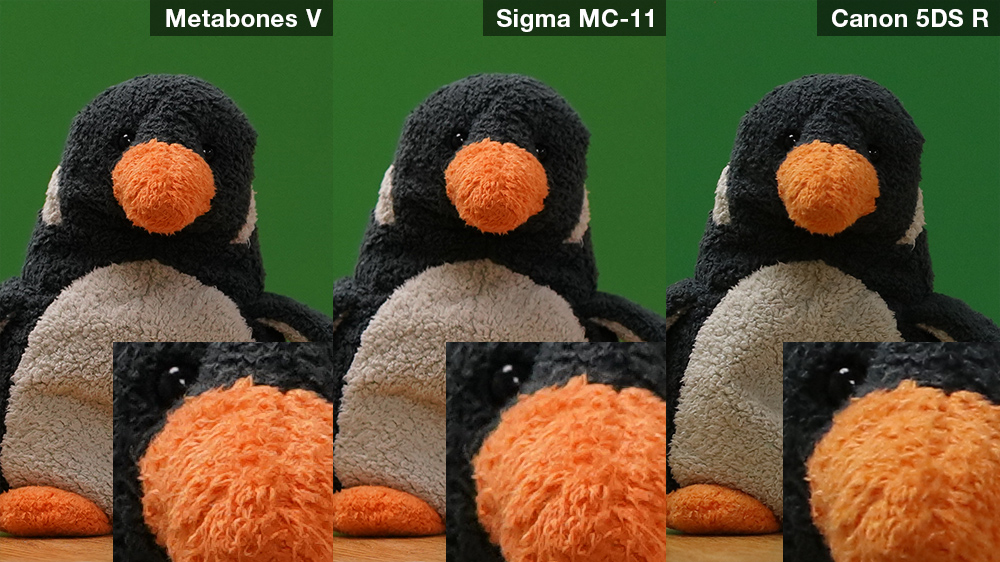

There didn’t seem to be any discernible difference between the adapters for this lens. As before, either adapter on the Sony a7R III was able to consistently get sharper focus than the Canon 5DS R.


4. Canon 50mm f/1.4 EF USM


Each shot is 1/100 sec, f/4, ISO-1000, tripod mount with 2 second timer.


(Click on thumbnails to view side-by-side comparisons)
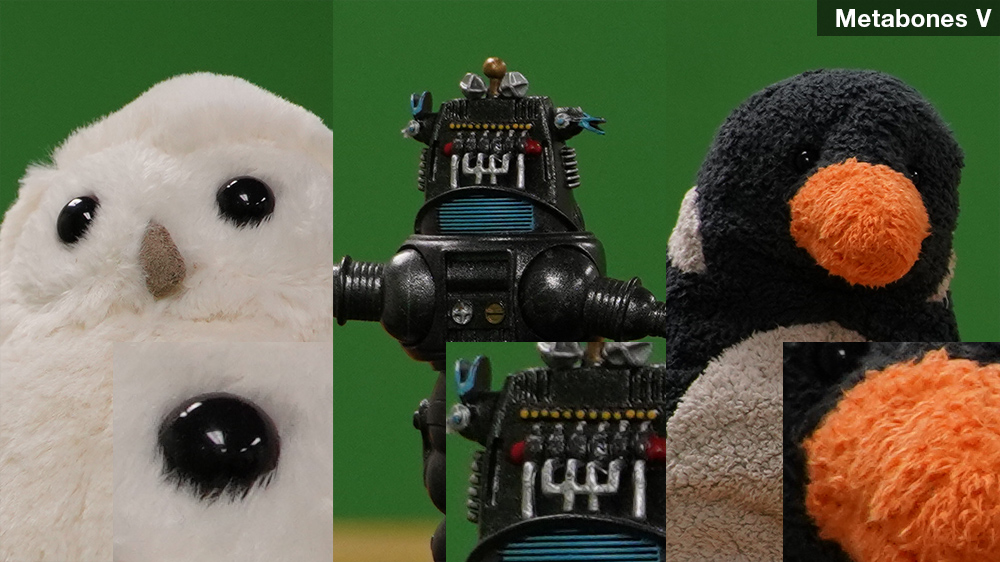


The Sony a7R III took longer to acquire focus with this lens with both adapters. Once it did, however, the shots came out sharper than those taken on the 5DS R (See the Sigma adapter shot in #2, and the Metabones shot in #3).


5. Canon 35mm f/2 EF IS USM


Each shot is 1/100 sec, f/4, ISO-1000, tripod mount with 2 second timer.


(Click on thumbnails to view side-by-side comparisons)


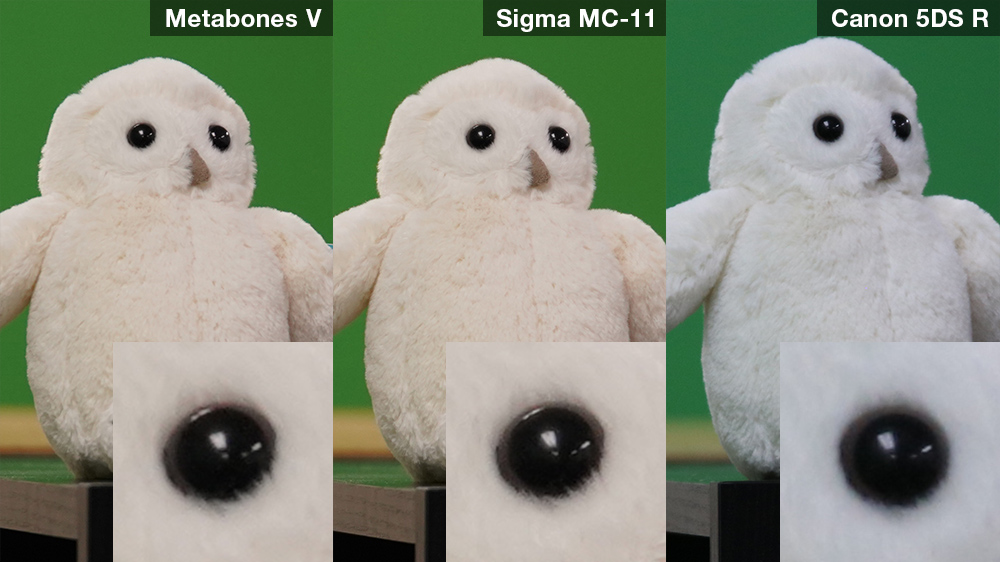
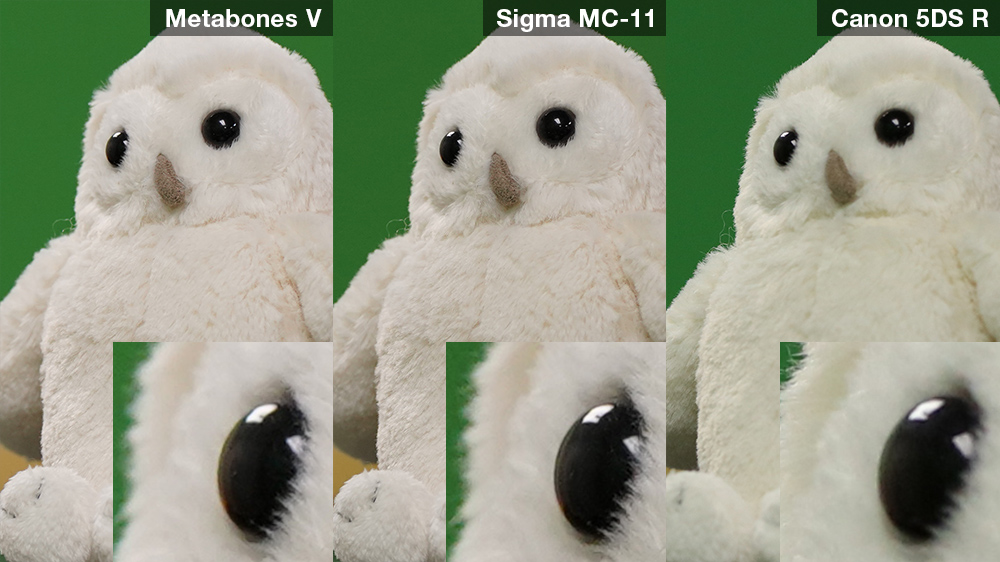
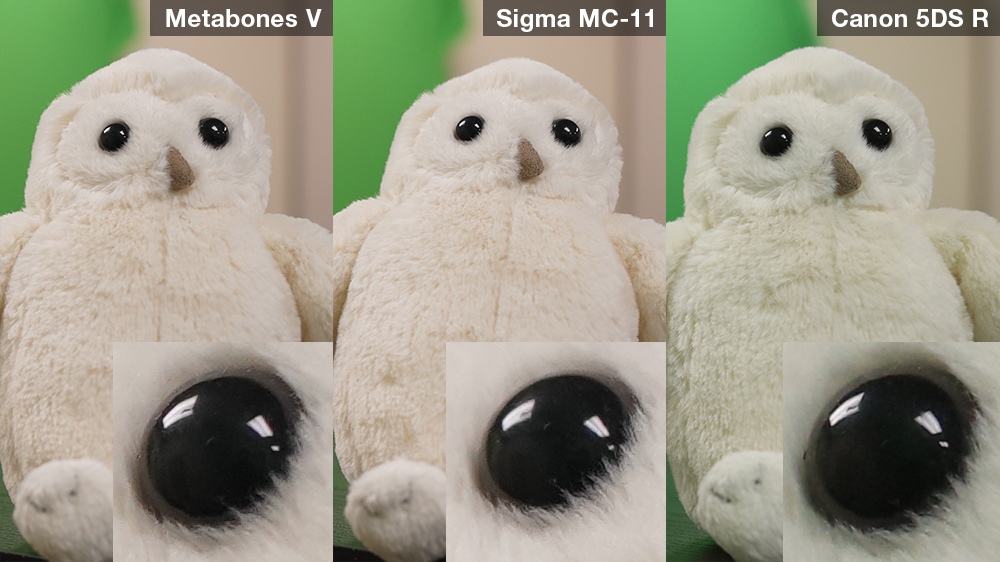
With this lens, the Sony a7R III with both adapters and the Canon 5DS R seemed to perform similarly. As usual, the a7R III was better at resolving details than the 5DS R, as can be seen in the close-up of the owl toy’s fur in Shot #1.


Continue to Part 3 for the rest of the comparisons and our conclusions.

Are Canon EF to Sony E Lens Adapters Worth It? (Part 1)

Part one of our Canon EF to Sony E Mount Lens Adapter comparison. Click here for Part 2, and click here for Part 3.

If you are considering switching from Canon cameras to Sony, you may be wondering how well you’ll be able to make your Canon EF and EF-S mount lenses work with your Sony E Mount camera.

In this article, we compare the Metabones V and Sigma MC-11 EF/EF-S to E mount adapters and compare their performance to lenses mounted natively on a Canon camera.


Here at RELATE, our photography/videography inventory has been moving steadily towards Sony. In the past, we primarily shot with Canons, but video is extremely important in our media production, and as we demonstrate and discuss in our recent Focus Test videos on our show Tech Down Over, Sony’s newer cameras have quite an edge in on-site shooting, offering faster, more accurate focus and better contrast in adverse light conditions.

We use the Sony a7R III and the Canon 5DS R in this comparison, which we compared in Tech Down Over Episode 154, using equivalent native 50mm lenses.

In that episode, we mention that the a7R III has in-body image stabilization, whereas the 5DS R does not, and we shoot mostly handheld in the show. In this test, we take each set of shots from a tripod mount, using a 2-second timer.

We have no affiliation with any of the brands represented in this test; all equipment is owned by us.

Our Comparison


We shot three subjects in each set of pictures:

1. A toy owl, which was nearest to the cameras and generally had the lowest contrast (on average, all of our camera-adapter-lens combinations took the longest to focus on this one).

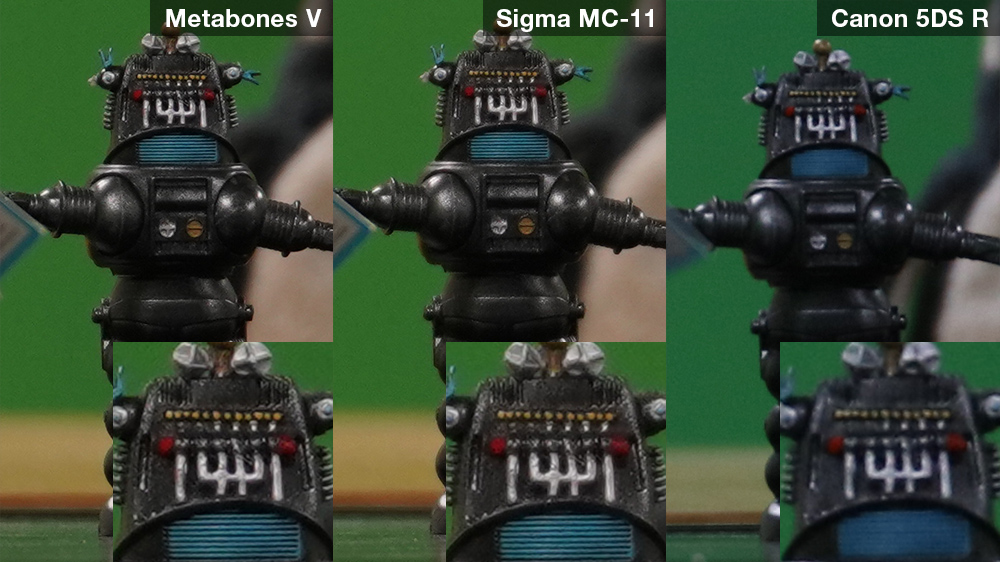
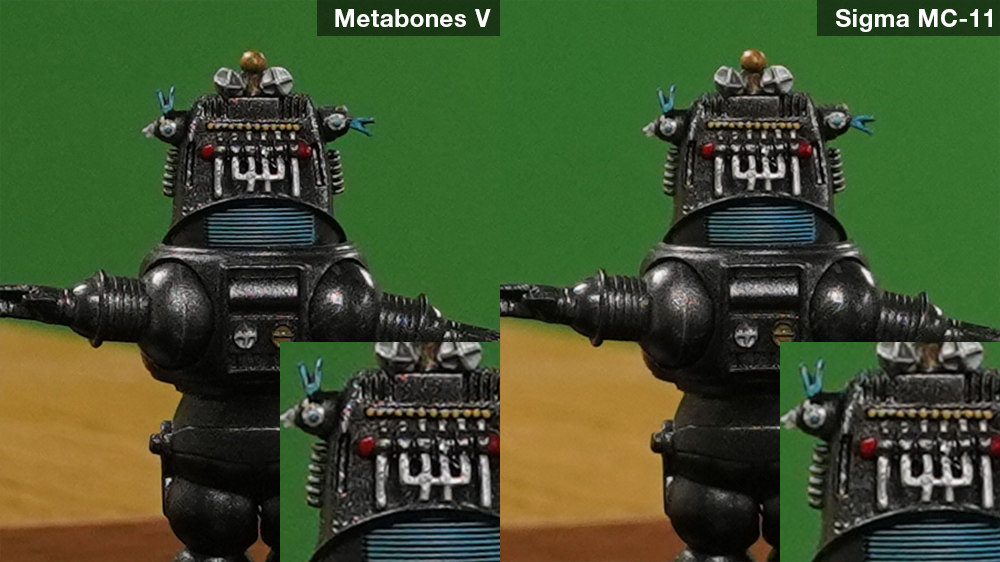
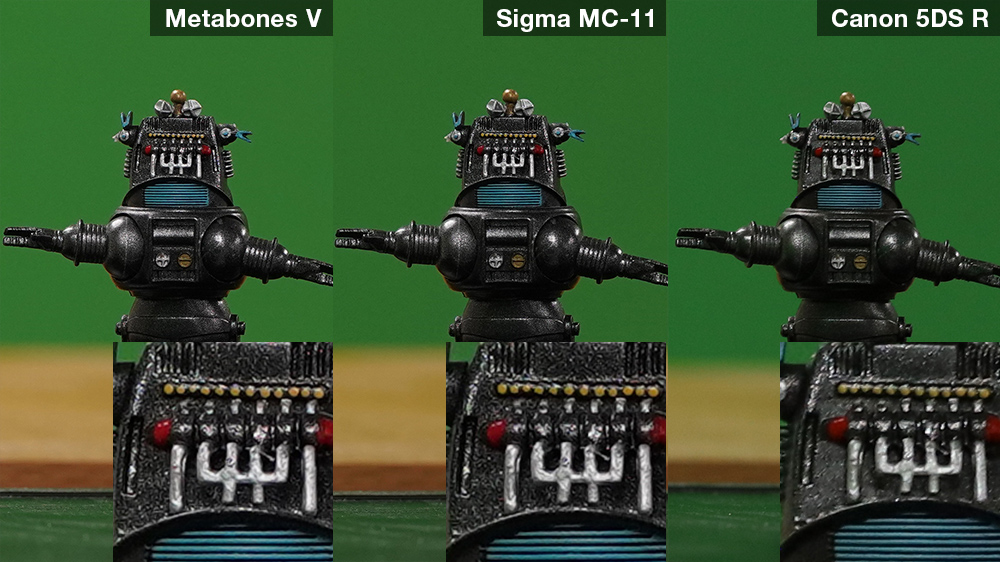
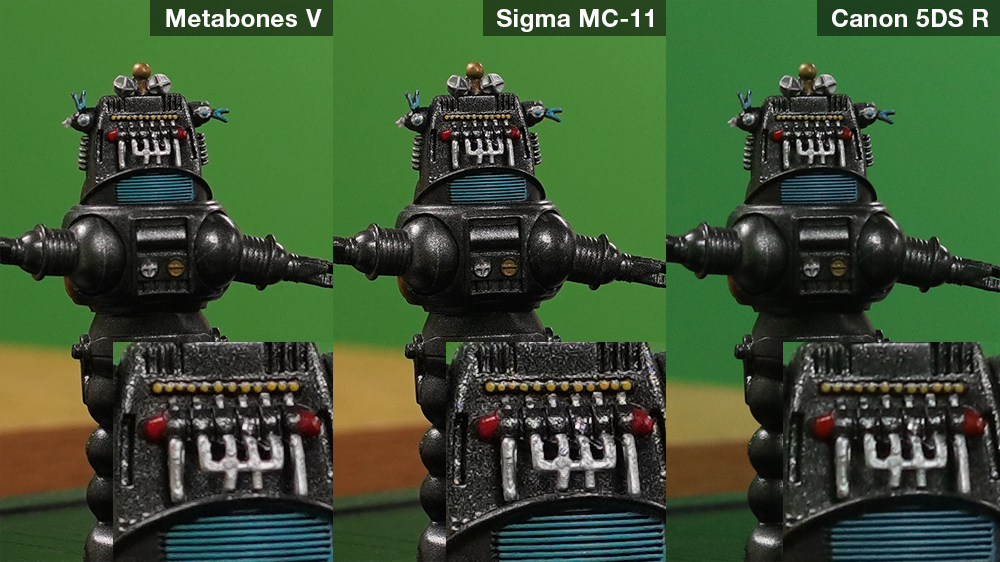
2. A “Robbie The Robot” figure (any "Forbidden Planet" fans out there?). This was the mid-distance target, and was invariably the easiest for the cameras to focus on due to its distinct, high-contrast silhouette.

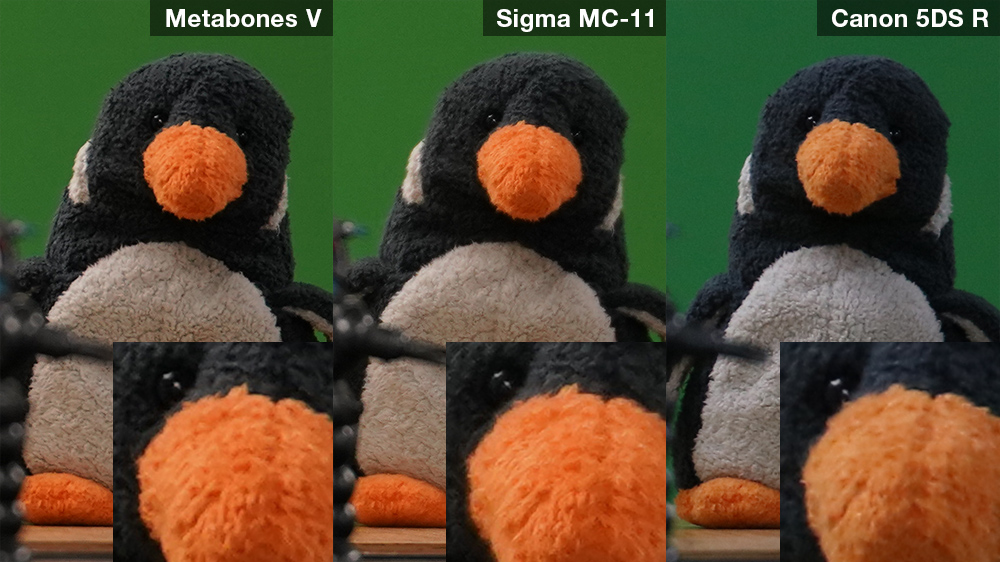
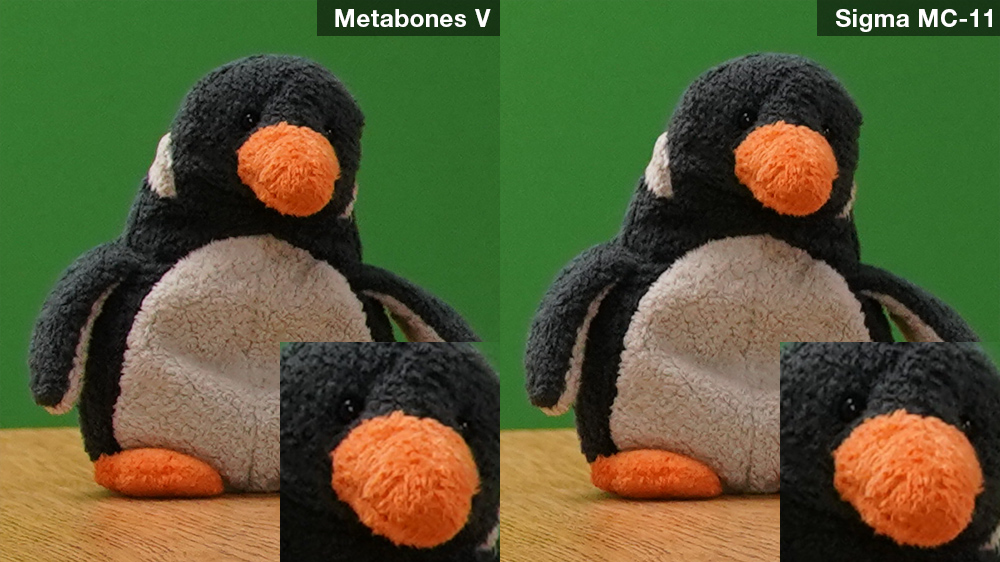
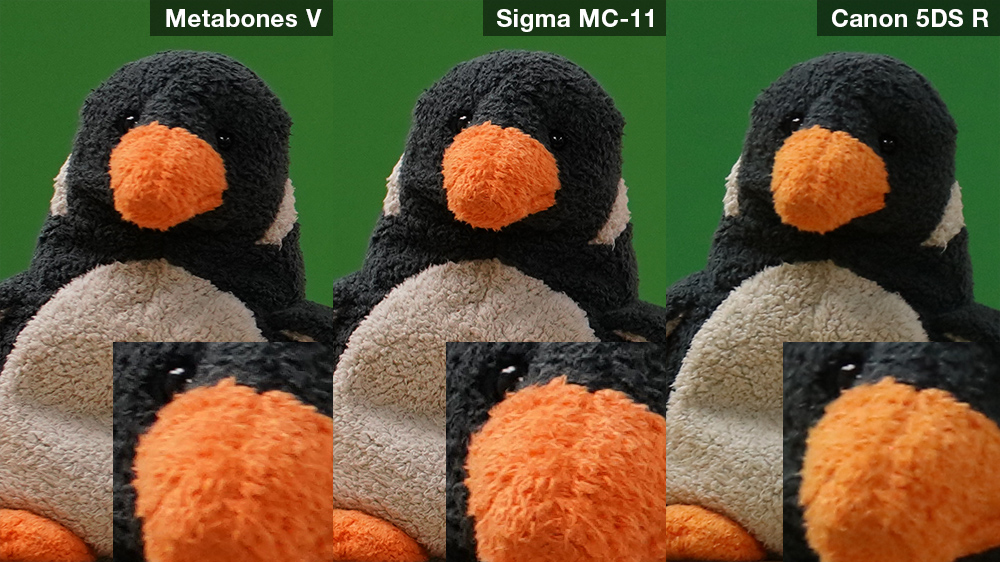
3. A toy penguin, which was the farthest from the cameras. Two of our lenses struggled with focusing on this target, as we’ll elaborate on later.

Our tests will show crops of each target object, with each camera or camera-adapter combination placed side-by-side.

Because of time constraints, we took the photos in two sessions: the Sony a7R III pictures were in a separate session from those shot on the Canon 5DS R.

Lenses and Adapters Used:


Using our Sony a7R III, we tested out two EF-to-E Mount adapters, the Metabones EF to E Mount Mark V and the Sigma MC-11, and compared those to the same lenses mounted natively on the Canon 5DS R.

For today’s test, we shot all photos using AF-S.

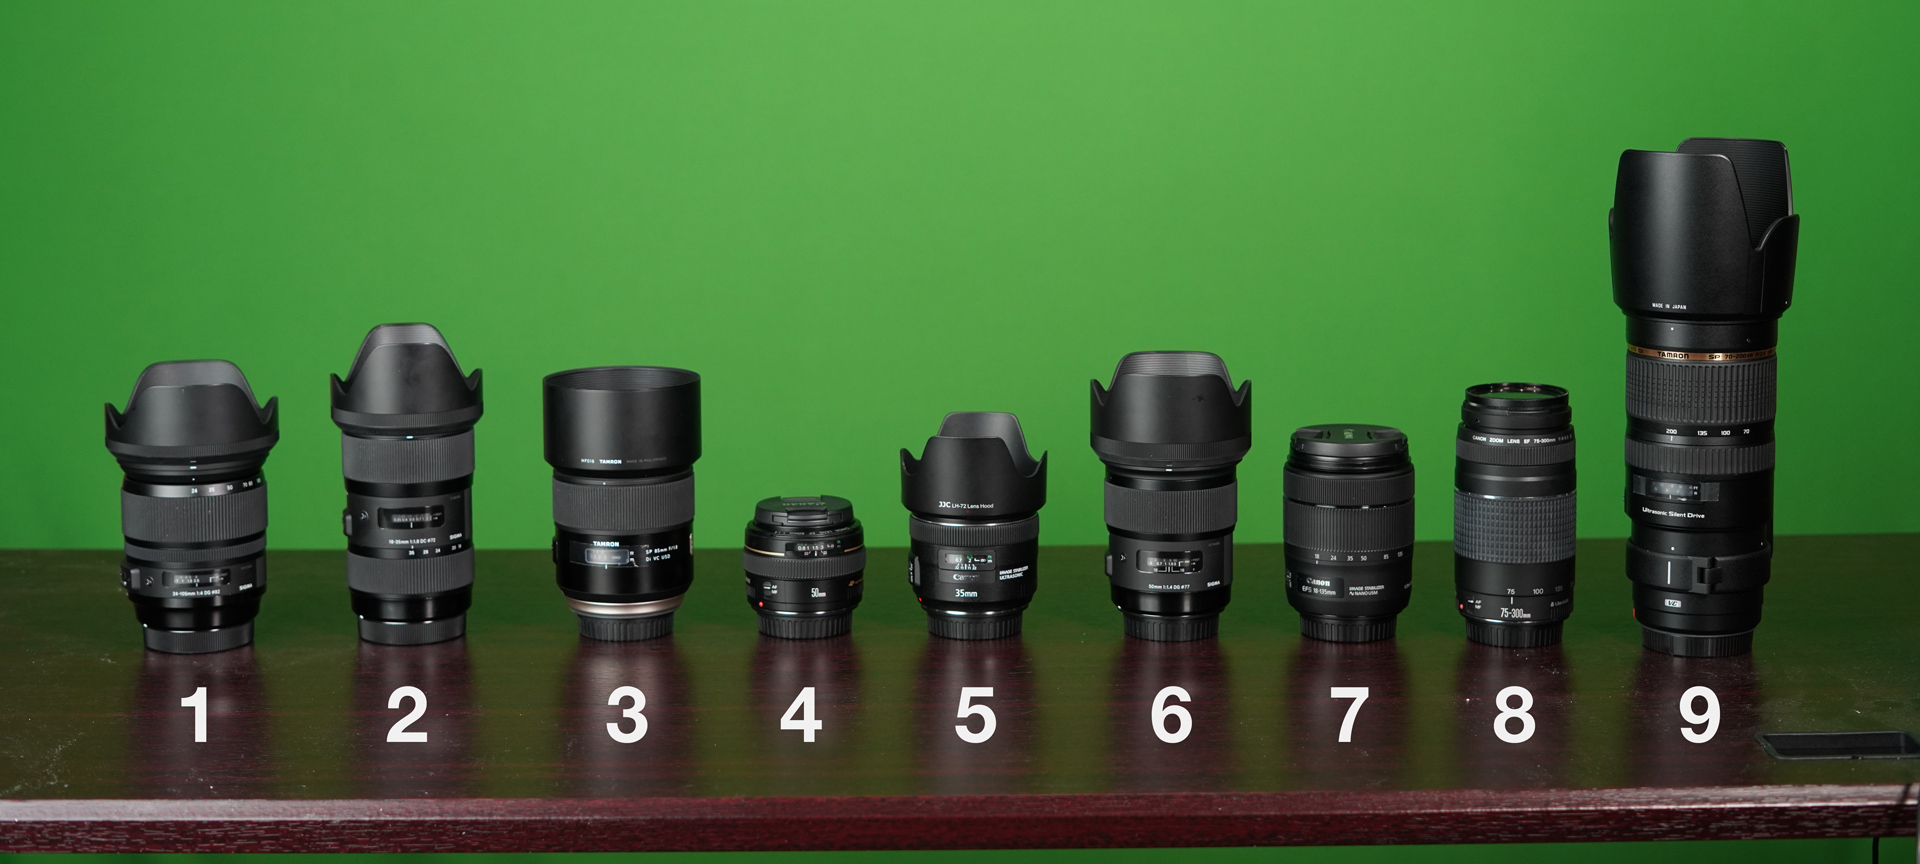
We tested using nine lenses (pictured below):

Lens Lineup

1. Sigma 24-105mm f/4 DG ø82 HSM Art

2. Sigma 18-35mm f/1.8 DC ø72 HSM Art (This is an EF-S/Sigma DC mount lens, therefore we did not test this one on the Canon 5DS R, which has an EF mount.)

3. Tamron 85mm f/1.8 Di VC USD

4. Canon 50mm f/1.4 EF USM

5. Canon 35mm f/2 EF IS USM

6. Sigma 50mm f/1.4 DG ø77 HSM Art

7. Canon 18-135mm f/3.5-5.6 EF-S IS Nano USM (This did not fit the Sigma adapter, and as an EF-S lens, it does not work with the Canon 5DS R. Hence, we were only able to use this with the Metabones V.)

8. Canon 75-300mm f/4-5.6 III EF

9. Tamron SP 70-200mm f/2.8 Di VC USD

Continue to Part 2 for our results.

Monday, December 18, 2017

Gamification, or Everything Old is New Again

In 1890, an American university student would spend untold hours in the study and translation of Latin, Greek and German – largely the grammar and vocabulary. Listening to it or speaking the language didn’t happen until the 2nd or 3rd year.


In 1916, Carl Krause proposed a more natural method. The Direct Method, he called it; learning language by being immersed in it. Mr. Krause’s method suggested that students attended classes where no English was allowed. Students would receive content and communicate back using only the language they were to learn.


It was a revolutionary idea, and one that changed curriculum design for many fields of study. The foundations of learner-centric design, and even gamification find their roots in the Direct Method:


  • the student was forced to practice, and their level of engagement pushed their success.

  • It applied psychology in much the same way gamification does. Krause understood that humans need to communicate. The Direct Method largely removed the boredom of rote learning and replaced it with communication challenges of increasing difficulty.


Sound familiar?


In our industry, we’re given to re-inventing the wheel. We know greater engagement equals greater success in learning outcomes. Gamification and Learner-centric design are just the latest experiments; how to apply a challenge such that it engages the learner enough to offset the boredom of learning material they might not choose to learn on their own.


Gamification can be effective. For example:


  1. The individual who is driven by recognition (I want to be first, best, or a star). While I personally feel this type of individual is highly motivated to learn without the gamification constructs, the widely available examples and ability to implement a recognition platform makes it a no-brainer to set up and try.

  2. It takes the boredom out of rote subjects through storytelling, social interaction, challenges and introducing fun elements such as sound and animation or actual game play.


The problem with gamification is that it’s hard to do well. Leaderboards and learning paths, badges and achievement points are great for early adopters. If you start the climb three years after implementation, the wall of leaders is a proven vehicle for dis-engagement, for example. “I’ll never beat that score!”


For many companies, taking your learning content and converting it to something animated and fun is an expensive and paradigm-shifting endeavor. The outlay is a deterrent to wholesale change unless you can prove the ROI is there to justify it.


There’s also resistance to change. How do you hand control over to your employee to drive their learning? How does the trainer learn to lead a session from within the group? How do you test for actual improvement in outcomes? How do you deal with learners who don’t respond well to self-direction?


Personally, I favor flipped classroom design. Ultimately, no matter your learning type, you settle down and teach yourself: by going for the star and racing through the content ahead of the pack, or listening to the instructor intently and practicing, or grabbing a book or watching a demo and trying it for yourself.


In each case, the learner does the driving. Flipped classroom lets the learner decide their path. Our job then becomes ensuring that no matter the road, the content delivery (or rewards) match the learner’s choice. It means making tough choices – such as a distributed learning system that contains content blocks which can be re-purposed with a new stylesheet; or a rewards system that sorts out levels of achievement, branches and refreshes so that new learners aren’t discouraged.


Ultimately, though, we’re still in 1916, trying to figure out how to get into the learner’s head and figure out what makes them tick.

Monday, December 11, 2017

Welcome to the RELATE blog!

Hi, I'm Rick Zanotti, founder and President of RELATE Corporation. It's a joy to have you here!

When I started the company back in 1984, I had a vision of providing software development and Training services that were professional and personal at the same time. With more than 3 decades of experience and thousands of projects, we haven't forgotten that main goal today.

Our backgrounds in Business, IT, Training and Marketing help us provide well-rounded solutions to our clients and the community at large. In the last decade we've also expanded into Internet broadcasting with millions of views and shows that highlight the best of our industries and sharing of information around the world. VISIT RELATECASTS to watch shows and learn more!

This blog is an extension of our professional life and will reflect the views of our leadership team as well as experts from our team as well as in the industry.

You'll find many categories for discussion and thought-provoking content. We urge you to interact with the writers to bring these blogs to life.

If you'd like to be a guest writer in our blog, sent an email to connect@relate.com and give us your name and topics you'd like to talk about. We will review your note and see if there's a fit for the blog let you know quickly.

We plan on sharing stories, tips & tricks and much more about pertaining to our fields of interest.

Please subscribe to the blog so you won't miss content and it will notify you when new content is posted.

Happy reading and writing!

Thanks again!!!

Saturday, November 8, 2014

Real World Review - Lowepro Slingshot 202AW


I really enjoy the Lowerpro line of camera bags. I have this one and its bigger brother. Both work beautifully. They're flexible and well designed.   Definitely a 'must-have' for photographers and videographers who want to go light but carry a lot of gear...

Monday, October 13, 2014

Stop the Unreadable UI Insanity!!!

I've long been a real proponent of readable, functional and easy on the eyes user interfaces. Heck, I spent a large part of my life as a UI designer in the IT world and also as a VP running IT departments that did a lot of development.

Those who know me understand my eyes aren't the best out there, but I'm not blind and can see pretty well except at night... So this is not a gripe about catering to disabilities. But this is a gripe about ridiculously designed UI that are hard to read, tiring and eye damaging (yes, eye strain can damage the eyes with prolonged use).

Years ago my biggest complaint in elearning tools was Adobe Captivate. Version 5 and 5.5 were this side of unreadable. It was plain awful to work on for 8 or more hours a day. Eye-strain was a given and not just for me, but for our staff of 20-50 year olds. They all complained of eye-strain, headaches and tiredness after a full day of development.  And they all had 20/20 vision!!!

Adobe finally capitulated and version 6 had more contrast and became 'usable'. Versions 7 and 8 mostly followed suite and it's not that hard to work on Captivate for long periods now.

Articulate started the trend of making the UI look like Office (first 2010 and now 2013). Lectora also thinned the fonts and grayed things up a bit. Not terrible but could be better.

Microsoft, particularly with Office 2013, has one of the worst UI color schemes around with almost no useful contrast. Things are plain hard to read for many. One of our younger graphic artists gets headaches working with PowerPoint, Articulate and others due to the low contrast (she has 20/20 vision). With all the billions that Microsoft has they came up with a lame color scheme for the Office products with no thought as to how functional or not people would be using them. My theory is that people use them, complain but don't complain loudly enough... I wonder how many lens prescriptions Microsoft is responsible for?

We recently upgraded to the new Articulate Storyline 2 and it's pretty cool! Great new functionality, improved workflows and overall a good release. We love working with Storyline. BUT, we hate (read that with extreme prejudice) the new UI. It is hard to read, no contrast and unfunctional for long (or even short periods) of time.

Here is Microsoft PowerPoint 2010:


Articulate Storyline 1


Articulate Storyline 2


PowerPoint sets the trend for awful UI design (I still don't think the ribbon menus are all that effective).

Articulate Storyline 1, while not great, was a tad better than PowerPoint.

Articulate Storyline 2, is much worse than Storyline 1 and surpasses PowerPoint in unreadability. 

If you know anything about photography, you know that auto-focus lenses use contrast to determine difference between objects. If you have very gray scenes, as in some fog or dusk, the cameras have a much harder time grabbing focus as contrast is very low. Cameras were patterned after the way our eyes also focus. While our eyes are a bit more flexible in lighting conditions than cameras, our eyes also require contrast or they will take much longer to acquire focus.

In our eyes, contrast and focus is acquired by squinting, or using the many tiny muscles around the eyes to try to make an unreadable image sharper. Many tests have been done to film people as they struggle with very bright screens, light interfaces, a lot of gray, etc.  Invariably, the eyes squint a lot more and the muscles around the eyes get tired. The lack of blinking that occurs while people focus continually on light screens  dries the eyes and causes other issues. 

In essence, no contrast UI is simply bad for the eyes whether you can read them well or not. Some of the people in our office can read them without a problem but when asked to pay attention to their eyes they realize they're squinting a bit or their eyes are getting dryer faster.

Solution?

Really quite simple. Use thicker, darker fonts. That's it!!! How hard is that???

But in our form before function world that seems almost impossible.

What reads better to you?