Tuesday, February 20, 2018

On YodaYeo's Panasonic GH5 Focus Fix

Last week, we commented in our Focus Test article about the Panasonic GH5's relatively slow autofocus. We found that, even since the firmware update, its focus was the slowest in our "distraction test." This echoed the experiences of many GH5 owners worldwide, but a workaround has recently been discovered.


On February 4, photography YouTuber YodaYeo posted a video detailing his discovery of a fix for the GH5's sluggish focus, video below:


Essentially, reducing your shutter angle to below 180 degrees speeds up the Panasonic GH5's autofocus dramatically.


For those unfamiliar with shutter angle, it's a filmmaking term that refers to a relationship between shutter speed and framerate. The use of degrees and angle was relevant to how older video cameras worked. Essentially, a higher shutter angle means a slower shutter speed relative to framerate, and vice versa.


Keeping a shutter angle of around than 180 is considered a "golden rule" of video. This is because it results in enough motion blur to eliminate jerkiness, but not too much. A 180 degree shutter angle translates to a shutter speed of 1/60 at 30 fps and a speed of 1/50 at 25 fps. YodaYeo's test, however, shows that this rule doesn't quite hold when it comes to the GH5.


If you've done a lot of video shooting, you probably find the prospect of having to use a smaller shutter angle unpleasant. "It'll be like watching a slideshow," you may think. Fortunately, as Matt Krieg demonstrates in the following video, a shutter angle of 179 will suffice.


In the video, Matt shows how to set your Panasonic GH5 to shutter angle mode, and then set your shutter angle to 179 degrees. He then performs tests with many different lenses to show the difference in focus speed with YodaYeo's fix.


[embed][/embed]


A few days later, YodaYeo posted a video, shown below, explaining the mechanics of this fix. It's rather technical, and very fascinating for those interested in how cameras function. The gist is that, for the best autofocus performance, the camera needs time to capture two images per video frame. Only one of these is actually saved as a video frame, but both are used by the camera for autofocus adjustment.


This is ideally possible at 180deg shutter angle with a framerate of exactly half the refresh rate. At 50Hz, which is PAL, this is 25fps, and in NTSC (59.94hz), this is 29.97fps. PAL stands for Phase Alternating Line, and NTSC stands for National Television System Committee. The difference is too technical to get into here, but NTSC is the USA standard, and PAL is standard in Europe.


However, the GH5's new focus system apparently does not compensate for the fact that it is using a complimentary metal-oxide semiconductor (CMOS) sensor.


As YodaYeo outlines in his explanation video, the GH5's sensor takes slightly longer than the shutter speed to capture an image. Because it takes a tiny bit longer than half of a refresh frame to take an image, the camera can't capture that second, autofocus-only image.


What does this have to do with the sensor type? Years ago, most digital cameras used charge-coupled device (CCD) sensors. Now the majority use complimentary metal-oxide semiconductor (CMOS) sensors, also known as active pixel sensors (APS).


There are a lot of reasons for this: CMOS sensors are cheaper, therefore making larger ones is more practical, and they consume less battery power per shot. CMOS sensors are typically more durable, lasting for more shots than CCDs.


The difference that concerns this article, however, is the pattern in which they capture images.


Namely, a CCD camera has a "global shutter," which means that when you take a picture, the whole sensor captures the image at once.


In contrast, a CMOS camera has a "rolling shutter," which means it captures the image row-by-row. This happens very quickly, but as YodaYeo points out, it takes a very slight amount of additional time. This tiny delay disrupts the otherwise perfect synchronization between refresh rate and framerate.


Global Shutter Example AnimationRolling Shutter Example Animation


Global shutter (left) and rolling shutter (right).


The question now is whether Panasonic will spot these videos and release a firmware update to compensate for this issue. If that happens, the GH5's focus would be greatly improved with no need for end-user fiddling.


There was one more issue we encountered in our focus test with the GH5, that is, its tracking autofocus tended to get distracted. Therefore, we also suggest that you watch Matt Krieg's Auto-focus Pulsing video. He describes how to change your GH5's focus speed and sensitivity settings to match your shooting needs.


We've also run our own test on the GH5 using the 179 degree shutter angle fix. Our findings echo those of others; the focus is noticeably faster than before, but still slower than Sony cameras. The video is below:

Because this fix worked for the GH5, we did a quick test with the GH4 to see if its focus time would also improve. Unfortunately, it does not seem to have made the same difference on the GH4. With the shutter angle set to either 180 or 179 degrees, it took about one second to acquire focus.


One of the selling points of the GH5 was that its sensor drive speed is twice that of the GH4. Maybe this could explain the contrasting results of our tests. You can see our test below:


Since the inital findings, both YodaYeo and Matt Krieg have continued to post updates on their GH5 focus findings. So, if you're a Panasonic GH5 user, we recommend subscribing and keeping up on whatever else they discover.


Monday, February 19, 2018

Mixing Board Basics from Curtis Judd

Yesterday, our good friend Curtis Judd from www.learnlightandsound.com released a primer on what a mixing board is for and how to use it. This is a perfect guide if you want to mix audio, but find the complexity of mixer interfaces daunting.

If you need to do audio mixing, for podcasts, videos, music, voice and narration, etc, this is an excellent resource. Last week, we posted a tutorial on creating your own podcasting setup. Curtis' video below will serve as an excellent addition to make the tools of audio production accessible to you.


Wednesday, February 14, 2018

Creating a Podcast

Broadcasting your own show has become easier than ever, but trying to find good information on the basics of how to create your own podcasting or video broadcasting setup can be daunting, so we've put together a video guide to help you get started, based on what we use for our RELATECASTS shows.

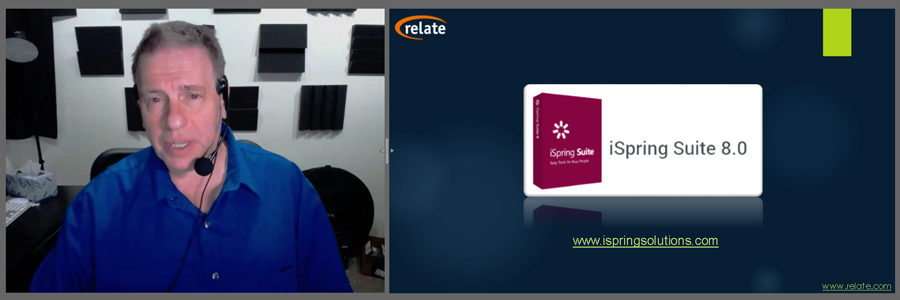
Click the preview image below to view the original iSpring presentation. For mobile devices (or browsers without Flash support), scroll down to the Vimeo video.


Though we didn't mention them in the video, our current go-to capture card brand is Magewell.

If you're using a laptop setup, the Magewell USB 3.0 HDMI Video Capture cards are an excellent choice that we've found is fast and reliable.

For our desktop setup, we're using two cards: the Magewell Pro Capture Quad HDMI card, and the Magewell Pro Capture Quad SDI card, which gives us the ability to connect up to 8 cameras if we need to, 4 through HDMI and 4 through SDI. These cards plug right into your computer's PCI slots with their PCI 4x connectors.

Tuesday, February 13, 2018

Focus Test Analysis: a9, GH5, NX80, and XF405

Early this year, we did AF-C Face/Eye Tracking focus tests on four cameras: the Sony a9, the Panasonic GH5, the Sony HXR NX80, and the Canon XF405. These tests are available to watch on our video podcast Tech Down Over, available below.


In these videos, we performed similar tests with each camera. Rick moved around while being filmed and face-tracked by each camera in different conditions: indoor lighting, direct sunlight, and outdoor shade, and at different distances and zoom levels.


As an eLearning and training development company, many of the videos we make are "run-and-gun," meaning we shoot many of the interviews and other videos we make for customers on site. Therefore, this series of tests was performed in a manner that simulates this type of shooting with little-to-no time to prepare, by moving from area to area without the stops to adjust and configure cameras and equipment that are possible in a studio setting.


Although these are focus tests, we also noticed significant differences in how the cameras handled contrast; that is, whether they were able to maintain contast in the face when the background or other elements were much brighter or higher-contrast than the subject.


Focus Test Videos:


(Analysis and comparison below)


Sony a9


Panasonic GH5


Sony HXR NX80


Canon XF405


Test Results:


Focus: Distance Test


Both Sony cameras held clear focus even when Rick was outdoors in daylight and very small in the frame. See 3:10 in the a9 video and 2:25 in the NX80 video, compared to 3:35 in the GH5 video and 6:15 in the XF405 video. At these points, the GH5 and Canon XF405's focus reticles stopped following Rick, but the Sony a9 and NX80's focus reticles stayed locked on Rick's eyes.


Focus: Detection Area Edge Test


The ability to keep a moving subject in focus is essential to dynamic scenes and action videography. Based on our tests, we found that the Sony a9 kept focus in the largest area of its frame, which was effectively the whole frame, as far as we could tell (see test at 4:27) compared to the other cameras. The Sony NX80 came in second, though its focus area was noticeably smaller than that of the a9 (see 3:15).

The Canon XF405 and the Panasonic GH5 had similar-sized focus areas, smaller than both the Sony cameras (see 5:07 for the XF405 and 2:40 for the GH5).


Focus: Distraction and Subject Obstruction


To give context to this test, last year (2017), the Panasonic GH5's autofocus was commonly criticized in the photography community for being easily distracted and losing focus when obstructions passed in front of the subject.

In response, Panasonic released Firmware Ver. 2 for the GH5 in September 2017, intended to fix the issues that photographers were experiencing with "wobbly" autofocus that would cause the focal plane to see-saw back and forth, sometimes for several seconds before settling on the subject.


Our tests seemed to mostly bear this out—at 5:20 in the GH5 footage, Rick tests this by waving his hands in front of his face. The GH5's autofocus is slightly distracted when the open hand first comes into frame, and when the hands actually cross over Rick's face, but holds focus the rest of the time Rick is waving around his hands, which is a big improvement on our previous experiences with the GH5's autofocus.

Still, The Sony NX80 (5:40) and the Canon XF405 (8:20) both did a better job on this test, or about equivalent to each other. Neither lost focus at all during this test. Note that we didn't do this particular exercise when testing the a9.


We noticed that the XF405's focus reticle stuck to Rick's head even several seconds after his hands totally blocked his face, and when he turned so that only the back of his head was visible. However, this didn't necessarily translate to better focus than the Sony NX80. Even though its focus reticles disappeared soon after Rick blocked his face or turned around, the NX80 near-instantly reacquired focus (thanks to Sony's ridiculously quick Hybrid AF) whereas, whenever the XF405 lost focus, it took 1-2 seconds to reacquire.


Contrast and Vibrance


Following are stills of our backlit-subject contrast test. These are unaltered except for scaling.

Sony NX80


Panasonic GH5


Canon XF405


Sony a9


To us, the Sony a9 shot is striking in its contrast, detail, and color vibrance despite being so strongly backlit. The NX80 and XF405 are roughly comparable, with the GH5 somewhat lagging in this test. Of course, this type of shot is not typically seen in professional photography and videography, often considered an amateur mistake, but if the a9 is any indication of the future state of cameras, such a shot may become more feasible as a stylistic choice.


Also, this sort of shot is likely to occur in many "point-and-shoot" situations, such as when filming children's sports games, outdoor weddings, family outings, etc.


Conclusion


Focus: Distance Test


Out of the four cameras we tested, we declare the Sony a9 as the winner in this comparison. However, it's also the most expensive by far, at about $4,500.00 USD for the camera body alone. For a professional action photography and videography or cinematography, this is a very viable choice, but most other photographers and videographers would probably opt for something more affordable.

Out of the other three cameras, the Panasonic GH5 is a good all-around choice, offering excellent features for both photos and video at about $2,000 USD (body only).

For video only, we recommend the Sony NX80 over the Canon XF405. The NX80 and XF405 aren't strictly equivalent, as the NX80 is HDMI-only, and the XF405 has an SDI interface, but at about $2,300 USD, the NX80 is much cheaper than the HDMI-only XF400, which is $3,000 USD (the SDI-enabled Sony PXW-Z90 and Canon XF405 are about $2,800 and $3,500, respectively).

Monday, February 12, 2018

Are Canon EF to Sony E Lens Adapters Worth It? (Part 3)

Part three of our Canon EF to Sony E Mount Lens Adapter comparison. Click here for Part 1, and click here for Part 2.


How Well Did The E Mount Adapters Perform?


As mentioned previously, for each lens, we’ve set up similar shots with three different focal areas.


6. Sigma 50mm f/1.4 DG ø77 HSM Art


Each shot is 1/100 sec, f/4, ISO-1000, tripod mount with 2 second timer.


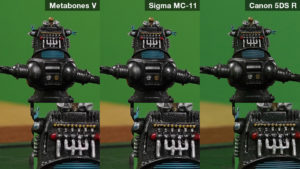
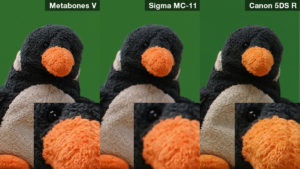
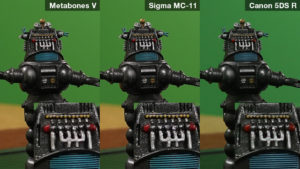
(Click on thumbnails to view side-by-side comparisons)


This Sigma is a top-of-the-line 50mm, and it shows—both cameras and both adapters focused quickly and captured impressively crisp, clear shots.


The picture quality seen in all combinations was equivalent, though showing the typical differences in color and contrast between the a7R III and the 5DS R.


7. Canon 18-135mm f/3.5-5.6 EFS IS Nano USM


Each shot is 1/60 sec, f/5.6, ISO-1000, tripod mount with 10 second timer.


(Click on thumbnails to view side-by-side comparisons)


This zoom lens performed relatively well on the a7R III with the Metabones V, giving us sharp and clear shots. However, it took a long time to gain focus, especially on the farthest target (the penguin).


Despite of our best efforts, we couldn’t get this 18-135mm lens to fit on the Sigma MC-11 adapter, and as an EFS lens, it did not fit the 5DS R. Therefore, we don’t have a comparison for this lens, unfortunately.


8. Canon 75-300mm f/4-5.6 III EF


Each shot is 1/60 sec, f/5.6, ISO-1000, tripod mount with 10 second timer.


(Click on thumbnails to view side-by-side comparisons)


This lens worked with both cameras and adapters, however there was a vast difference in the focusing time between the Sony a7R III with either adapter and the Canon 5DS R. The 5DS R acquired focus in 2-3 seconds, while we had to fiddle with the a7R III for minutes trying to get it to focus on anything with this lens. We weren't able to focus on the farthest target (the penguin) at all with either adapter, though the 5DS R was able to catch it in 1-2 seconds.


Once the Sony a7R III did focus on something, it definitely got a clearer picture than the 5DS R through this lens. In general, this lens is soft and blurry on the long end, but it is a budget lens, at about $200 new. Because of the unreasonably lengthy focus time, we don’t recommend this lens for use with an adapter.


9. Tamron SP 70-200mm f/2.8 Di VC USD


Each shot is 1/60 sec, f/5.6, ISO-1000, tripod mount with 10 second timer.


(Click on thumbnails to view side-by-side comparisons)


This Tamron did a superb job on all adapter-camera combinations we tested here. This is a high-end lens, and it definitely shows in the sharp, clean images we got with it.


Our Conclusions


The Metabones V and Sigma MC-11 both gave us very good photos, comparable to the lenses in native mount on a Canon camera, with no discernible quality loss. For photography, we would definitely recommend either of these if you have EF or EF-S Mount lenses that you want to use on a Sony E Mount camera. The only lens we had significant trouble with when using the adapters was the Canon 75-300mm III lens, and we suspect it may be because that is a relatively old lens, released in 1999.


The primary shortcoming we found was that, with either adapter and any lens, AF-C Face Tracking did not seem to work in video mode on our Sony A7R III. This severely limits the types of videography you could do with these adapters.


You could still shoot sitting interviews where the subject is relatively still (and AF-S could be used), timelapse video, or anything involving manual focus, but most other types of video would be much more difficult or impossible without access to AF-C.


Back to Part 1


Back to Part 2

Are Canon EF to Sony E Lens Adapters Worth It? (Part 2)

Part two of our Canon EF to Sony E Mount Lens Adapter comparison. Click here for Part 1, and here for Part 3.


How Well Did The E Mount Adapters Perform?


As mentioned previously, for each lens, we’ve set up similar shots with three different focal areas.


1. Sigma 24-105mm f/4 DG ø82 HSM Art


Using this lens, we shot on the longest end (105mm). Each shot is 1/100 sec, f/4, ISO-1000, tripod mount with 2 second timer.


(Click on thumbnails to view side-by-side comparisons)


With the same settings as the Canon, the Sony A7 RIII performed better with the lens on both adapters than the Canon 5DS R did with the lens mounted natively.


We suspect this is not because of a difference in lenses, but rather because of how focusing works in each camera's firmware and, to a lesser extent, difference in camera sensors.


Somewhat less suprising (given that this is a Sigma lens) was that the Sigma adapter gave slightly cleaner shots with this Sigma lens than the Metabones did.


2. Sigma 18-35mm f/1.8 DC ø72 HSM Art


This is an EFS mount lens (DC mount in Sigma terminology), so we only tested this on the Sony A7 RIII to compare the adapters. Each shot is 1/100 sec, f/4, ISO-1000, at the short end (18mm), tripod mount with 2 second timer.


(Click on thumbnails to view side-by-side comparisons)


Overall, we didn’t notice any significant quality difference between the two adapters in the shots we took.


3. Tamron 85mm f/1.8 Di VC USD


Each shot is 1/100 sec, f/4, ISO-1000, tripod mount with 2 second timer.


(Click on thumbnails to view side-by-side comparisons)


There didn’t seem to be any discernible difference between the adapters for this lens. As before, either adapter on the Sony a7R III was able to consistently get sharper focus than the Canon 5DS R.


4. Canon 50mm f/1.4 EF USM


Each shot is 1/100 sec, f/4, ISO-1000, tripod mount with 2 second timer.


(Click on thumbnails to view side-by-side comparisons)


The Sony a7R III took longer to acquire focus with this lens with both adapters. Once it did, however, the shots came out sharper than those taken on the 5DS R (See the Sigma adapter shot in #2, and the Metabones shot in #3).


5. Canon 35mm f/2 EF IS USM


Each shot is 1/100 sec, f/4, ISO-1000, tripod mount with 2 second timer.


(Click on thumbnails to view side-by-side comparisons)


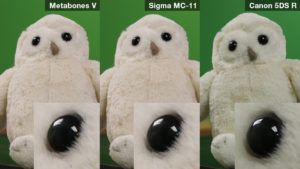
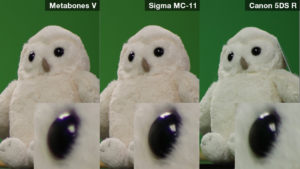
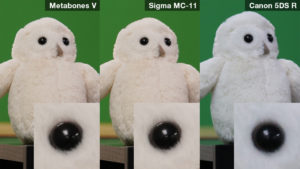
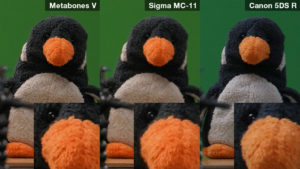
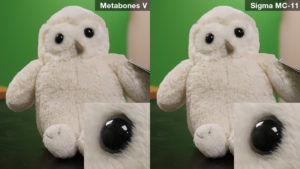
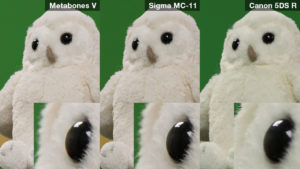
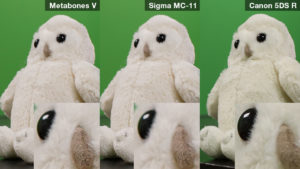
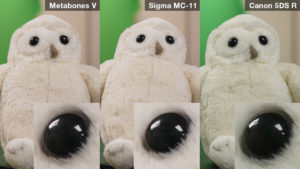
With this lens, the Sony a7R III with both adapters and the Canon 5DS R seemed to perform similarly. As usual, the a7R III was better at resolving details than the 5DS R, as can be seen in the close-up of the owl toy’s fur in Shot #1.


Continue to Part 3 for the rest of the comparisons and our conclusions.

Are Canon EF to Sony E Lens Adapters Worth It? (Part 1)

Part one of our Canon EF to Sony E Mount Lens Adapter comparison. Click here for Part 2, and click here for Part 3.

If you are considering switching from Canon cameras to Sony, you may be wondering how well you’ll be able to make your Canon EF and EF-S mount lenses work with your Sony E Mount camera.

In this article, we compare the Metabones V and Sigma MC-11 EF/EF-S to E mount adapters and compare their performance to lenses mounted natively on a Canon camera.


Here at RELATE, our photography/videography inventory has been moving steadily towards Sony. In the past, we primarily shot with Canons, but video is extremely important in our media production, and as we demonstrate and discuss in our recent Focus Test videos on our show Tech Down Over, Sony’s newer cameras have quite an edge in on-site shooting, offering faster, more accurate focus and better contrast in adverse light conditions.

We use the Sony a7R III and the Canon 5DS R in this comparison, which we compared in Tech Down Over Episode 154, using equivalent native 50mm lenses.

In that episode, we mention that the a7R III has in-body image stabilization, whereas the 5DS R does not, and we shoot mostly handheld in the show. In this test, we take each set of shots from a tripod mount, using a 2-second timer.

We have no affiliation with any of the brands represented in this test; all equipment is owned by us.

Our Comparison


We shot three subjects in each set of pictures:

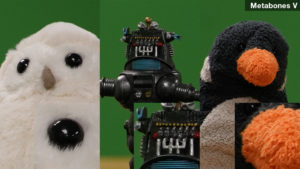
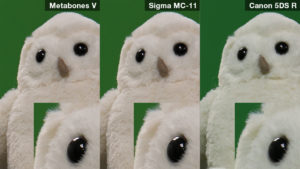
1. A toy owl, which was nearest to the cameras and generally had the lowest contrast (on average, all of our camera-adapter-lens combinations took the longest to focus on this one).

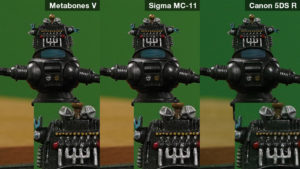
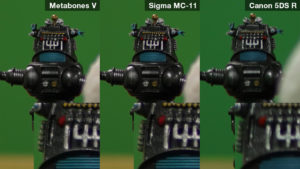
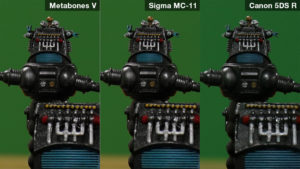
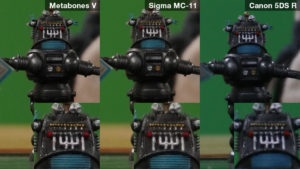
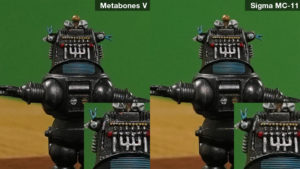
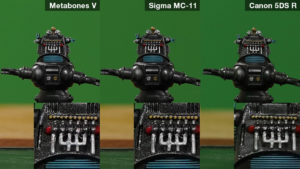
2. A “Robbie The Robot” figure (any "Forbidden Planet" fans out there?). This was the mid-distance target, and was invariably the easiest for the cameras to focus on due to its distinct, high-contrast silhouette.

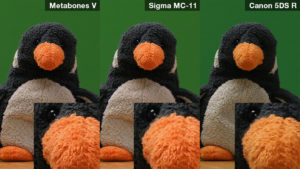
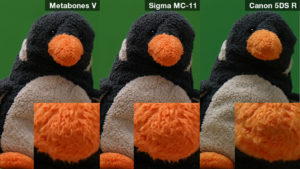
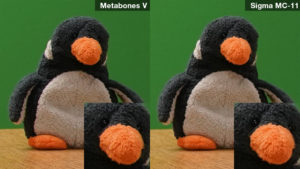
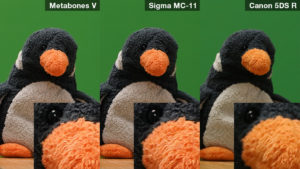
3. A toy penguin, which was the farthest from the cameras. Two of our lenses struggled with focusing on this target, as we’ll elaborate on later.

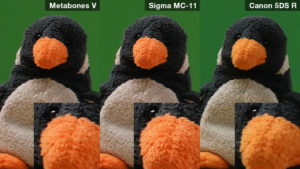
Our tests will show crops of each target object, with each camera or camera-adapter combination placed side-by-side.

Because of time constraints, we took the photos in two sessions: the Sony a7R III pictures were in a separate session from those shot on the Canon 5DS R.

Lenses and Adapters Used:


Using our Sony a7R III, we tested out two EF-to-E Mount adapters, the Metabones EF to E Mount Mark V and the Sigma MC-11, and compared those to the same lenses mounted natively on the Canon 5DS R.

For today’s test, we shot all photos using AF-S.

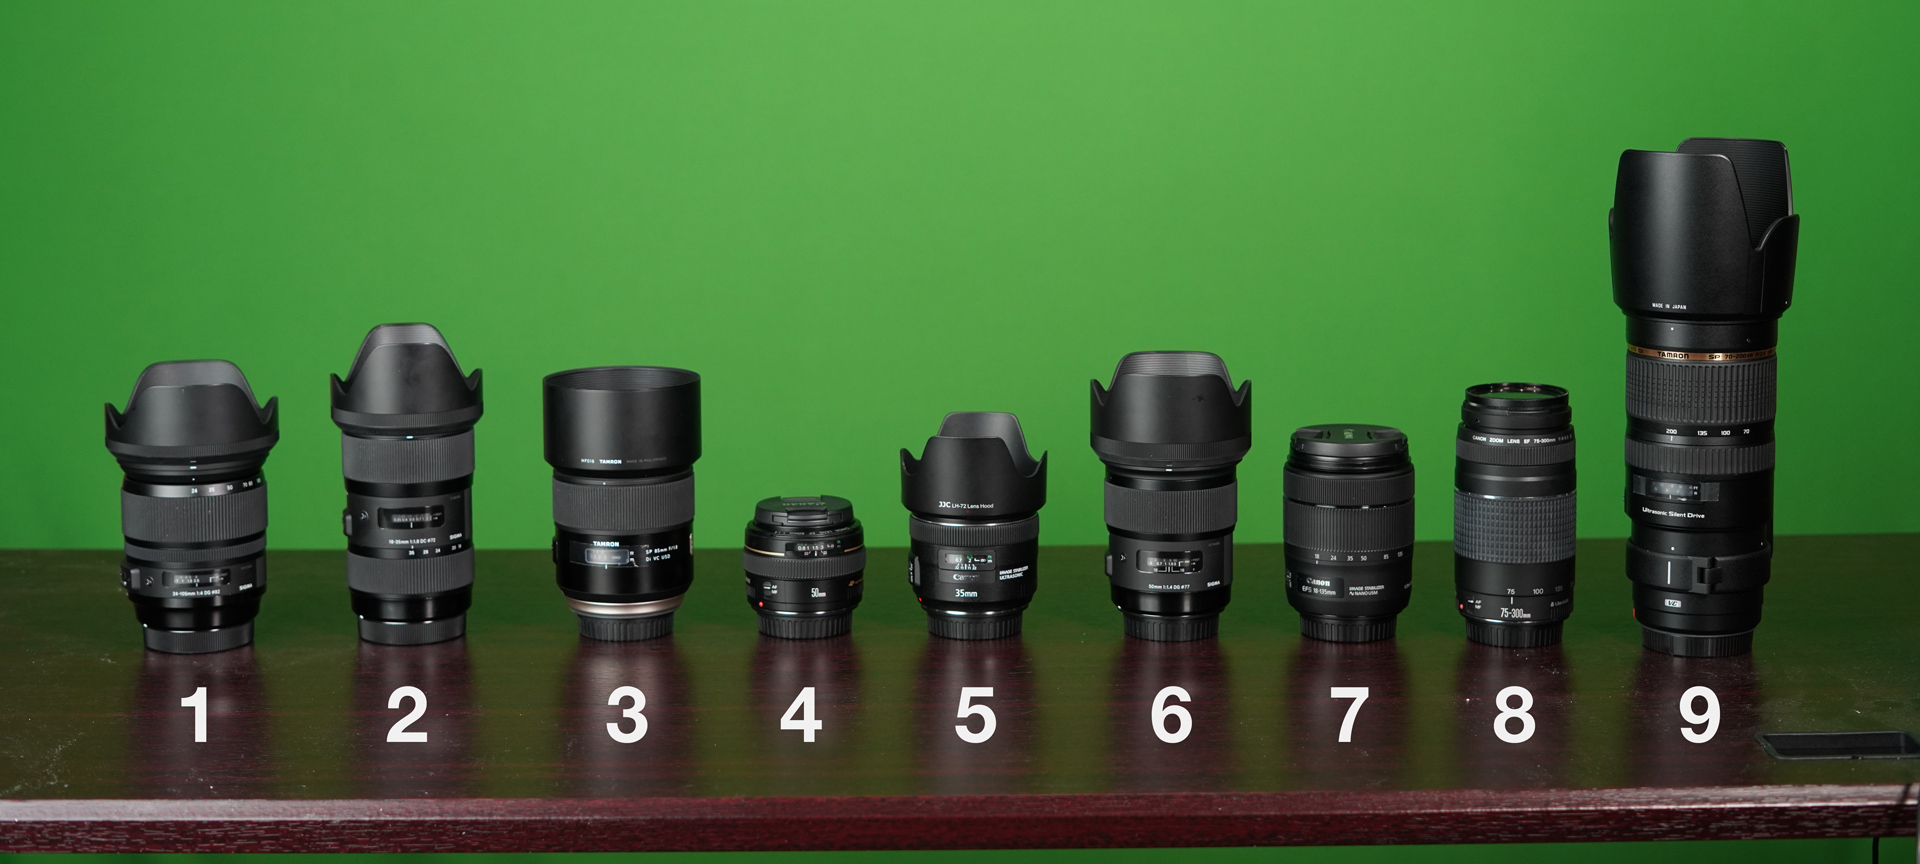
We tested using nine lenses (pictured below):

Lens Lineup

1. Sigma 24-105mm f/4 DG ø82 HSM Art

2. Sigma 18-35mm f/1.8 DC ø72 HSM Art (This is an EF-S/Sigma DC mount lens, therefore we did not test this one on the Canon 5DS R, which has an EF mount.)

3. Tamron 85mm f/1.8 Di VC USD

4. Canon 50mm f/1.4 EF USM

5. Canon 35mm f/2 EF IS USM

6. Sigma 50mm f/1.4 DG ø77 HSM Art

7. Canon 18-135mm f/3.5-5.6 EF-S IS Nano USM (This did not fit the Sigma adapter, and as an EF-S lens, it does not work with the Canon 5DS R. Hence, we were only able to use this with the Metabones V.)

8. Canon 75-300mm f/4-5.6 III EF

9. Tamron SP 70-200mm f/2.8 Di VC USD

Continue to Part 2 for our results.