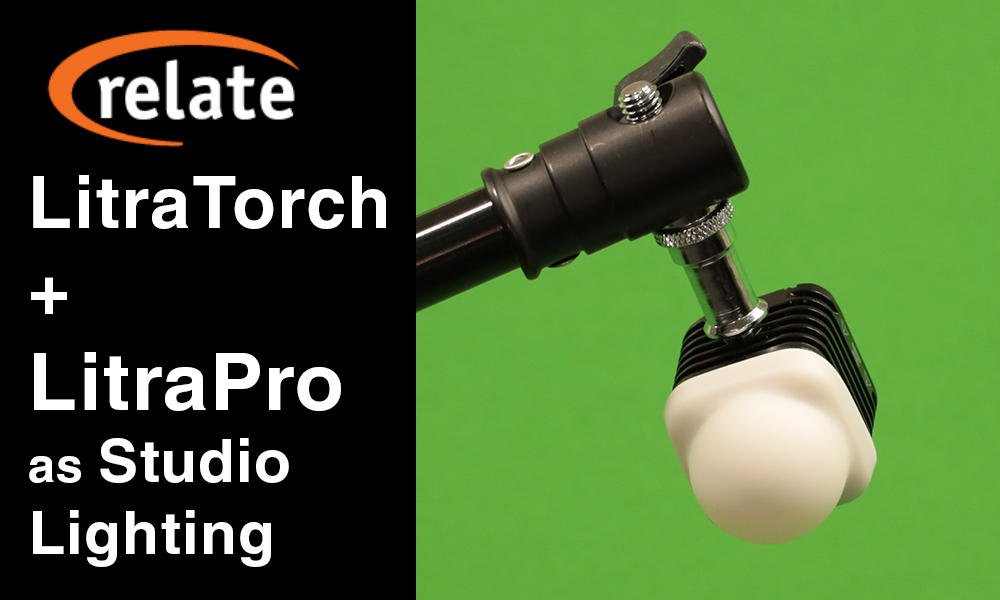
We've had the LitraTorch portable LED light for a couple of years now, and it's proven to be a capable portable light. We've used it for event coverage, for example, or adding fill and accents in the studio.
Quick aside: this article and review is not endorsed or sponsored by Litra. As usual, we're simply giving you information on equipment we use.
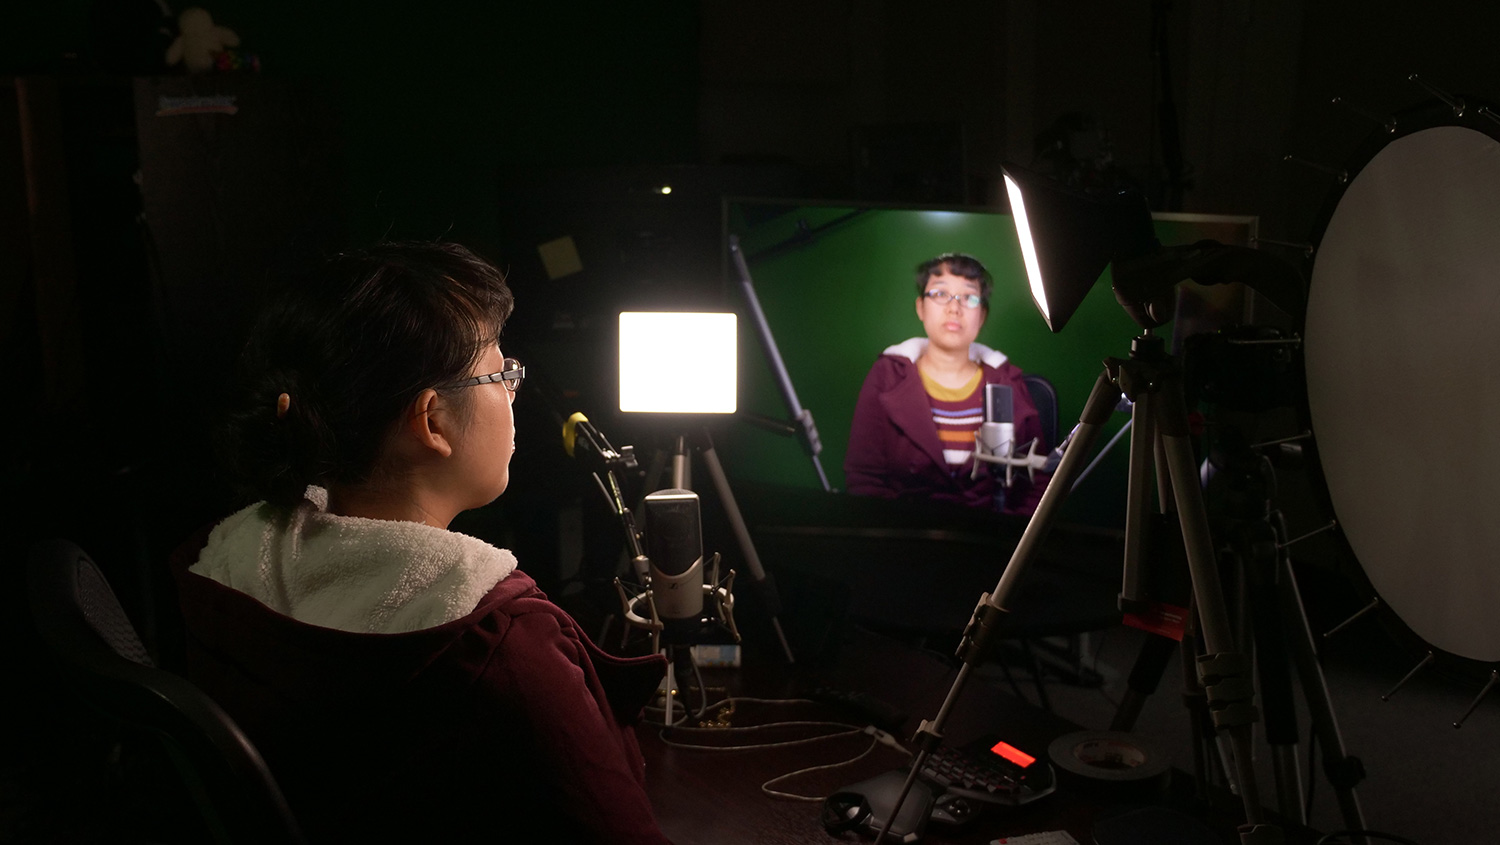
In 2019, Litra released two more lights: the LitraPro and the LitraStudio. We got two of the LitraPro lights, since we liked the LitraTorch so well. Since we have three Litra lights, we decided to try a three-point lighting setup.
Using this setup, we filmed a short Tech Down Over segment, which you can see here.
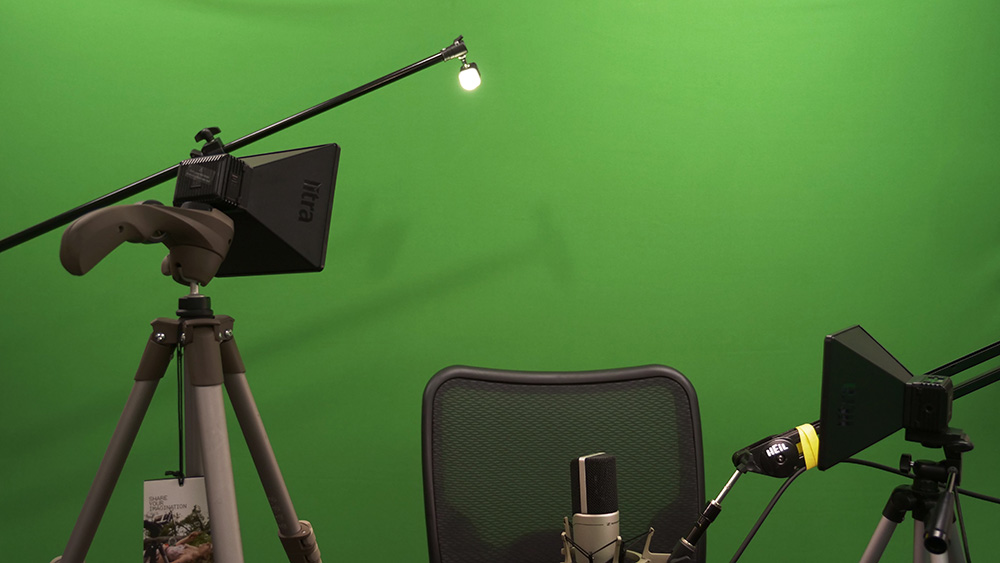
In terms of placement, these lights are versatile. With multiple 1⁄4in. threaded holes, you can attach them to tripods in a number of different configurations. The bottoms of the LitraTorch & LitraPro also have magnets, which allow you to mount them easily on any ferrous metal surface. Besides this, they come with both cold-shoe camera mounts and GoPro mounts.
In our case, we mounted the LitraTorch on a microphone boom arm. Meanwhile, the LitraPros were on small portable tripods, which we placed on a desk.
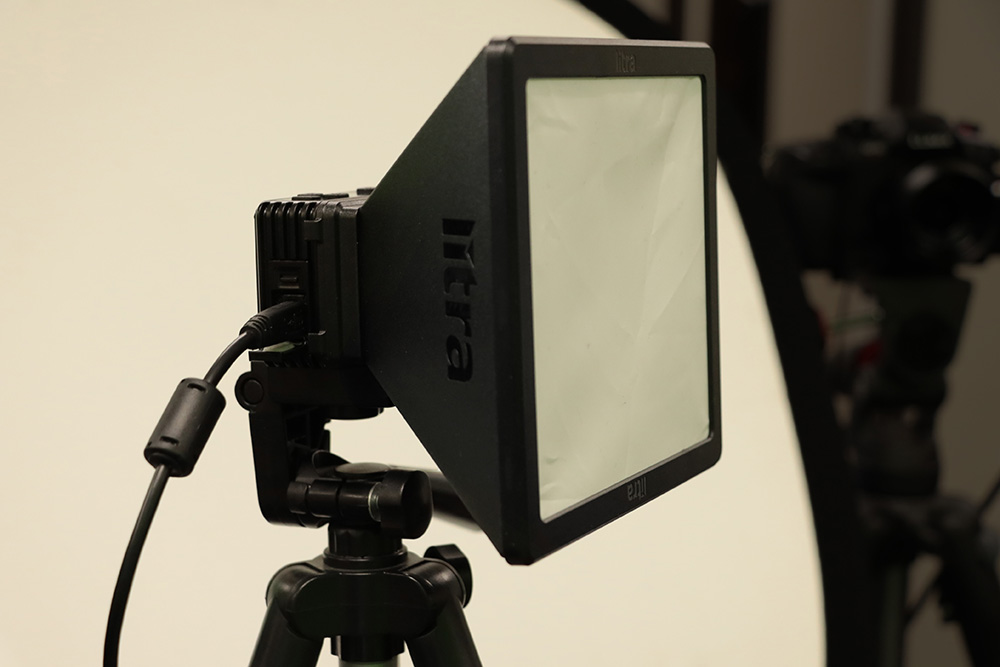
With the LitraPro lights, we used the softboxes designed for them, which each cost $45 extra. We also plugged one LitraPro into a USB charging adapter, as its battery was low on charge. On that note, we recommend using these with either a long USB cable and power adapter, or USB cable and power bank. Both lights have a USB Micro-B type connection.
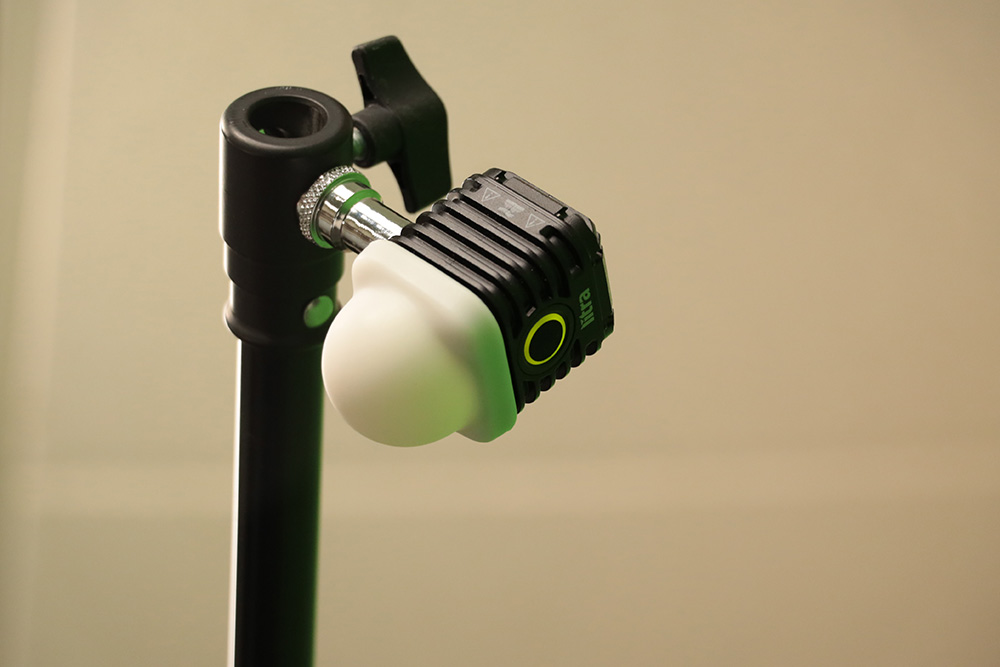
While we used the softboxes for our test, the LitraPros come with silicone diffusers similar to the one on the LitraTorch pictured above. These also provide a nice, soft light.
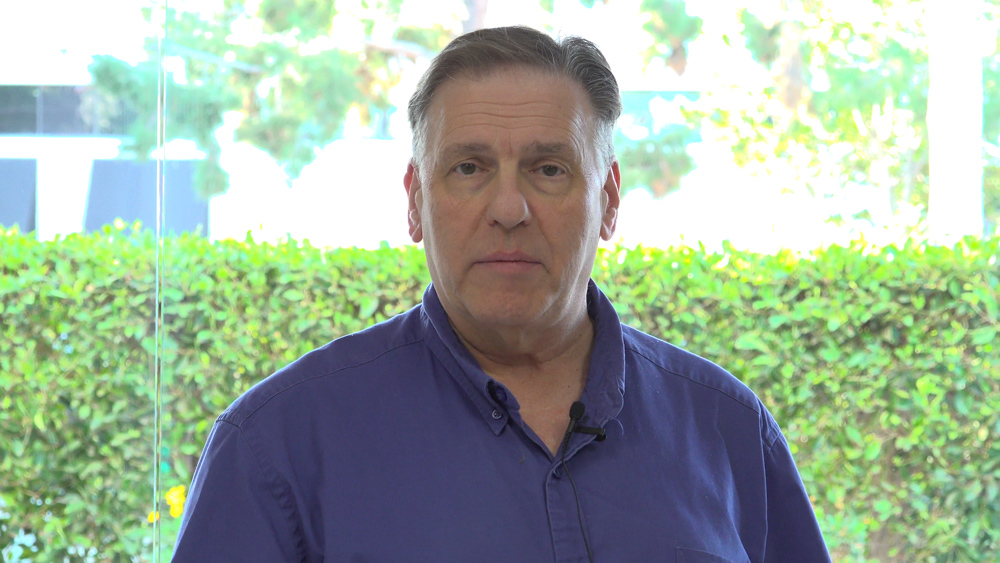
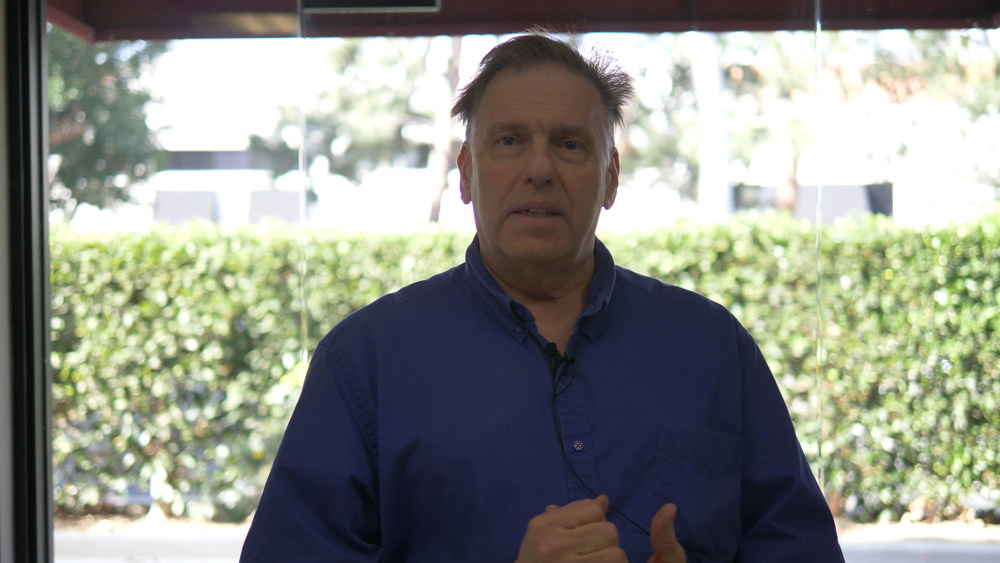
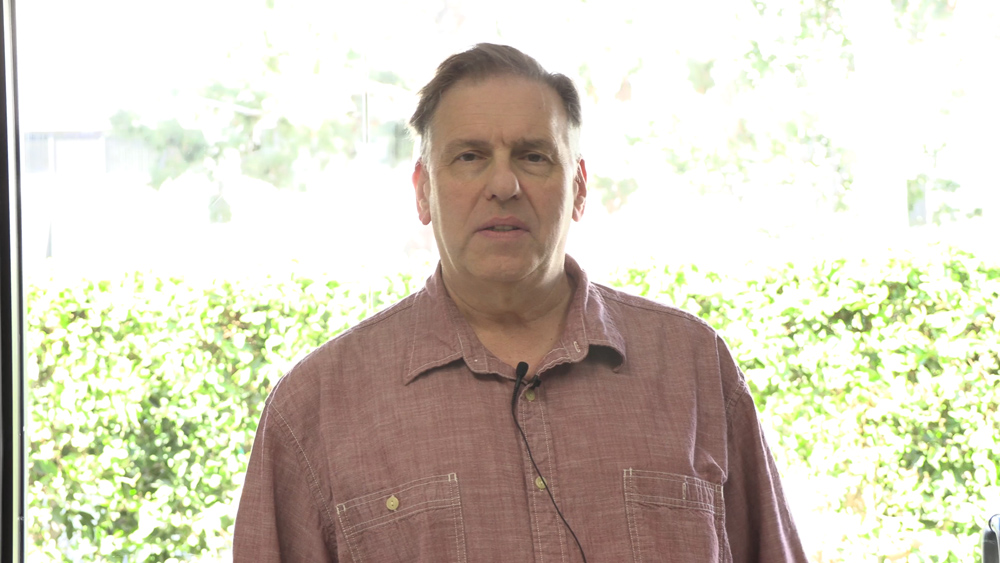
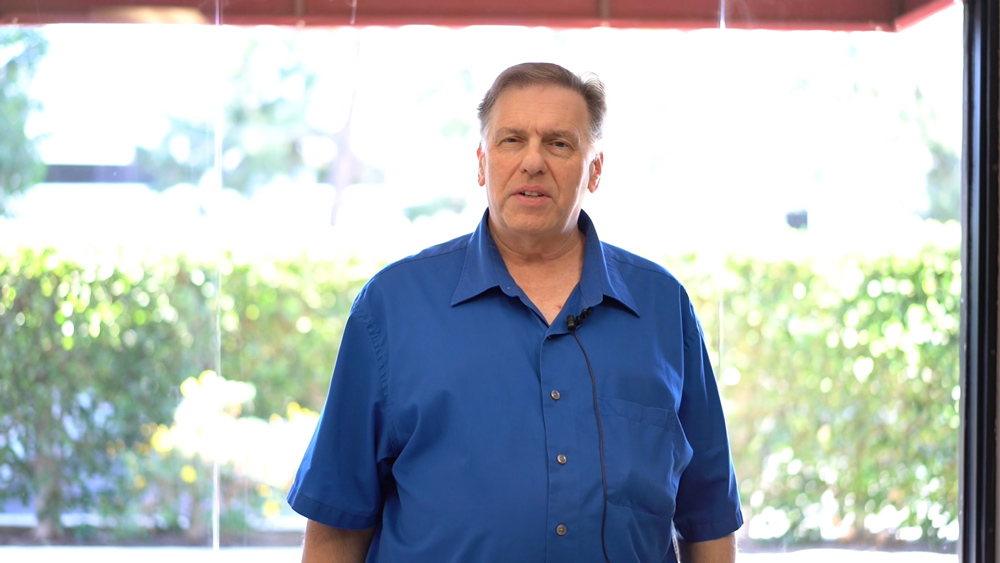
Below are photos of the setup in action. This gives you an idea of how soft the light is, and how well it preserves skin tones.
We think these lights give an impressive result for such a small and inexpensive package, at $620 USD total for the lights and softboxes used here. Let us know your thoughts in the comments section below!If you liked this article, check out some of our other articles on photography!
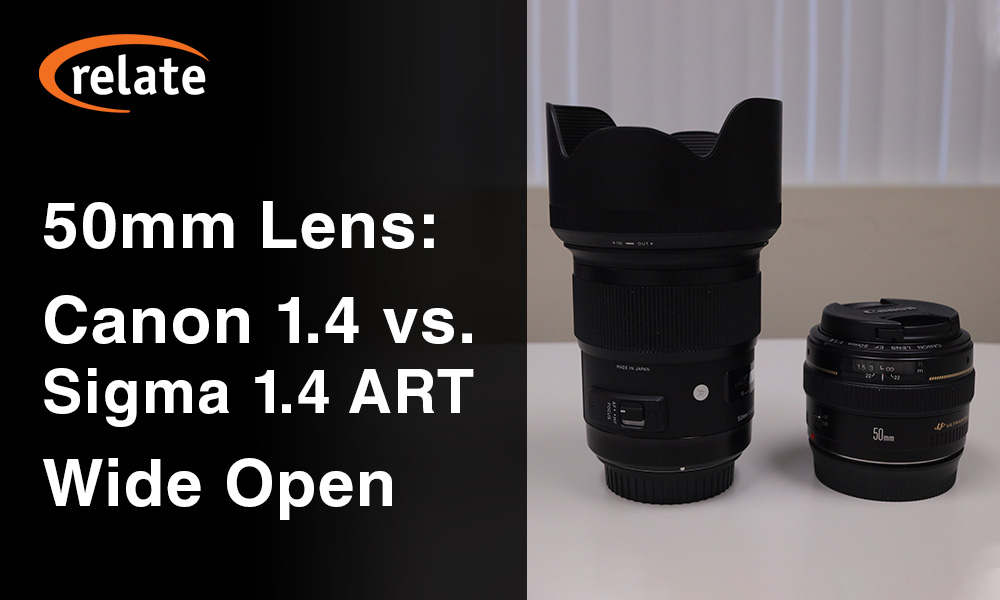
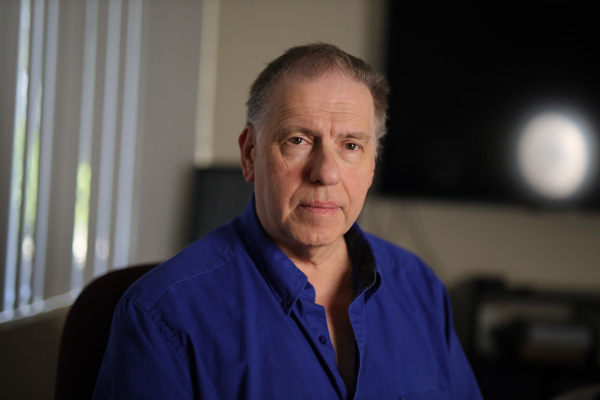
Recently at RELATE, we were using the Canon 50mm EF f/1.4 USM and Sigma 50mm f/1.4 Art DG lenses with our EOS R and the EF-EOS R adapter. This got us thinking: are the results really that different?
Therefore, we did a small test with portraiture, which is the type of shot we typically use these lenses for. Camera settings were at 1/125 sec. shutter and ISO 1000, while both lenses were at f/1.4. We've heard that the differences between these lenses are most pronounced when wide open.
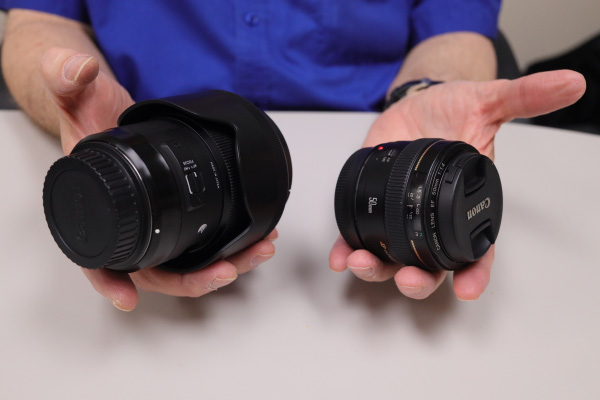
This is because the Canon has 7 lens elements, while the Sigma has 13 lens elements. The Sigma includes an aspherical element, which should reduce spherical aberration when wide open. This is the softness that many lenses suffer at large apertures. However, due to these additional elements, the Sigma is twice the size, thrice the price, and three times the weight.
The Canon 50mm EF f/1.4 USM is around $325-350 USD new, while the Sigma 50mm f/1.4 Art DG is ≈$950 USD new.
Therefore, we'll take a couple photos from each lens and compare:
1. The overall look of the photos.2. Resolution of fine details.3. Chromatic aberration.
Lens Comparison #1: Overall look
Canon 50mm EF f/1.4 USM (click for full resolution)
Sigma 50mm f/1.4 Art DG (click for full resolution)
Canon 50mm EF f/1.4 USM (click for full resolution)
Sigma 50mm f/1.4 Art DG (click for full resolution)
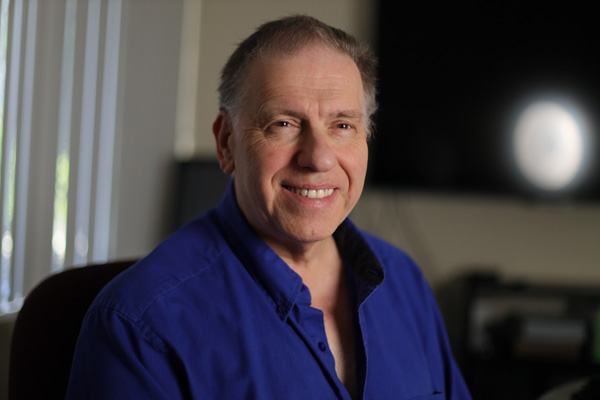
You can click the links in order to view these at full resolution, and I recommend you do so! Towards the center of the frame (which is around Rick's chin) the images are pretty similar. As you move further out, though, the effect of the Sigma's aspherical element allows it to stay sharper. I'll detail this further in the next section, and show some close-ups.
Lens Comparison #2: Resolution of fine details
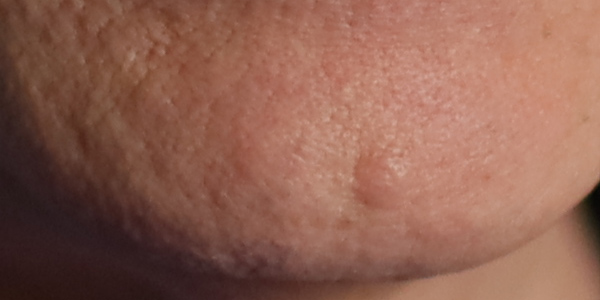
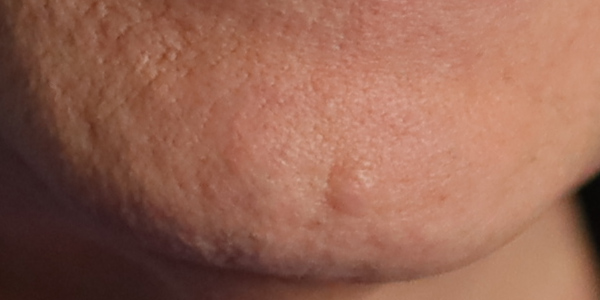
In this image, I'll start by comparing zooms near the center of the frame. This is where the two should be most similar in terms of fine detail. Again, you can use the links above to see the photos in full resolution, if you prefer.
Canon 50mm EF f/1.4 USM
Sigma 50mm f/1.4 Art DG
As we can see, at the very center of the frame, the lenses are similar, even wide open. Therefore, we'll go a bit further up in the image.
Canon 50mm EF f/1.4 USM
Sigma 50mm f/1.4 Art DG
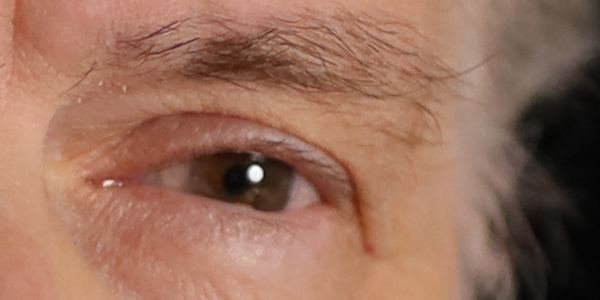
This is the eye that was slightly further from the camera. Hence, on both images, we're seeing slight blurring due to the extremely shallow depth of field at f/1.4. Still, with the Canon lens we're starting to see the effects of spherical aberration. Here, it manifests as a slight "smearing" of the image. Even so, they're not that far off from each other. The final crop will be much closer to the edge of the photo.
Canon 50mm EF f/1.4 USM
Sigma 50mm f/1.4 Art DG
Here, the difference is most pronounced. On the Sigma shot, the hair towards the foreground is quite sharp, and blurs further back due to shallow DoF. On the Canon lens shot, though, the whole thing is noticeably blurry.
Lens Comparison #3: Chromatic aberration
Our final comparison is chromatic aberration. There are a few points where we'll compare, but this particular type of photo isn't the best to showcase this. This is because there are no objects with sharp edges or a lot of bright points of light. Therefore, this would be more of a concern with still lifes, macro photography, and night shots.
Landscapes and other outdoor photos might have bright points of light and sharp edges, but it's less of a concern there. That's because you'll usually shoot those at smaller apertures, both for deeper DoF and because daylight is so bright.
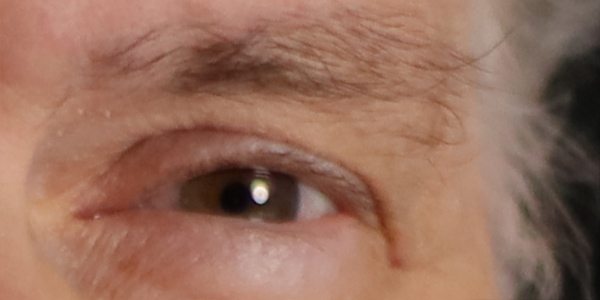
First, we'll compare the eye highlights.
Canon 50mm EF f/1.4 USM
Sigma 50mm f/1.4 Art DG
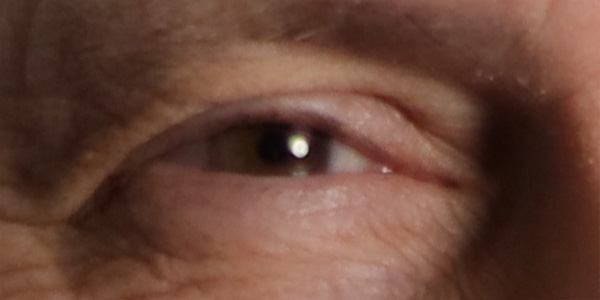
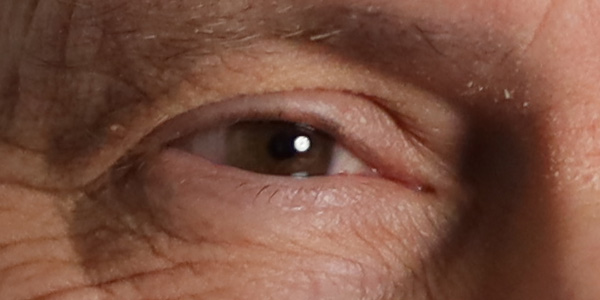
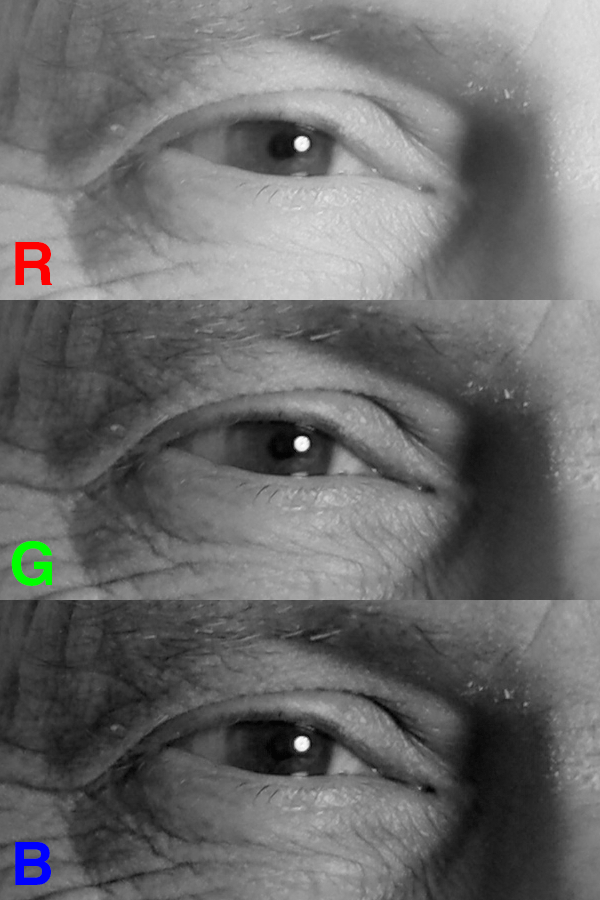
Chromatic aberration is probably more evident here than anywhere else in the picture. Even so, it's not obvious. The eye glint looks like a white disc with several faint colored discs slightly overlapping. Separating the channels, I found that in this area of the image, blues shifted lower-left, while reds shifted slightly upwards.
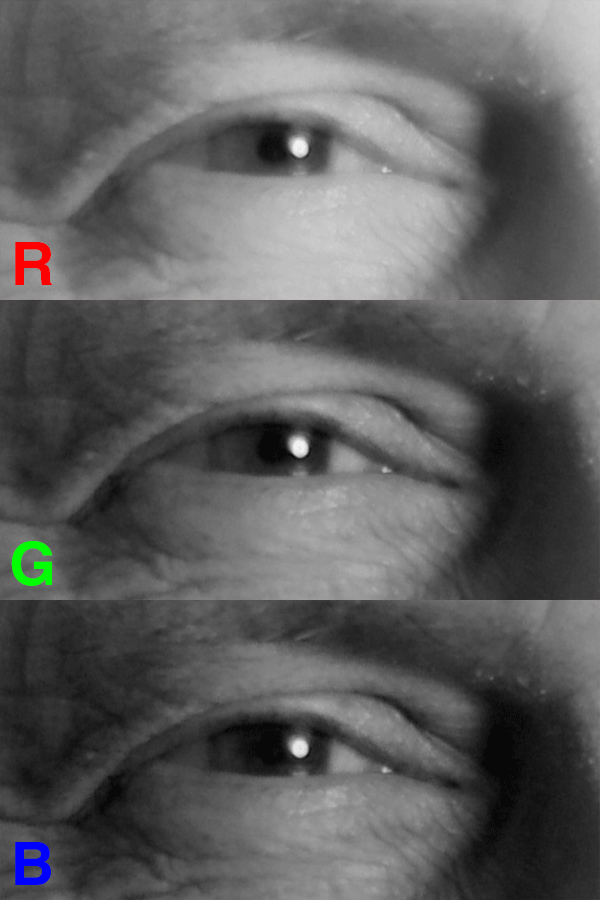
The animations below show this crop in each color channel.
Canon 50mm EF f/1.4 USM
Sigma 50mm f/1.4 Art DG
As you can see, the highlight shifts slightly more on the Canon shot, while the Sigma's highlight stays in place. There is a slight amount of chromatic aberration on the blue channel even with the Sigma, though.
Our next chromatic aberration test is on the edges of shapes. As we mentioned earlier, this will be less noticeable on a portrait. This is because the edges of a face will blur more at a larger aperture. Meanwhile, chromatic aberration is less pronounced at smaller apertures.
Canon 50mm EF f/1.4 USM
Sigma 50mm f/1.4 Art DG
While a slight shift of the green channel is visible in this area of the Canon photo, it's relatively mild. Towards the edges of the picture, spherical aberration dwarfs the chromatic aberration effect, so it's harder to tell how pronounced it is.
Therefore, I don't think the difference in chromatic aberration will be a major problem for the majority of photo types. Only specific types of shots would highlight the difference here. For example, if you photographed a stark black-and-white polka dot pattern wide open, it may become noticeable.
After all these tests, we come back to the question: is the difference noticeable? Although I didn't notice much difference at first, after closer examination, it's somewhat obvious. However, keep in mind that these were shot at conditions where an aspherical lens element would make significant difference. At smaller aperture values, the differences between the lenses become less and less pronounced.
Overall, your best bet is to compare these lenses and their potential differences against your needs. Do you shoot at large apertures often, and are fine details and sharp edges all throughout the frame essential? If so, does this outweigh the big differences in price, weight, and size?
If you often travel with your camera, weight and size could be a major consideration. One lens is slightly over half a pound, the other is nearly two, the Canon at 290g and Sigma at 815g.
Note the difference in size of each lens' front element.
In terms of dimensions, the Canon is 2.9" x 2" dia. or 73.8mm x 50.5mm dia. Meanwhile, the Sigma is 3.9" x 3.4" dia. or 99.9mm x 85.4mm dia. This means that the Canon lens takes three-quarters of the volume in your camera bag. This doesn't include lens hoods. The Canon 50mm doesn't come with a lens hood, while the Sigma does. While hoods add bulk to your kit, they're a good idea if you're going traveling. Of course, lens flares can be quite trendy in photography nowadays when used consciously!
We tend to take the Canon lens on trips, but the Sigma is an excellent studio lens with crisp resolution of details.
Hopefully this article, though somewhat limited in scope, was helpful to you!
If you found it useful, you can find my other articles on photography and design here.For our articles on photography topics only, follow this link.
Recently, we did a Tech Down Over episode on some new softboxes we purchased for our studio at RELATE. Here, we'll recap what we talked about on the show, and go a little deeper into these light modifiers.
In order to get more out of our Aputure c120d and Aputure c120d ii, we got some new softboxes. These are the Aputure Light Dome Mini I and the Phottix Raja Deep 80, which we're comparing with our Aputure Light Dome I.
Raja Deep & Mini Dome in their carrying cases.
Note, however, that these light modifiers use the Bowens Speedring standard and will work with any light featuring that mount.
Our tests will take a look at ease of setup, how they affect the light's brightness, and then light softness.
How Easy Are These Softboxes To Set Up?
We mainly use these in our studio, therefore, we don't need to take them apart too often. If you're bringing these with you on a shoot, this could be a big factor in which you prefer, though.
However, even if we didn't take apart the Light Dome I very often, setup was our biggest gripe with it.
You need to bend the dome's 16 rods and then fit them into the corresponding slots. This takes longer than necessary, besides which the force required makes me think I'm about to break the dome!
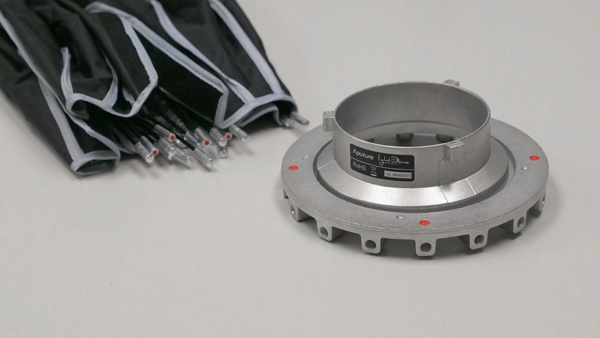
The Light Dome I's Bowens speedring and poles.
As I understand, the Light Dome II has improved on this, but we couldn't get it at the time. This was because of an issue involving CA Proposition 65 and some of the materials in the dome.
The Mini II was also facing this issue. Therefore, we got the Light Dome Mini I and the Phottix Raja Deep 80.
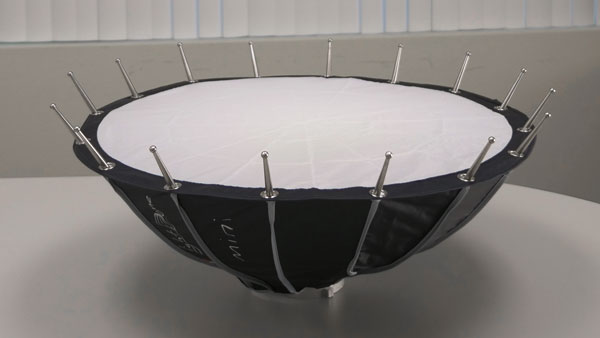
The Mini I has a similar setup to the Light Dome I, but it was easier to assemble. Mostly, this was because it's a lot smaller. It's also a lot flatter, which means you have to bend the poles less to get them into the slots. Overall, I didn't feel like I was going to rip the dome or break the poles, and that's a plus!
The Light Dome Mini's shape makes for easier setup.
Finally, the Raja was extremely fast to setup. This was because it uses an umbrella-like mechanism that allows for very quick dome expansion:
As you can see, it only takes a few seconds to expand this thing.
How Does Each Softbox Affect Light Intensity?
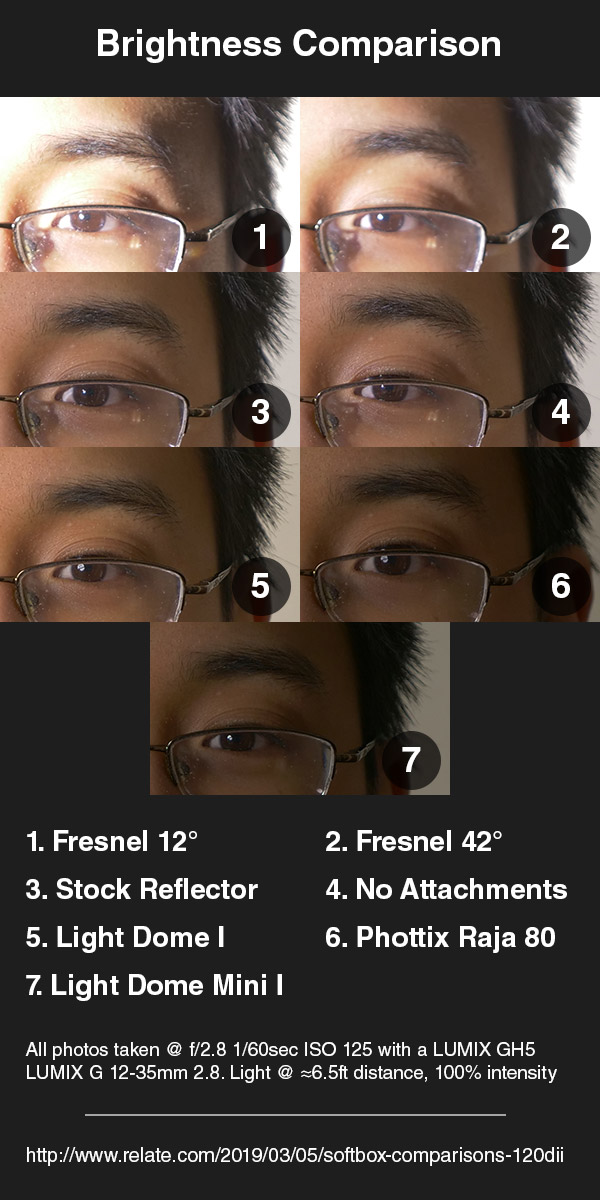
Because the diffusers and reflectors used in these softboxes aren't 100% efficient (naturally!), they reduce the light on your subject. Therefore, we've put together a comparison that should give you an idea of just how much they'll dim your light.
These photos are exposed for the light with no attachments at 100% brightness. Therefore, light focusers like the Fresnel lens overexpose the image, and the softboxes underexpose them.
This basically went as I expected. The Fresnel at its longest focal length created the most intense light, while the Light Dome Mini dimmed the most. This is because the Light Dome Mini spread the light so much. Out of the softboxes, the Light Dome I gave the brightest light.
How Much Does Each Softbox Soften The Light?
I expected the light focusing Fresnel lens to create harder shadows than the softboxes and light without attachment. This matched my tests, but the rest of the results surprised me a little.
When compared to the light with no attachment or the stock metal reflector, the softboxes create softer lighting.
However, the difference between these and the light without modifiers was not as much as I'd expected. I may have had the light too far from me. Still, on the larger softboxes, the front of each was only about 3 feet from my face.
With the softboxes, the shadow of my nose is noticeably softer. However, my cheek and the skin texture (which looks rougher with harder lighting) looks about the same. Also, the highlights were about the same.
While I was doing the test, the Raja seemed to offer the softest light. Reviewing these photos, though, it looks like the Light Dome I came out on top.
Which Softbox Is The Best?
In the brightness and softness tests, the Aputure Light Dome I excelled. However, the setup is a beast and a half. Further, it's more expensive than the other two, at about $150 USD.
The Light Dome II combines the poles and speedring for quicker setup, so it may be a more appealing option. But at the time of this article's writing, its availability is limited, especially in California. It also costs more, from what I understand, though none of the retailers we regularly use carry it yet.
Meanwhile, the Light Dome Mini I gives light that's almost as soft as its big brother, and is cheaper, at $100USD. The main draws, though, are the much more portable size and easier setup. It would be much more practical to try and bring this on a shoot. Still, do remember that this knocks out a lot of your light's intensity—you'll need to adjust accordingly.
Finally, the Raja casts light that is comparable to the Light Dome I at a lower price with super-simple setup. The version we bought was about $120 USD, but the setup time taking mere seconds was the biggest draw.
The version we got, the Phottix Raja Deep 80 (referring to its 80cm/31.5in overall length) is quite big. However, it comes in a lot of different sizes and shapes. It comes in both a normal (shallower) profile and the Deep, like what we bought.
Again, it lets out slightly less light than the Aputure Light Dome I, so you'll need to take that into account.
To summarize:
Price: #1: Aputure Light Dome Mini I: $100 #2: Phottix Raja Deep 80: $120 #3: Aputure Light Dome I: $150
Ease of Setup #1: Phottix Raja Deep 80 #2: Aputure Light Dome Mini I #3: Aputure Light Dome I
Brightness #1: Aputure Light Dome I #2: Phottix Raja Deep 80 #3: Aputure Light Dome Mini I
Softness #1: Aputure Light Dome I #2: Phottix Raja Deep 80 #3: Aputure Light Dome Mini I
Of course, these are just the softboxes that we decided to get—they aren't direct equivalents. Still, we hope that this information helped you, whether you decided to get a certain softbox, another modifier, or none at all!
If there's another test you'd like to see us do with these, or if you have other thoughts on lighting, let us know in the comments below!
Last week, we commented in our Focus Test article about the Panasonic GH5's relatively slow autofocus. We found that, even since the firmware update, its focus was the slowest in our "distraction test." This echoed the experiences of many GH5 owners worldwide, but a workaround has recently been discovered.
On February 4, photography YouTuber YodaYeo posted a video detailing his discovery of a fix for the GH5's sluggish focus, video below:
Essentially, reducing your shutter angle to below 180 degrees speeds up the Panasonic GH5's autofocus dramatically.
For those unfamiliar with shutter angle, it's a filmmaking term that refers to a relationship between shutter speed and framerate. The use of degrees and angle was relevant to how older video cameras worked. Essentially, a higher shutter angle means a slower shutter speed relative to framerate, and vice versa.
Keeping a shutter angle of around than 180 is considered a "golden rule" of video. This is because it results in enough motion blur to eliminate jerkiness, but not too much. A 180 degree shutter angle translates to a shutter speed of 1/60 at 30 fps and a speed of 1/50 at 25 fps. YodaYeo's test, however, shows that this rule doesn't quite hold when it comes to the GH5.
If you've done a lot of video shooting, you probably find the prospect of having to use a smaller shutter angle unpleasant. "It'll be like watching a slideshow," you may think. Fortunately, as Matt Krieg demonstrates in the following video, a shutter angle of 179 will suffice.
In the video, Matt shows how to set your Panasonic GH5 to shutter angle mode, and then set your shutter angle to 179 degrees. He then performs tests with many different lenses to show the difference in focus speed with YodaYeo's fix.
[embed][/embed]
A few days later, YodaYeo posted a video, shown below, explaining the mechanics of this fix. It's rather technical, and very fascinating for those interested in how cameras function. The gist is that, for the best autofocus performance, the camera needs time to capture two images per video frame. Only one of these is actually saved as a video frame, but both are used by the camera for autofocus adjustment.
This is ideally possible at 180deg shutter angle with a framerate of exactly half the refresh rate. At 50Hz, which is PAL, this is 25fps, and in NTSC (59.94hz), this is 29.97fps. PAL stands for Phase Alternating Line, and NTSC stands for National Television System Committee. The difference is too technical to get into here, but NTSC is the USA standard, and PAL is standard in Europe.
However, the GH5's new focus system apparently does not compensate for the fact that it is using a complimentary metal-oxide semiconductor (CMOS) sensor.
As YodaYeo outlines in his explanation video, the GH5's sensor takes slightly longer than the shutter speed to capture an image. Because it takes a tiny bit longer than half of a refresh frame to take an image, the camera can't capture that second, autofocus-only image.
What does this have to do with the sensor type? Years ago, most digital cameras used charge-coupled device (CCD) sensors. Now the majority use complimentary metal-oxide semiconductor (CMOS) sensors, also known as active pixel sensors (APS).
There are a lot of reasons for this: CMOS sensors are cheaper, therefore making larger ones is more practical, and they consume less battery power per shot. CMOS sensors are typically more durable, lasting for more shots than CCDs.
The difference that concerns this article, however, is the pattern in which they capture images.
Namely, a CCD camera has a "global shutter," which means that when you take a picture, the whole sensor captures the image at once.
In contrast, a CMOS camera has a "rolling shutter," which means it captures the image row-by-row. This happens very quickly, but as YodaYeo points out, it takes a very slight amount of additional time. This tiny delay disrupts the otherwise perfect synchronization between refresh rate and framerate.
Global shutter (left) and rolling shutter (right).
The question now is whether Panasonic will spot these videos and release a firmware update to compensate for this issue. If that happens, the GH5's focus would be greatly improved with no need for end-user fiddling.
There was one more issue we encountered in our focus test with the GH5, that is, its tracking autofocus tended to get distracted. Therefore, we also suggest that you watch Matt Krieg's Auto-focus Pulsing video. He describes how to change your GH5's focus speed and sensitivity settings to match your shooting needs.
We've also run our own test on the GH5 using the 179 degree shutter angle fix. Our findings echo those of others; the focus is noticeably faster than before, but still slower than Sony cameras. The video is below:
Because this fix worked for the GH5, we did a quick test with the GH4 to see if its focus time would also improve. Unfortunately, it does not seem to have made the same difference on the GH4. With the shutter angle set to either 180 or 179 degrees, it took about one second to acquire focus.
One of the selling points of the GH5 was that its sensor drive speed is twice that of the GH4. Maybe this could explain the contrasting results of our tests. You can see our test below:
Since the inital findings, both YodaYeo and Matt Krieg have continued to post updates on their GH5 focus findings. So, if you're a Panasonic GH5 user, we recommend subscribing and keeping up on whatever else they discover.
Early this year, we did AF-C Face/Eye Tracking focus tests on four cameras: the Sony a9, the Panasonic GH5, the Sony HXR NX80, and the Canon XF405. These tests are available to watch on our video podcast Tech Down Over, available below.
In these videos, we performed similar tests with each camera. Rick moved around while being filmed and face-tracked by each camera in different conditions: indoor lighting, direct sunlight, and outdoor shade, and at different distances and zoom levels.
As an eLearning and training development company, many of the videos we make are "run-and-gun," meaning we shoot many of the interviews and other videos we make for customers on site. Therefore, this series of tests was performed in a manner that simulates this type of shooting with little-to-no time to prepare, by moving from area to area without the stops to adjust and configure cameras and equipment that are possible in a studio setting.
Although these are focus tests, we also noticed significant differences in how the cameras handled contrast; that is, whether they were able to maintain contast in the face when the background or other elements were much brighter or higher-contrast than the subject.
Focus Test Videos:
(Analysis and comparison below)
Sony a9
Panasonic GH5
Sony HXR NX80
Canon XF405
Test Results:
Focus: Distance Test
Both Sony cameras held clear focus even when Rick was outdoors in daylight and very small in the frame. See 3:10 in the a9 video and 2:25 in the NX80 video, compared to 3:35 in the GH5 video and 6:15 in the XF405 video. At these points, the GH5 and Canon XF405's focus reticles stopped following Rick, but the Sony a9 and NX80's focus reticles stayed locked on Rick's eyes.
Focus: Detection Area Edge Test
The ability to keep a moving subject in focus is essential to dynamic scenes and action videography. Based on our tests, we found that the Sony a9 kept focus in the largest area of its frame, which was effectively the whole frame, as far as we could tell (see test at 4:27) compared to the other cameras. The Sony NX80 came in second, though its focus area was noticeably smaller than that of the a9 (see 3:15).
The Canon XF405 and the Panasonic GH5 had similar-sized focus areas, smaller than both the Sony cameras (see 5:07 for the XF405 and 2:40 for the GH5).
Focus: Distraction and Subject Obstruction
To give context to this test, last year (2017), the Panasonic GH5's autofocus was commonly criticized in the photography community for being easily distracted and losing focus when obstructions passed in front of the subject.
In response, Panasonic released Firmware Ver. 2 for the GH5 in September 2017, intended to fix the issues that photographers were experiencing with "wobbly" autofocus that would cause the focal plane to see-saw back and forth, sometimes for several seconds before settling on the subject.
Our tests seemed to mostly bear this out—at 5:20 in the GH5 footage, Rick tests this by waving his hands in front of his face. The GH5's autofocus is slightly distracted when the open hand first comes into frame, and when the hands actually cross over Rick's face, but holds focus the rest of the time Rick is waving around his hands, which is a big improvement on our previous experiences with the GH5's autofocus.
Still, The Sony NX80 (5:40) and the Canon XF405 (8:20) both did a better job on this test, or about equivalent to each other. Neither lost focus at all during this test. Note that we didn't do this particular exercise when testing the a9.
We noticed that the XF405's focus reticle stuck to Rick's head even several seconds after his hands totally blocked his face, and when he turned so that only the back of his head was visible. However, this didn't necessarily translate to better focus than the Sony NX80. Even though its focus reticles disappeared soon after Rick blocked his face or turned around, the NX80 near-instantly reacquired focus (thanks to Sony's ridiculously quick Hybrid AF) whereas, whenever the XF405 lost focus, it took 1-2 seconds to reacquire.
Contrast and Vibrance
Following are stills of our backlit-subject contrast test. These are unaltered except for scaling.
Sony NX80
Panasonic GH5
Canon XF405
Sony a9
To us, the Sony a9 shot is striking in its contrast, detail, and color vibrance despite being so strongly backlit. The NX80 and XF405 are roughly comparable, with the GH5 somewhat lagging in this test. Of course, this type of shot is not typically seen in professional photography and videography, often considered an amateur mistake, but if the a9 is any indication of the future state of cameras, such a shot may become more feasible as a stylistic choice.
Also, this sort of shot is likely to occur in many "point-and-shoot" situations, such as when filming children's sports games, outdoor weddings, family outings, etc.
Conclusion
Focus: Distance Test
Out of the four cameras we tested, we declare the Sony a9 as the winner in this comparison. However, it's also the most expensive by far, at about $4,500.00 USD for the camera body alone. For a professional action photography and videography or cinematography, this is a very viable choice, but most other photographers and videographers would probably opt for something more affordable.
Out of the other three cameras, the Panasonic GH5 is a good all-around choice, offering excellent features for both photos and video at about $2,000 USD (body only).
For video only, we recommend the Sony NX80 over the Canon XF405. The NX80 and XF405 aren't strictly equivalent, as the NX80 is HDMI-only, and the XF405 has an SDI interface, but at about $2,300 USD, the NX80 is much cheaper than the HDMI-only XF400, which is $3,000 USD (the SDI-enabled Sony PXW-Z90 and Canon XF405 are about $2,800 and $3,500, respectively).
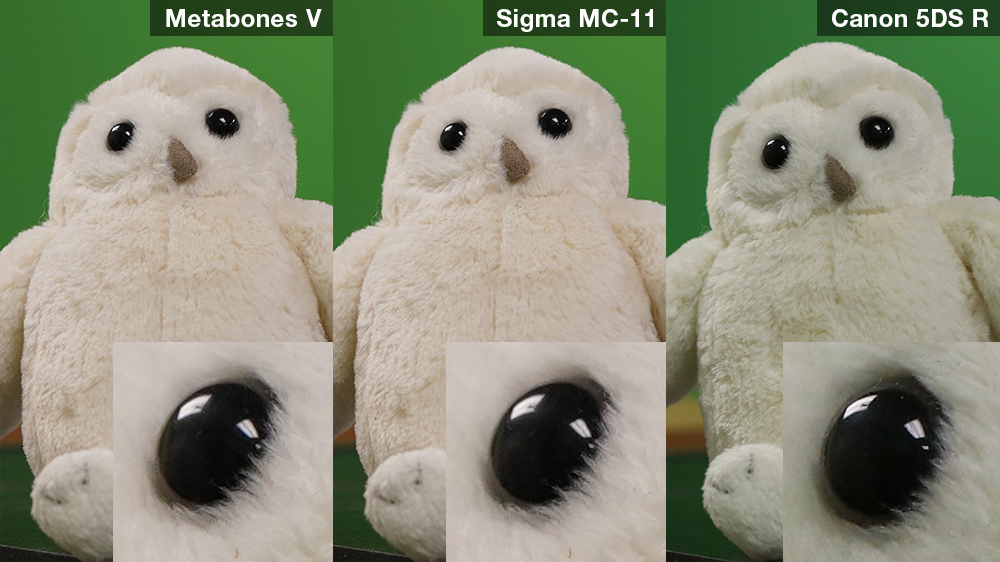
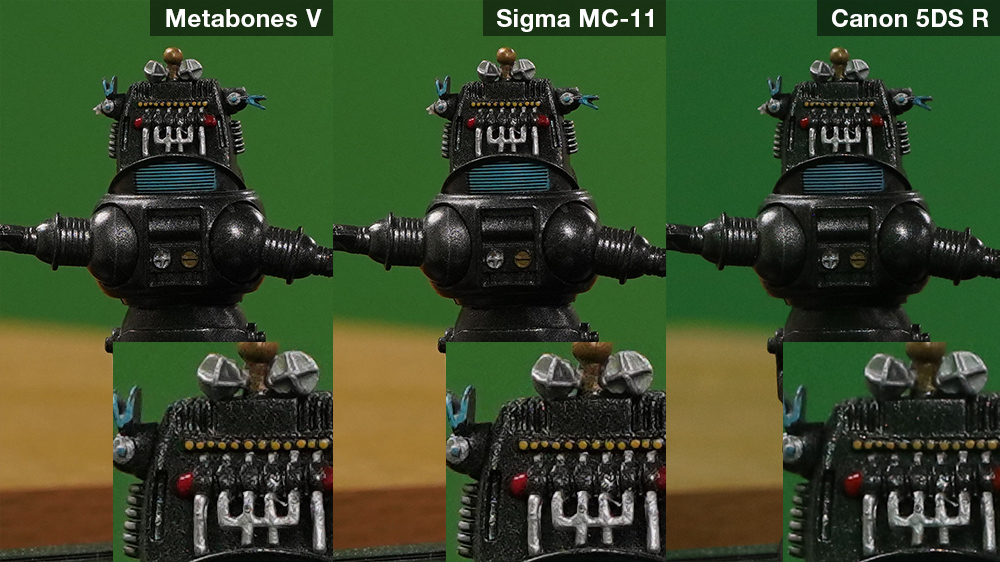
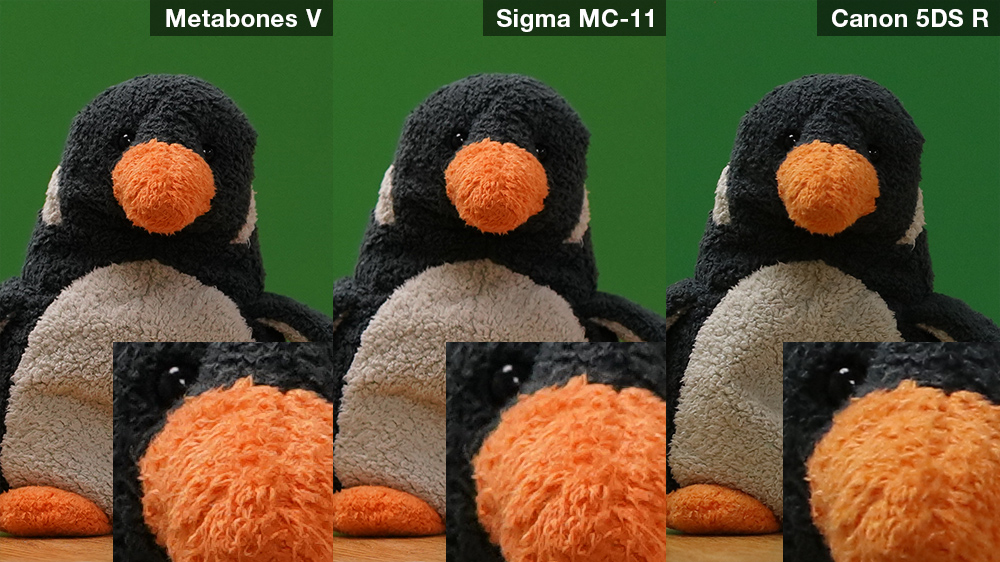
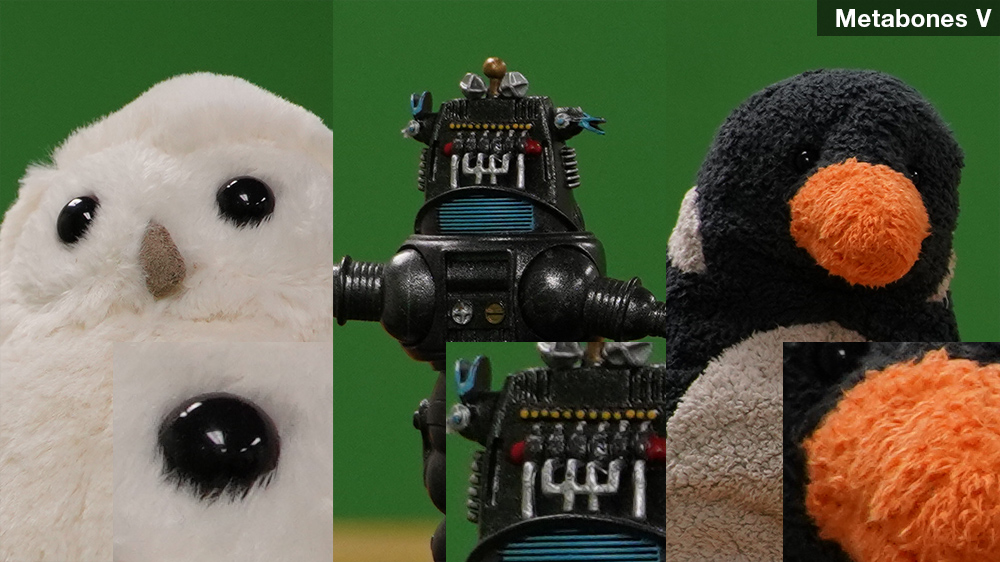
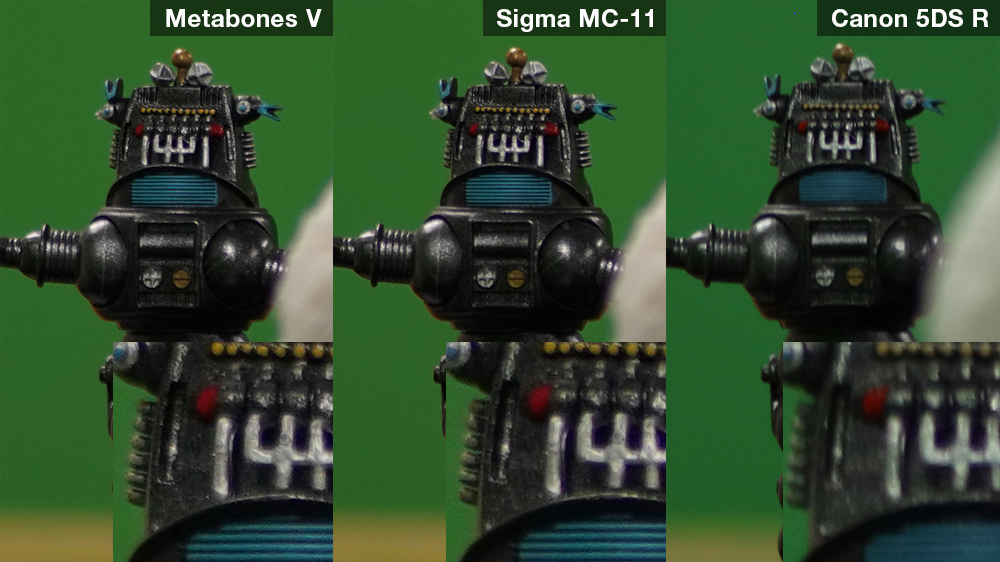
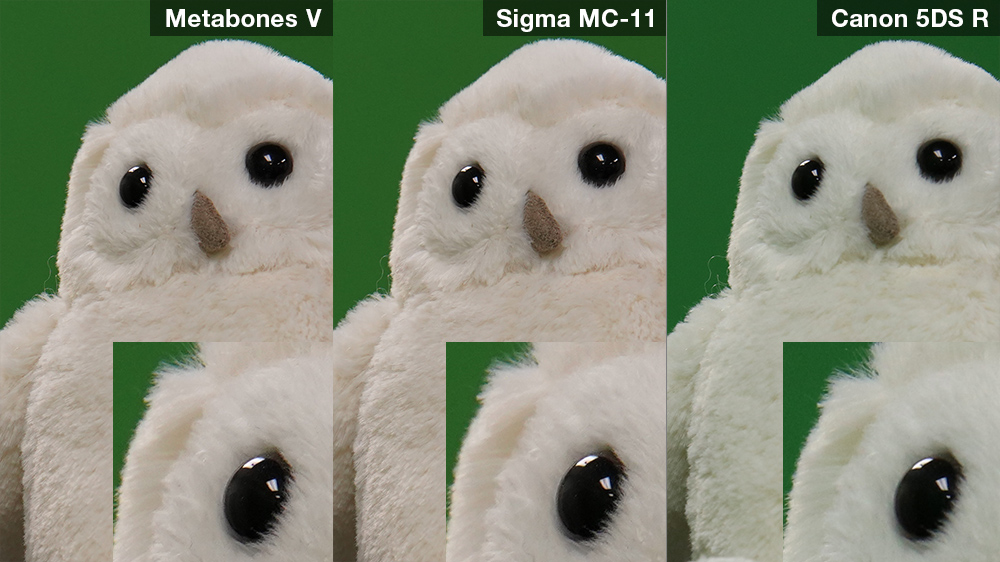
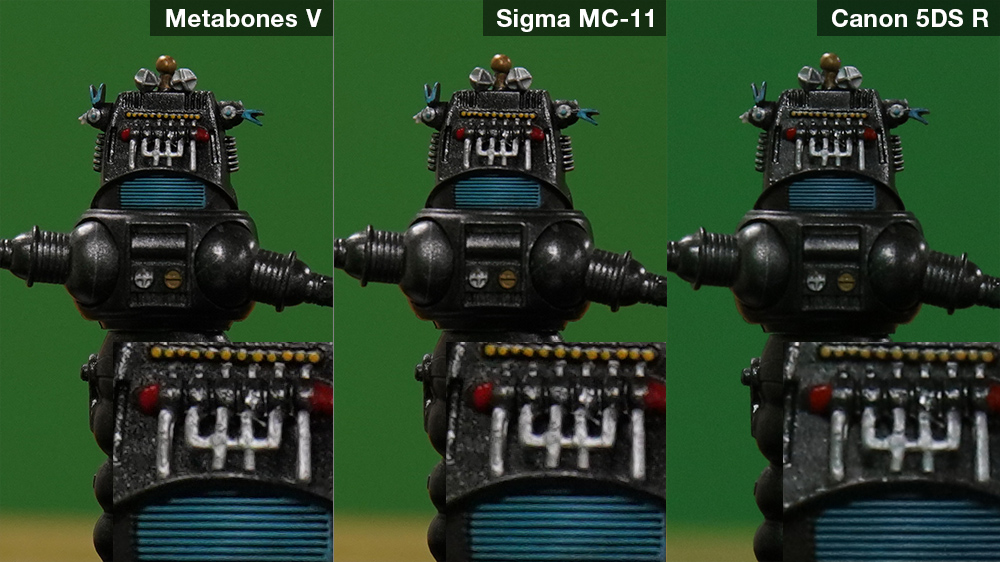
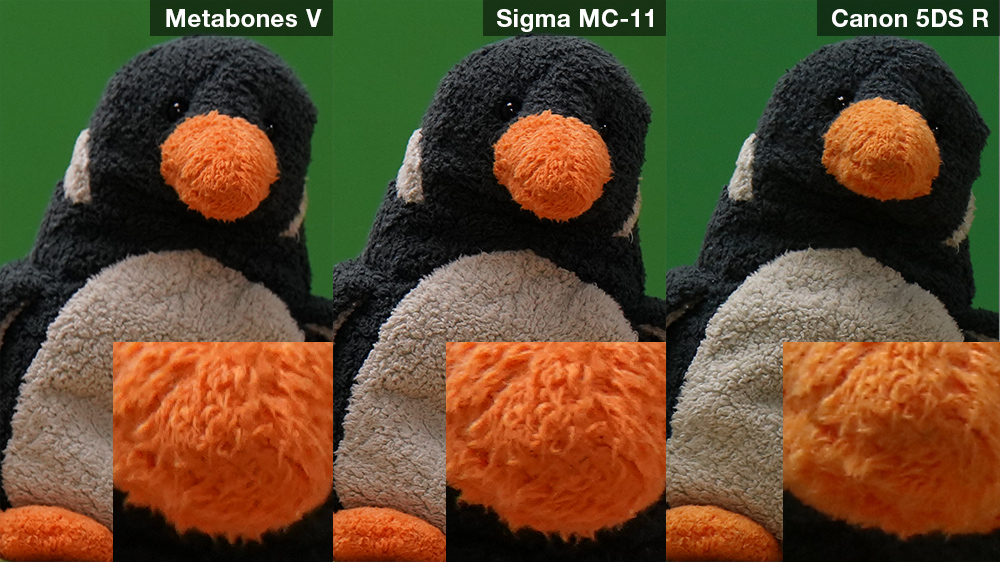
As mentioned previously, for each lens, we’ve set up similar shots with three different focal areas.
6. Sigma 50mm f/1.4 DG ø77 HSM Art
Each shot is 1/100 sec, f/4, ISO-1000, tripod mount with 2 second timer.
(Click on thumbnails to view side-by-side comparisons)
This Sigma is a top-of-the-line 50mm, and it shows—both cameras and both adapters focused quickly and captured impressively crisp, clear shots.
The picture quality seen in all combinations was equivalent, though showing the typical differences in color and contrast between the a7R III and the 5DS R.
7. Canon 18-135mm f/3.5-5.6 EFS IS Nano USM
Each shot is 1/60 sec, f/5.6, ISO-1000, tripod mount with 10 second timer.
(Click on thumbnails to view side-by-side comparisons)
This zoom lens performed relatively well on the a7R III with the Metabones V, giving us sharp and clear shots. However, it took a long time to gain focus, especially on the farthest target (the penguin).
Despite of our best efforts, we couldn’t get this 18-135mm lens to fit on the Sigma MC-11 adapter, and as an EFS lens, it did not fit the 5DS R. Therefore, we don’t have a comparison for this lens, unfortunately.
8. Canon 75-300mm f/4-5.6 III EF
Each shot is 1/60 sec, f/5.6, ISO-1000, tripod mount with 10 second timer.
(Click on thumbnails to view side-by-side comparisons)
This lens worked with both cameras and adapters, however there was a vast difference in the focusing time between the Sony a7R III with either adapter and the Canon 5DS R. The 5DS R acquired focus in 2-3 seconds, while we had to fiddle with the a7R III for minutes trying to get it to focus on anything with this lens. We weren't able to focus on the farthest target (the penguin) at all with either adapter, though the 5DS R was able to catch it in 1-2 seconds.
Once the Sony a7R III did focus on something, it definitely got a clearer picture than the 5DS R through this lens. In general, this lens is soft and blurry on the long end, but it is a budget lens, at about $200 new. Because of the unreasonably lengthy focus time, we don’t recommend this lens for use with an adapter.
9. Tamron SP 70-200mm f/2.8 Di VC USD
Each shot is 1/60 sec, f/5.6, ISO-1000, tripod mount with 10 second timer.
(Click on thumbnails to view side-by-side comparisons)
This Tamron did a superb job on all adapter-camera combinations we tested here. This is a high-end lens, and it definitely shows in the sharp, clean images we got with it.
Our Conclusions
The Metabones V and Sigma MC-11 both gave us very good photos, comparable to the lenses in native mount on a Canon camera, with no discernible quality loss. For photography, we would definitely recommend either of these if you have EF or EF-S Mount lenses that you want to use on a Sony E Mount camera. The only lens we had significant trouble with when using the adapters was the Canon 75-300mm III lens, and we suspect it may be because that is a relatively old lens, released in 1999.
The primary shortcoming we found was that, with either adapter and any lens, AF-C Face Tracking did not seem to work in video mode on our Sony A7R III. This severely limits the types of videography you could do with these adapters.
You could still shoot sitting interviews where the subject is relatively still (and AF-S could be used), timelapse video, or anything involving manual focus, but most other types of video would be much more difficult or impossible without access to AF-C.
 We've had the LitraTorch portable LED light for a couple of years now, and it's proven to be a capable portable light. We've used it for event coverage, for example, or adding fill and accents in the studio.
Quick aside: this article and review is not endorsed or sponsored by Litra. As usual, we're simply giving you information on equipment we use.
In 2019, Litra released two more lights: the LitraPro and the LitraStudio. We got two of the LitraPro lights, since we liked the LitraTorch so well. Since we have three Litra lights, we decided to try a three-point lighting setup.
We've had the LitraTorch portable LED light for a couple of years now, and it's proven to be a capable portable light. We've used it for event coverage, for example, or adding fill and accents in the studio.
Quick aside: this article and review is not endorsed or sponsored by Litra. As usual, we're simply giving you information on equipment we use.
In 2019, Litra released two more lights: the LitraPro and the LitraStudio. We got two of the LitraPro lights, since we liked the LitraTorch so well. Since we have three Litra lights, we decided to try a three-point lighting setup.
 Using this setup, we filmed a short Tech Down Over segment, which you can see here.
In terms of placement, these lights are versatile. With multiple 1⁄4in. threaded holes, you can attach them to tripods in a number of different configurations. The bottoms of the LitraTorch & LitraPro also have magnets, which allow you to mount them easily on any ferrous metal surface. Besides this, they come with both cold-shoe camera mounts and GoPro mounts.
In our case, we mounted the LitraTorch on a microphone boom arm. Meanwhile, the LitraPros were on small portable tripods, which we placed on a desk.
Using this setup, we filmed a short Tech Down Over segment, which you can see here.
In terms of placement, these lights are versatile. With multiple 1⁄4in. threaded holes, you can attach them to tripods in a number of different configurations. The bottoms of the LitraTorch & LitraPro also have magnets, which allow you to mount them easily on any ferrous metal surface. Besides this, they come with both cold-shoe camera mounts and GoPro mounts.
In our case, we mounted the LitraTorch on a microphone boom arm. Meanwhile, the LitraPros were on small portable tripods, which we placed on a desk.
 With the LitraPro lights, we used the softboxes designed for them, which each cost $45 extra. We also plugged one LitraPro into a USB charging adapter, as its battery was low on charge. On that note, we recommend using these with either a long USB cable and power adapter, or USB cable and power bank. Both lights have a USB Micro-B type connection.
 While we used the softboxes for our test, the LitraPros come with silicone diffusers similar to the one on the LitraTorch pictured above. These also provide a nice, soft light.
Below are photos of the setup in action. This gives you an idea of how soft the light is, and how well it preserves skin tones.
While we used the softboxes for our test, the LitraPros come with silicone diffusers similar to the one on the LitraTorch pictured above. These also provide a nice, soft light.
Below are photos of the setup in action. This gives you an idea of how soft the light is, and how well it preserves skin tones.
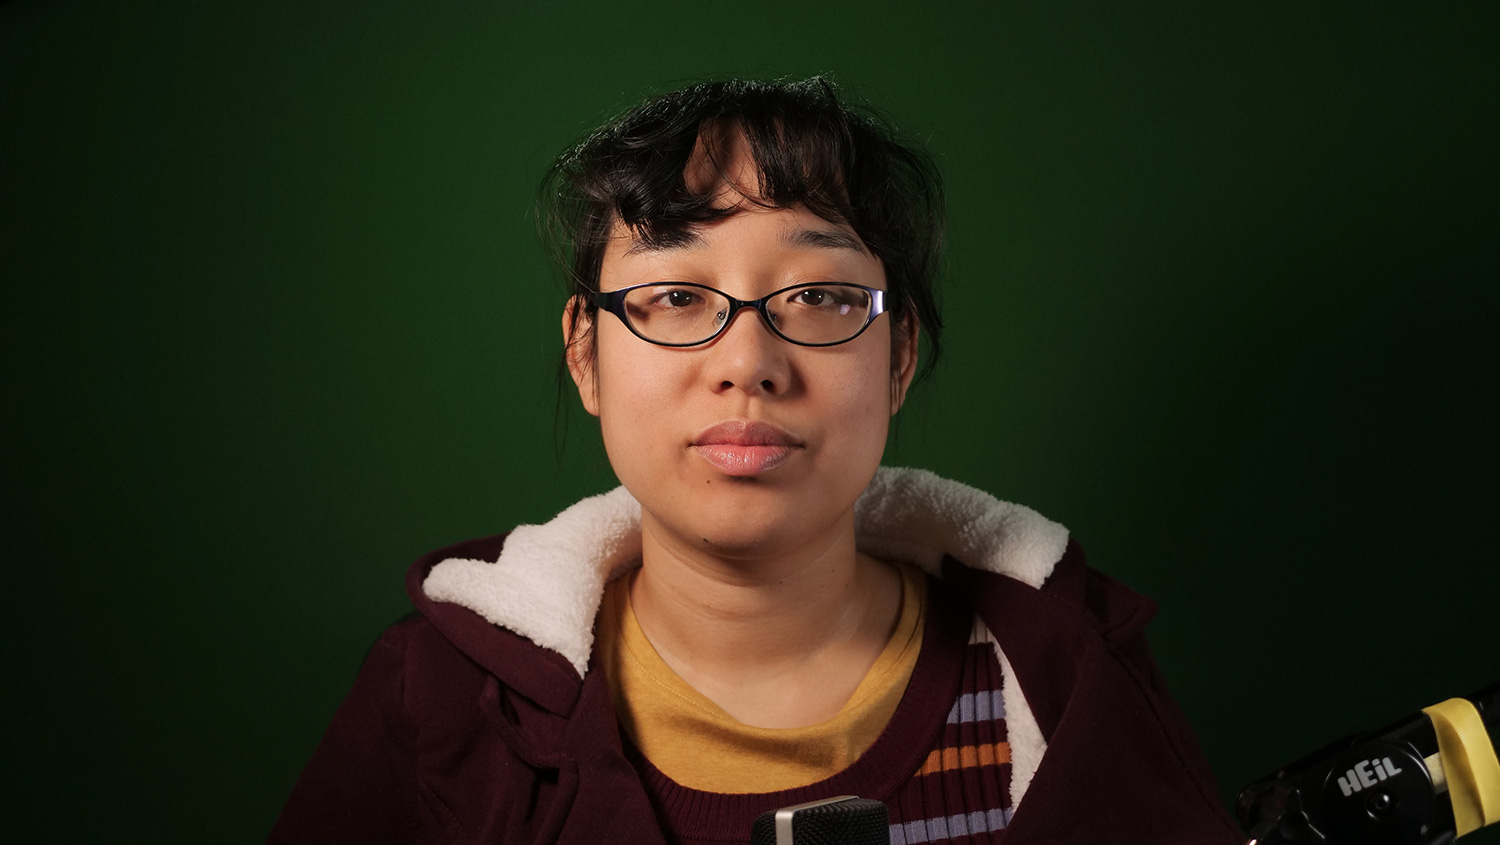
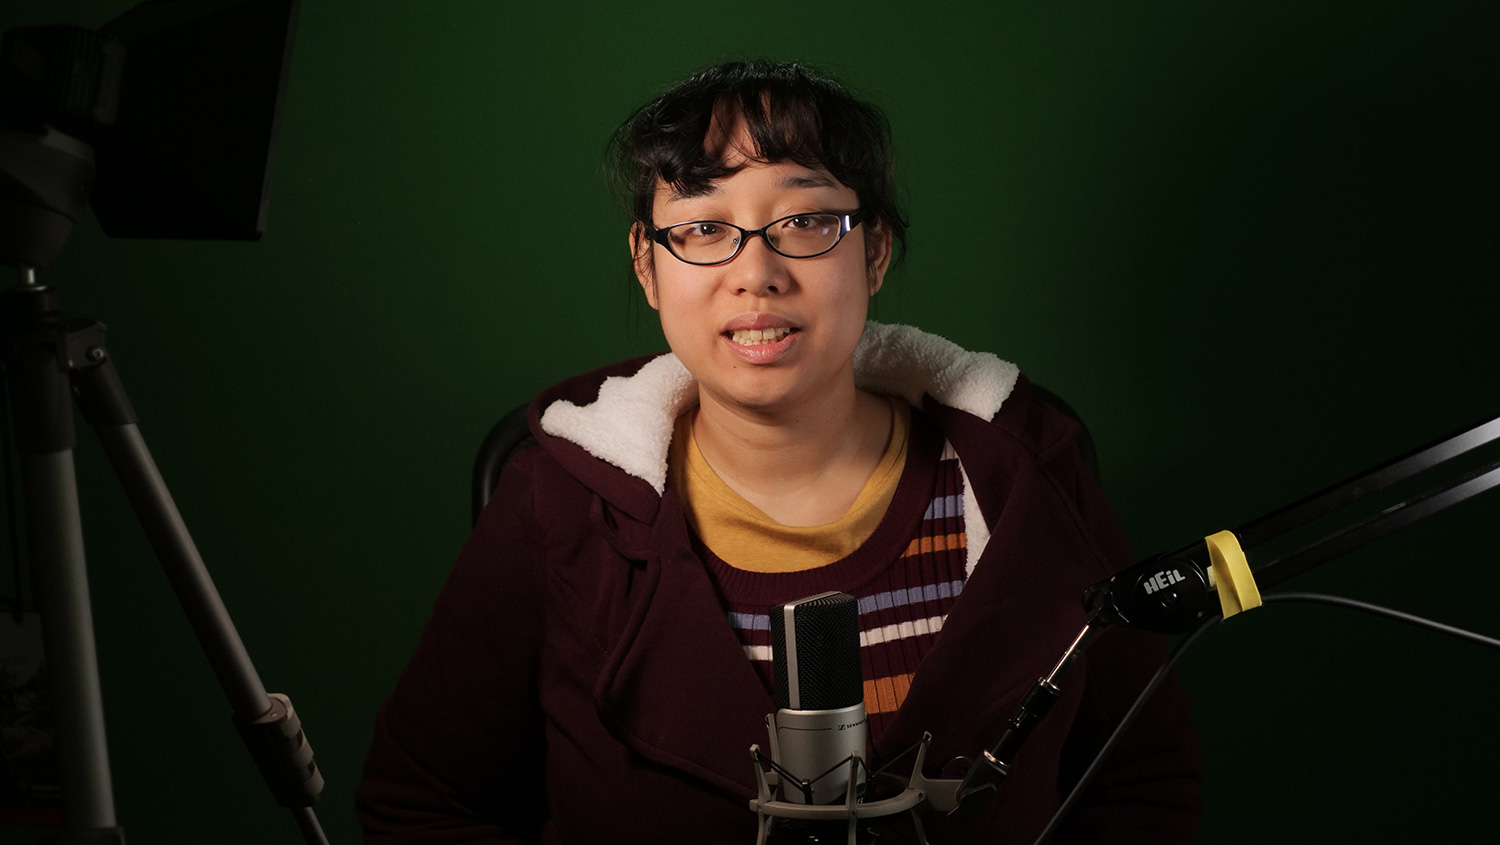
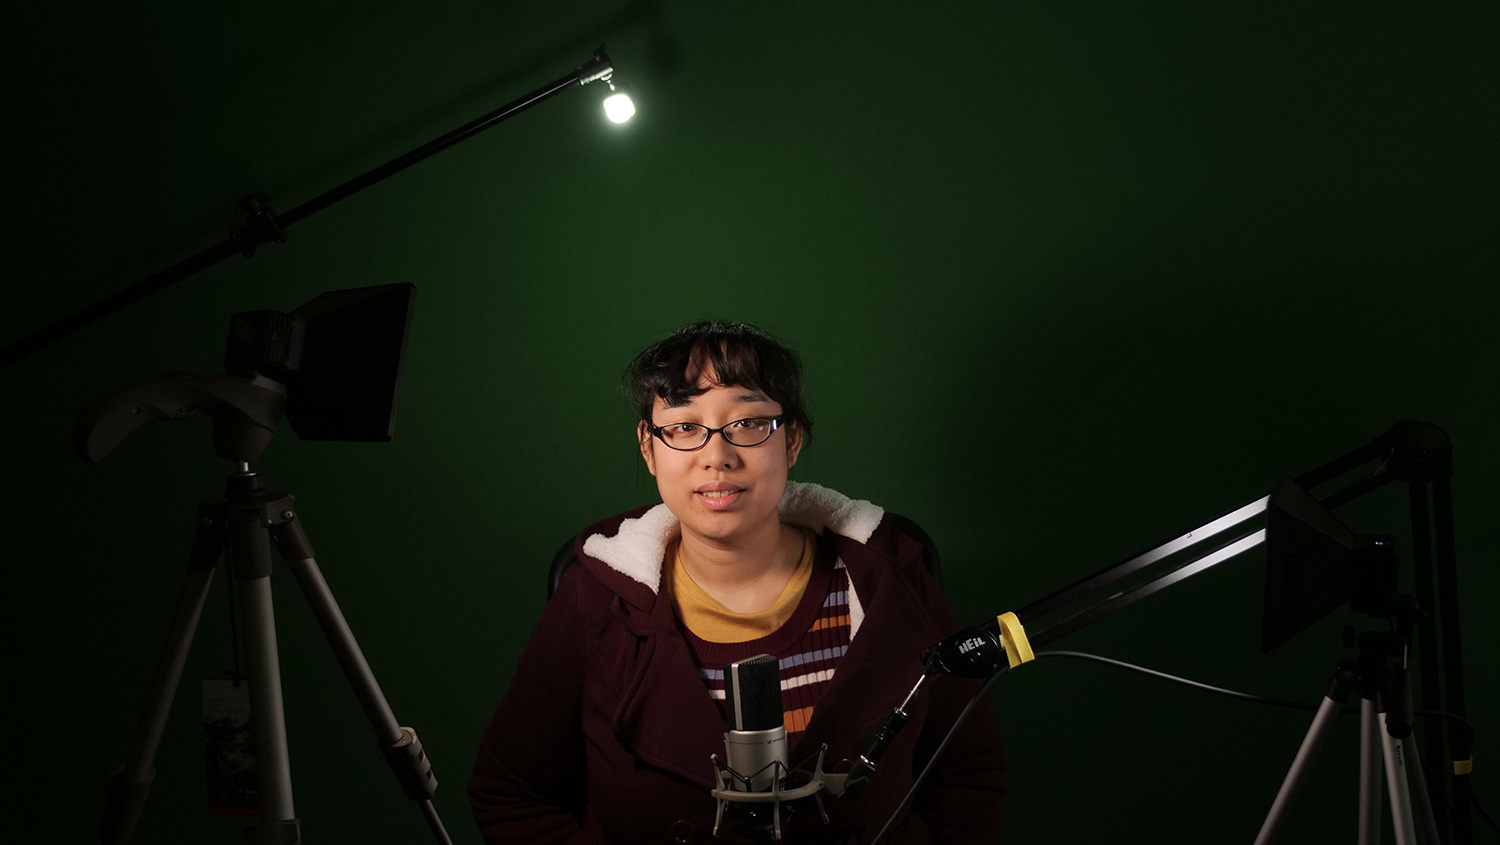
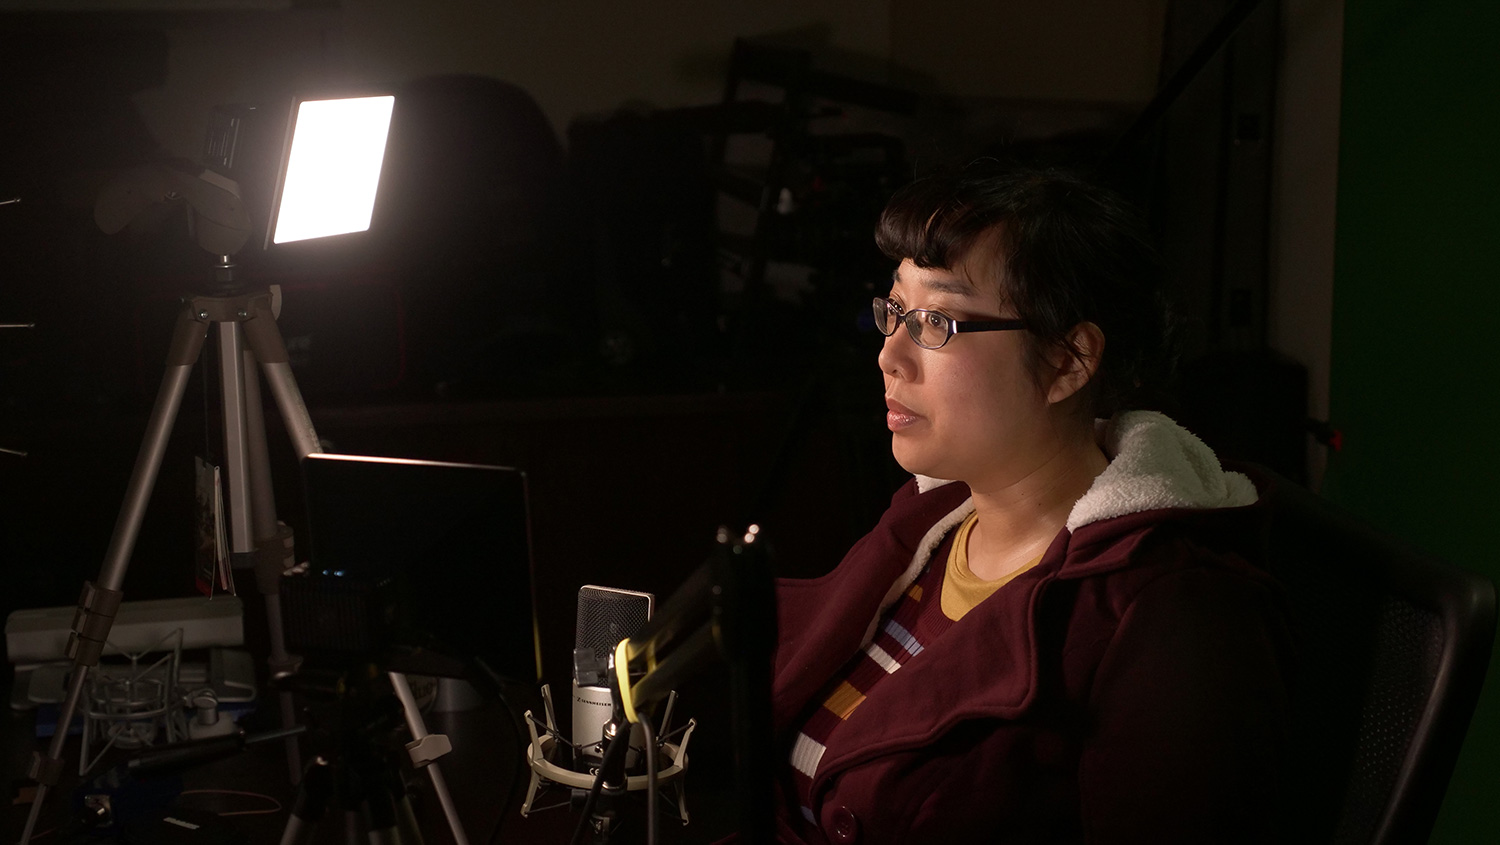
 We think these lights give an impressive result for such a small and inexpensive package, at $620 USD total for the lights and softboxes used here. Let us know your thoughts in the comments section below!If you liked this article, check out some of our other articles on photography!

 Recently at RELATE, we were using the Canon 50mm EF f/1.4 USM and Sigma 50mm f/1.4 Art DG lenses with our EOS R and the EF-EOS R adapter. This got us thinking: are the results really that different?
Therefore, we did a small test with portraiture, which is the type of shot we typically use these lenses for. Camera settings were at 1/125 sec. shutter and ISO 1000, while both lenses were at f/1.4. We've heard that the differences between these lenses are most pronounced when wide open.
This is because the Canon has 7 lens elements, while the Sigma has 13 lens elements. The Sigma includes an aspherical element, which should reduce spherical aberration when wide open. This is the softness that many lenses suffer at large apertures. However, due to these additional elements, the Sigma is twice the size, thrice the price, and three times the weight.
Recently at RELATE, we were using the Canon 50mm EF f/1.4 USM and Sigma 50mm f/1.4 Art DG lenses with our EOS R and the EF-EOS R adapter. This got us thinking: are the results really that different?
Therefore, we did a small test with portraiture, which is the type of shot we typically use these lenses for. Camera settings were at 1/125 sec. shutter and ISO 1000, while both lenses were at f/1.4. We've heard that the differences between these lenses are most pronounced when wide open.
This is because the Canon has 7 lens elements, while the Sigma has 13 lens elements. The Sigma includes an aspherical element, which should reduce spherical aberration when wide open. This is the softness that many lenses suffer at large apertures. However, due to these additional elements, the Sigma is twice the size, thrice the price, and three times the weight.
 The Canon 50mm EF f/1.4 USM is around $325-350 USD new, while the Sigma 50mm f/1.4 Art DG is ≈$950 USD new.
Therefore, we'll take a couple photos from each lens and compare:
The Canon 50mm EF f/1.4 USM is around $325-350 USD new, while the Sigma 50mm f/1.4 Art DG is ≈$950 USD new.
Therefore, we'll take a couple photos from each lens and compare:
 Canon 50mm EF f/1.4 USM
  Sigma 50mm f/1.4 Art DG
  Canon 50mm EF f/1.4 USM
  Sigma 50mm f/1.4 Art DG
  Canon 50mm EF f/1.4 USM
 Sigma 50mm f/1.4 Art DG
As we can see, at the very center of the frame, the lenses are similar, even wide open. Therefore, we'll go a bit further up in the image.
Sigma 50mm f/1.4 Art DG
As we can see, at the very center of the frame, the lenses are similar, even wide open. Therefore, we'll go a bit further up in the image.
 Canon 50mm EF f/1.4 USM
 Sigma 50mm f/1.4 Art DG
This is the eye that was slightly further from the camera. Hence, on both images, we're seeing slight blurring due to the extremely shallow depth of field at f/1.4. Still, with the Canon lens we're starting to see the effects of spherical aberration. Here, it manifests as a slight "smearing" of the image. Even so, they're not that far off from each other. The final crop will be much closer to the edge of the photo.
Sigma 50mm f/1.4 Art DG
This is the eye that was slightly further from the camera. Hence, on both images, we're seeing slight blurring due to the extremely shallow depth of field at f/1.4. Still, with the Canon lens we're starting to see the effects of spherical aberration. Here, it manifests as a slight "smearing" of the image. Even so, they're not that far off from each other. The final crop will be much closer to the edge of the photo.
 Canon 50mm EF f/1.4 USM
 Sigma 50mm f/1.4 Art DG
Here, the difference is most pronounced. On the Sigma shot, the hair towards the foreground is quite sharp, and blurs further back due to shallow DoF. On the Canon lens shot, though, the whole thing is noticeably blurry.
Sigma 50mm f/1.4 Art DG
Here, the difference is most pronounced. On the Sigma shot, the hair towards the foreground is quite sharp, and blurs further back due to shallow DoF. On the Canon lens shot, though, the whole thing is noticeably blurry.
 Canon 50mm EF f/1.4 USM
 Sigma 50mm f/1.4 Art DG
Chromatic aberration is probably more evident here than anywhere else in the picture. Even so, it's not obvious. The eye glint looks like a white disc with several faint colored discs slightly overlapping. Separating the channels, I found that in this area of the image, blues shifted lower-left, while reds shifted slightly upwards.
The animations below show this crop in each color channel.
Sigma 50mm f/1.4 Art DG
Chromatic aberration is probably more evident here than anywhere else in the picture. Even so, it's not obvious. The eye glint looks like a white disc with several faint colored discs slightly overlapping. Separating the channels, I found that in this area of the image, blues shifted lower-left, while reds shifted slightly upwards.
The animations below show this crop in each color channel.
 Canon 50mm EF f/1.4 USM
 Sigma 50mm f/1.4 Art DG
As you can see, the highlight shifts slightly more on the Canon shot, while the Sigma's highlight stays in place. There is a slight amount of chromatic aberration on the blue channel even with the Sigma, though.
Our next chromatic aberration test is on the edges of shapes. As we mentioned earlier, this will be less noticeable on a portrait. This is because the edges of a face will blur more at a larger aperture. Meanwhile, chromatic aberration is less pronounced at smaller apertures.
Sigma 50mm f/1.4 Art DG
As you can see, the highlight shifts slightly more on the Canon shot, while the Sigma's highlight stays in place. There is a slight amount of chromatic aberration on the blue channel even with the Sigma, though.
Our next chromatic aberration test is on the edges of shapes. As we mentioned earlier, this will be less noticeable on a portrait. This is because the edges of a face will blur more at a larger aperture. Meanwhile, chromatic aberration is less pronounced at smaller apertures.
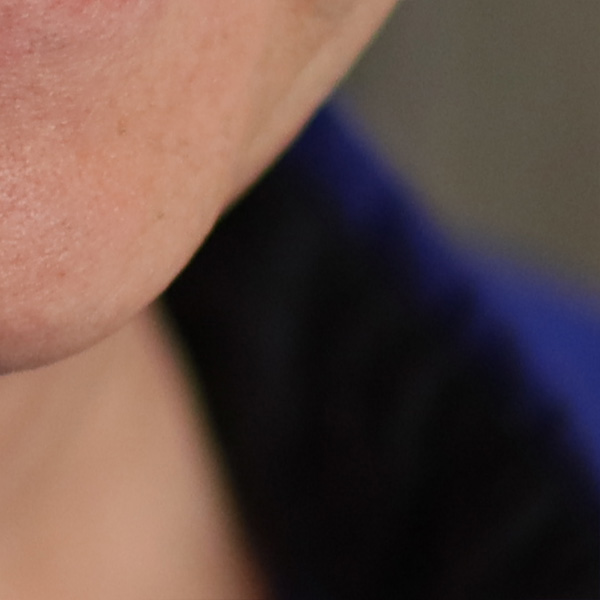 Canon 50mm EF f/1.4 USM
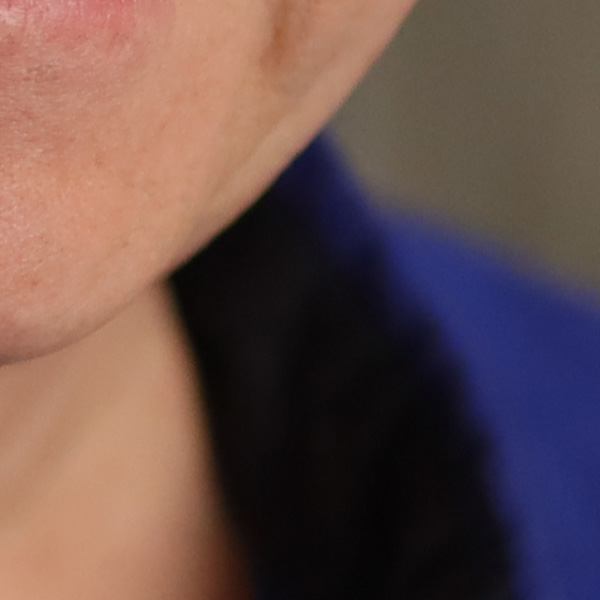 Sigma 50mm f/1.4 Art DG
While a slight shift of the green channel is visible in this area of the Canon photo, it's relatively mild. Towards the edges of the picture, spherical aberration dwarfs the chromatic aberration effect, so it's harder to tell how pronounced it is.
Therefore, I don't think the difference in chromatic aberration will be a major problem for the majority of photo types. Only specific types of shots would highlight the difference here. For example, if you photographed a stark black-and-white polka dot pattern wide open, it may become noticeable.
After all these tests, we come back to the question: is the difference noticeable? Although I didn't notice much difference at first, after closer examination, it's somewhat obvious. However, keep in mind that these were shot at conditions where an aspherical lens element would make significant difference. At smaller aperture values, the differences between the lenses become less and less pronounced.
Overall, your best bet is to compare these lenses and their potential differences against your needs. Do you shoot at large apertures often, and are fine details and sharp edges all throughout the frame essential? If so, does this outweigh the big differences in price, weight, and size?
If you often travel with your camera, weight and size could be a major consideration. One lens is slightly over half a pound, the other is nearly two, the Canon at 290g and Sigma at 815g.
Sigma 50mm f/1.4 Art DG
While a slight shift of the green channel is visible in this area of the Canon photo, it's relatively mild. Towards the edges of the picture, spherical aberration dwarfs the chromatic aberration effect, so it's harder to tell how pronounced it is.
Therefore, I don't think the difference in chromatic aberration will be a major problem for the majority of photo types. Only specific types of shots would highlight the difference here. For example, if you photographed a stark black-and-white polka dot pattern wide open, it may become noticeable.
After all these tests, we come back to the question: is the difference noticeable? Although I didn't notice much difference at first, after closer examination, it's somewhat obvious. However, keep in mind that these were shot at conditions where an aspherical lens element would make significant difference. At smaller aperture values, the differences between the lenses become less and less pronounced.
Overall, your best bet is to compare these lenses and their potential differences against your needs. Do you shoot at large apertures often, and are fine details and sharp edges all throughout the frame essential? If so, does this outweigh the big differences in price, weight, and size?
If you often travel with your camera, weight and size could be a major consideration. One lens is slightly over half a pound, the other is nearly two, the Canon at 290g and Sigma at 815g.
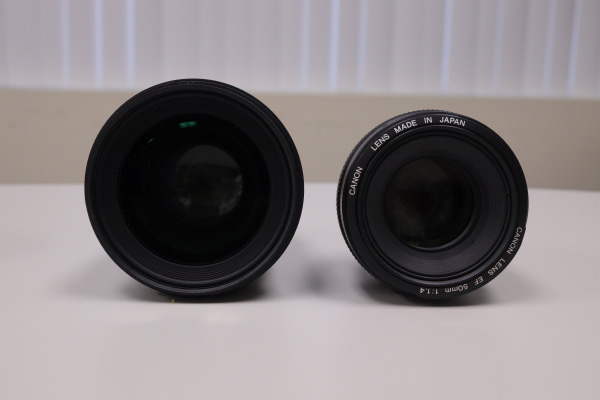 Note the difference in size of each lens' front element.
In terms of dimensions, the Canon is 2.9" x 2" dia. or 73.8mm x 50.5mm dia. Meanwhile, the Sigma is 3.9" x 3.4" dia. or 99.9mm x 85.4mm dia. This means that the Canon lens takes three-quarters of the volume in your camera bag. This doesn't include lens hoods. The Canon 50mm doesn't come with a lens hood, while the Sigma does. While hoods add bulk to your kit, they're a good idea if you're going traveling. Of course, lens flares can be quite trendy in photography nowadays when used consciously!
We tend to take the Canon lens on trips, but the Sigma is an excellent studio lens with crisp resolution of details.
Hopefully this article, though somewhat limited in scope, was helpful to you!
If you found it useful, you can find my other articles on photography and design
Note the difference in size of each lens' front element.
In terms of dimensions, the Canon is 2.9" x 2" dia. or 73.8mm x 50.5mm dia. Meanwhile, the Sigma is 3.9" x 3.4" dia. or 99.9mm x 85.4mm dia. This means that the Canon lens takes three-quarters of the volume in your camera bag. This doesn't include lens hoods. The Canon 50mm doesn't come with a lens hood, while the Sigma does. While hoods add bulk to your kit, they're a good idea if you're going traveling. Of course, lens flares can be quite trendy in photography nowadays when used consciously!
We tend to take the Canon lens on trips, but the Sigma is an excellent studio lens with crisp resolution of details.
Hopefully this article, though somewhat limited in scope, was helpful to you!
If you found it useful, you can find my other articles on photography and design 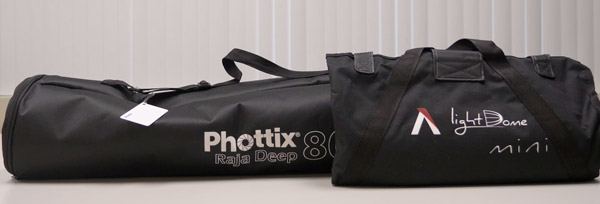
 These photos are exposed for the light with no attachments at 100% brightness. Therefore, light focusers like the Fresnel lens overexpose the image, and the softboxes underexpose them.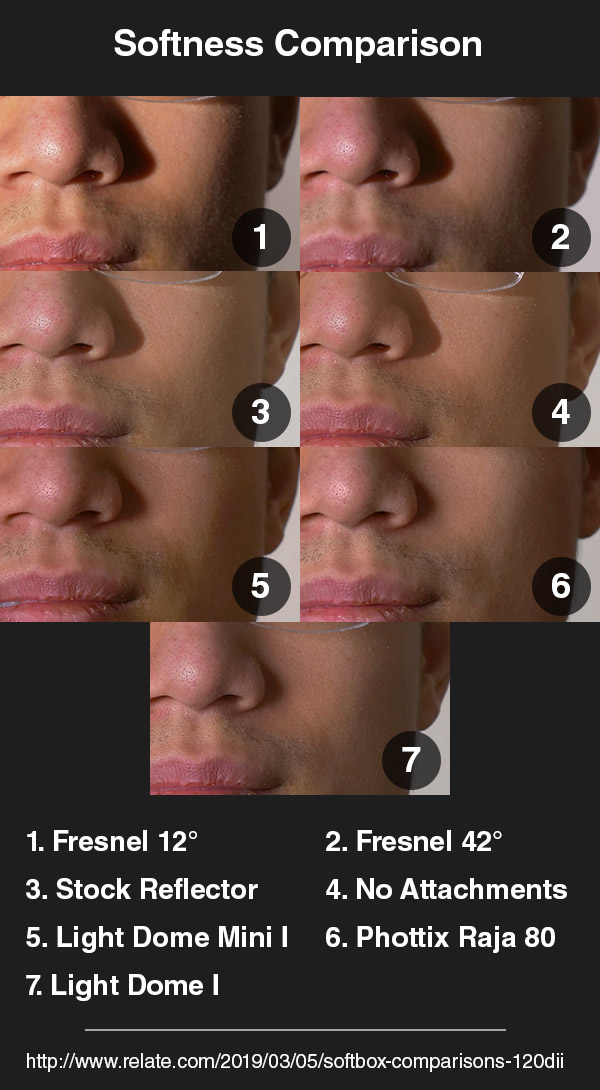


 , the
, the  , the
, the  , and the
  . These tests are available to watch on our video podcast Tech Down Over, available below.