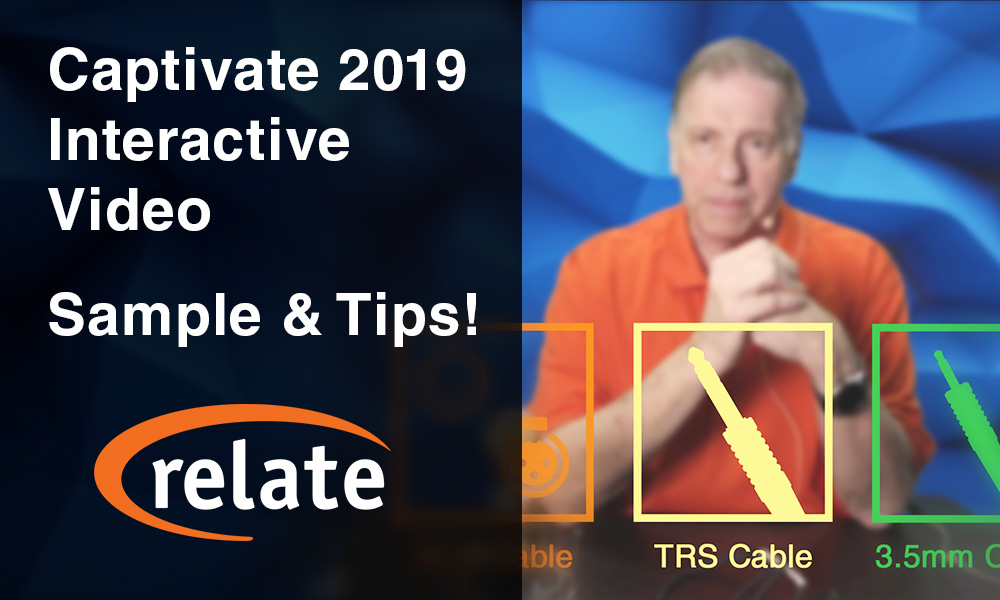
Join us for a look at the Adobe Captivate interactive video element, new to Adobe Captivate 2019.
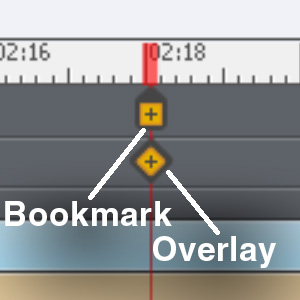
Interactive Video allows you to present a video, either from a file or YouTube, and define bookmarks and Overlay slides. You can jump to Bookmarks with Actions, while Overlays pause the video and show another slide on top.
Buttons can jump to a Bookmark, whether it's on a different slide or the same one. Meanwhile, Overlays let you pause the video and show a lot of content on top of the video, if needed.
An Overlay is contained in its own slide, which is initiated by an Overlay timeline item on the main slide. Therefore, it's super easy to move an Overlay around on the timeline.
Sample Demonstration of Interactive Video
Follow the link below and view our Interactive Video demo in order to get an up-close look at these features!
When using Interactive Video, you may run into a problem we did: white flashes between Interactive Video slides. There are two things to watch out for here: Slide Transitions and background colors.
If you use, for example, a Fade transition on a slide with Interactive video, it tends to fade from white. Likewise, if either your Master Slide or Slide Color are white, it will flash white.
Of course, this can be jarring if your video has a dark background. If you still need to use a Fade transition, you'll want to make sure that:
1. The Slide Color is set similarly to your video's background. When you're on the slide with nothing more specific selected, Slide Color shows in your right Properties bar.
2. The Master Slide color is set similarly to the video background. In order to change this, go to Themes on the top. Specifically, Themes > Master Slide, then Slide Color in Properties on the right.
3. Finally, in Edit > Preferences > Defaults, the Background Color is set to the same color as the others.
Generally, it's a good idea to set these in projects that are heavy on the Interactive Video elements. Besides transitions, you'll also see a flash of background color when jumping back to an earlier slide.
When jumping to Interactive Video Bookmarks from a different slide, they first flash a single frame from the target video. It can be a bit jarring, but we haven't yet found a workaround for it.
The frame it shows is pulled from around the middle of the video, similarly to a YouTube thumbnail. This is what Captivate uses in order to display the video when it's not loading the whole thing.
For example, it uses this frame as the thumbnail for Filmstrip view on the left.
Despite these few "gotcha"s, Interactive Video is a useful new feature that makes creating, well, interactive video, easy in Captivate!
We'd love to hear your comments, corrections, and questions in the comments below!
Recently, we did a Tech Down Over episode on some new softboxes we purchased for our studio at RELATE. Here, we'll recap what we talked about on the show, and go a little deeper into these light modifiers.
In order to get more out of our Aputure c120d and Aputure c120d ii, we got some new softboxes. These are the Aputure Light Dome Mini I and the Phottix Raja Deep 80, which we're comparing with our Aputure Light Dome I.
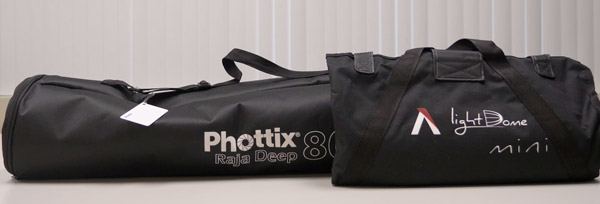
Raja Deep & Mini Dome in their carrying cases.
Note, however, that these light modifiers use the Bowens Speedring standard and will work with any light featuring that mount.
Our tests will take a look at ease of setup, how they affect the light's brightness, and then light softness.
How Easy Are These Softboxes To Set Up?
We mainly use these in our studio, therefore, we don't need to take them apart too often. If you're bringing these with you on a shoot, this could be a big factor in which you prefer, though.
However, even if we didn't take apart the Light Dome I very often, setup was our biggest gripe with it.
You need to bend the dome's 16 rods and then fit them into the corresponding slots. This takes longer than necessary, besides which the force required makes me think I'm about to break the dome!
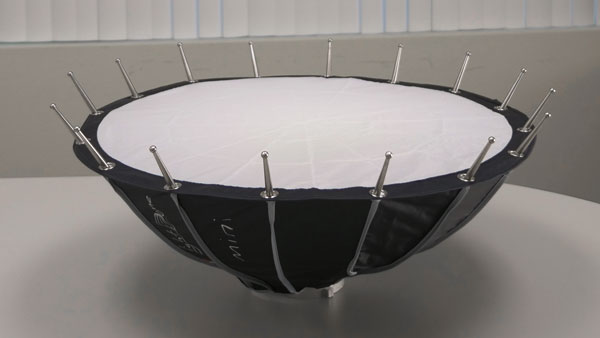
The Light Dome I's Bowens speedring and poles.
As I understand, the Light Dome II has improved on this, but we couldn't get it at the time. This was because of an issue involving CA Proposition 65 and some of the materials in the dome.
The Mini II was also facing this issue. Therefore, we got the Light Dome Mini I and the Phottix Raja Deep 80.
The Mini I has a similar setup to the Light Dome I, but it was easier to assemble. Mostly, this was because it's a lot smaller. It's also a lot flatter, which means you have to bend the poles less to get them into the slots. Overall, I didn't feel like I was going to rip the dome or break the poles, and that's a plus!
The Light Dome Mini's shape makes for easier setup.
Finally, the Raja was extremely fast to setup. This was because it uses an umbrella-like mechanism that allows for very quick dome expansion:
As you can see, it only takes a few seconds to expand this thing.
How Does Each Softbox Affect Light Intensity?
Because the diffusers and reflectors used in these softboxes aren't 100% efficient (naturally!), they reduce the light on your subject. Therefore, we've put together a comparison that should give you an idea of just how much they'll dim your light.
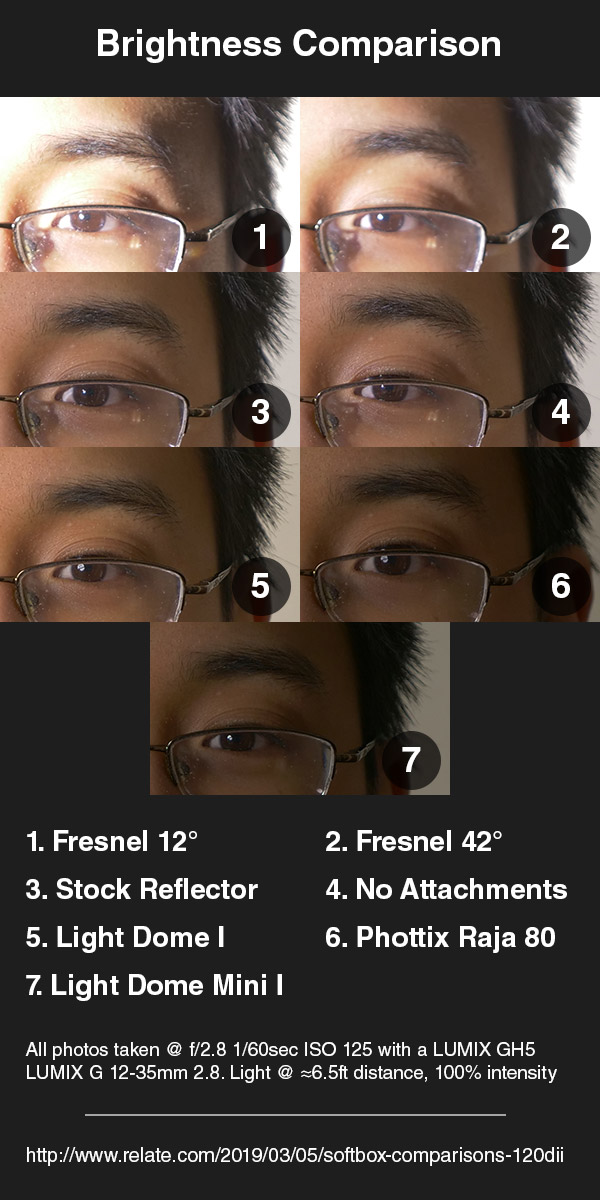
These photos are exposed for the light with no attachments at 100% brightness. Therefore, light focusers like the Fresnel lens overexpose the image, and the softboxes underexpose them.
This basically went as I expected. The Fresnel at its longest focal length created the most intense light, while the Light Dome Mini dimmed the most. This is because the Light Dome Mini spread the light so much. Out of the softboxes, the Light Dome I gave the brightest light.
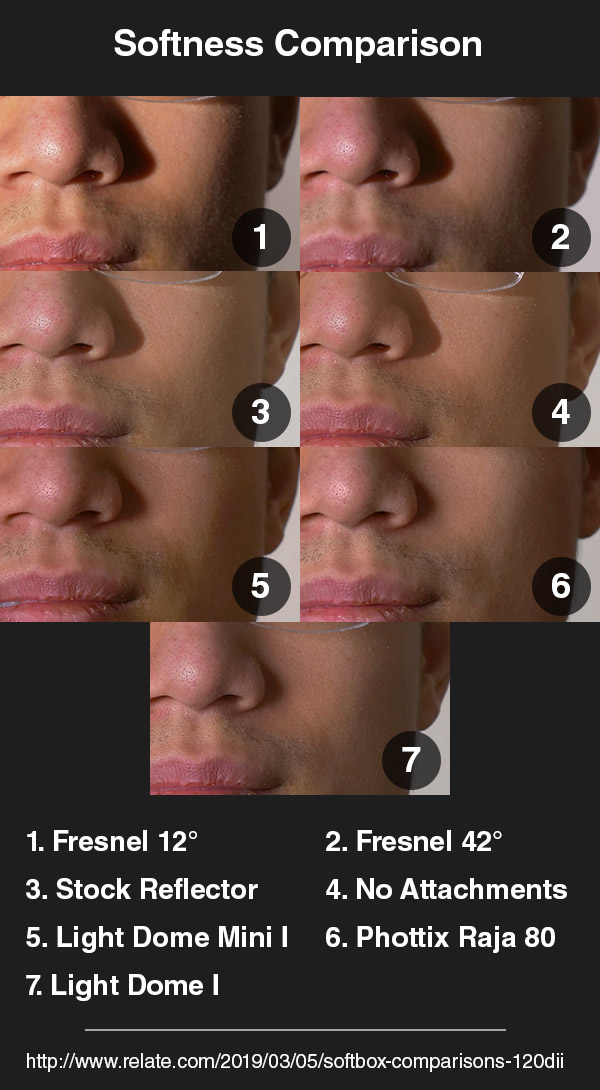
How Much Does Each Softbox Soften The Light?
I expected the light focusing Fresnel lens to create harder shadows than the softboxes and light without attachment. This matched my tests, but the rest of the results surprised me a little.
When compared to the light with no attachment or the stock metal reflector, the softboxes create softer lighting.
However, the difference between these and the light without modifiers was not as much as I'd expected. I may have had the light too far from me. Still, on the larger softboxes, the front of each was only about 3 feet from my face.
With the softboxes, the shadow of my nose is noticeably softer. However, my cheek and the skin texture (which looks rougher with harder lighting) looks about the same. Also, the highlights were about the same.
While I was doing the test, the Raja seemed to offer the softest light. Reviewing these photos, though, it looks like the Light Dome I came out on top.
Which Softbox Is The Best?
In the brightness and softness tests, the Aputure Light Dome I excelled. However, the setup is a beast and a half. Further, it's more expensive than the other two, at about $150 USD.
The Light Dome II combines the poles and speedring for quicker setup, so it may be a more appealing option. But at the time of this article's writing, its availability is limited, especially in California. It also costs more, from what I understand, though none of the retailers we regularly use carry it yet.
Meanwhile, the Light Dome Mini I gives light that's almost as soft as its big brother, and is cheaper, at $100USD. The main draws, though, are the much more portable size and easier setup. It would be much more practical to try and bring this on a shoot. Still, do remember that this knocks out a lot of your light's intensity—you'll need to adjust accordingly.
Finally, the Raja casts light that is comparable to the Light Dome I at a lower price with super-simple setup. The version we bought was about $120 USD, but the setup time taking mere seconds was the biggest draw.
The version we got, the Phottix Raja Deep 80 (referring to its 80cm/31.5in overall length) is quite big. However, it comes in a lot of different sizes and shapes. It comes in both a normal (shallower) profile and the Deep, like what we bought.
Again, it lets out slightly less light than the Aputure Light Dome I, so you'll need to take that into account.
To summarize:
Price: #1: Aputure Light Dome Mini I: $100 #2: Phottix Raja Deep 80: $120 #3: Aputure Light Dome I: $150
Ease of Setup #1: Phottix Raja Deep 80 #2: Aputure Light Dome Mini I #3: Aputure Light Dome I
Brightness #1: Aputure Light Dome I #2: Phottix Raja Deep 80 #3: Aputure Light Dome Mini I
Softness #1: Aputure Light Dome I #2: Phottix Raja Deep 80 #3: Aputure Light Dome Mini I
Of course, these are just the softboxes that we decided to get—they aren't direct equivalents. Still, we hope that this information helped you, whether you decided to get a certain softbox, another modifier, or none at all!
If there's another test you'd like to see us do with these, or if you have other thoughts on lighting, let us know in the comments below!
 Buttons can jump to a Bookmark, whether it's on a different slide or the same one. Meanwhile, Overlays let you pause the video and show a lot of content on top of the video, if needed.
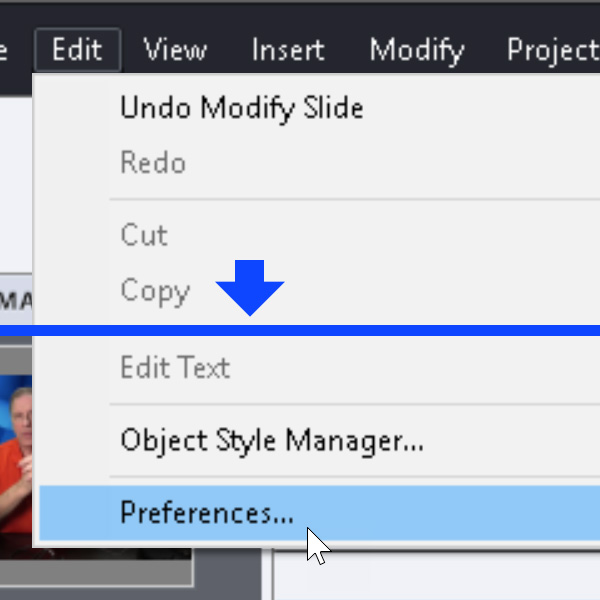

 These photos are exposed for the light with no attachments at 100% brightness. Therefore, light focusers like the Fresnel lens overexpose the image, and the softboxes underexpose them.