 Too much text overwhelms your learners, so today we'll see how iSpring 9 Visuals lets you organize and paginate content.
Certainly, a lot of new ways to do that are available in iSpring Suite 9, using the Visuals editor.
In essence, the Interactions you create in iSpring Visuals can be organized like mini websites. This allows you to include a lot of content that is not only familiar in format, but varied and interesting.
If you're interested in iSpring 9 and its features, we've also done articles on TalkMaster and Cam Pro.
You can either keep reading, or skip ahead to later sections with these links:
Why Use Paginated Content?
How Easy Are Visuals Pages To Make?
Text Editing
How Does Paginated Content Appear In Courses?
Concluding Thoughts
Why Use Paginated Content?
With iSpring's visuals options such as Tabs, Accordion, Catalogue, Media Catalog, you can fit a lot on a single slide. For eLearning courses, you'll often have a lot of content to fit on each slide, but little space for it.
Check out our demo of iSpring Visuals in order to see some of these features in action.
Therefore, we often struggle to fit everything without boring our learners with big, lifeless blocks of text. Generally, things like pop-ups, fading-in content, and animations help break the monotony.
iSpring Visuals doesn't necessarily replace those, but rather, it adds a lot of easy-to-use options. Thus, with minimal effort, you can create a nice-looking course with plenty of variety.
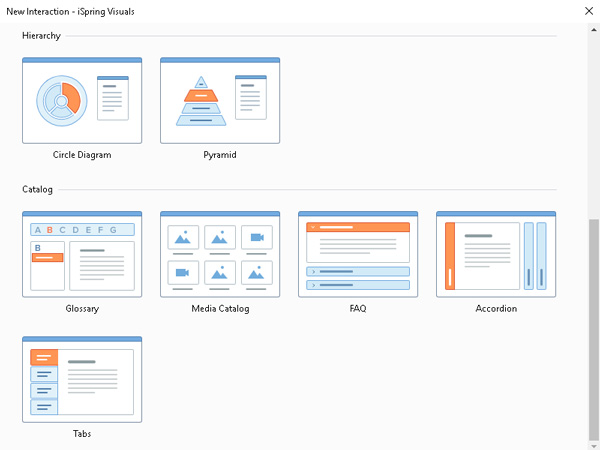
And when I say a lot of options, I mean it. There are 13 iSpring Visuals options at this article's writing and, last I heard, even more are coming.
However, I'll only touch on some of the simpler ones here, including Tabs, Glossary, and Accordion. Rather than going over all of the types in detail, we'll go over some general features.
How Easy Are Visuals Pages To Make?
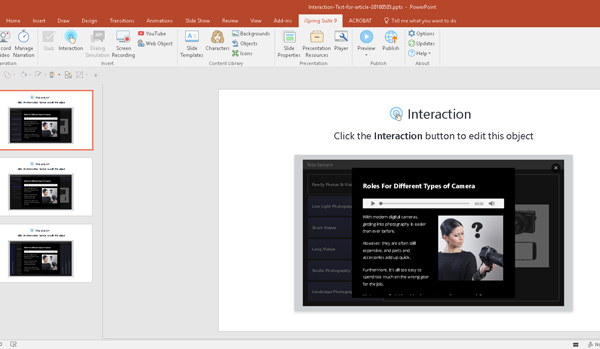
When you click on the Interaction button, the active slide creates an Interaction object, and the Visuals editor opens. This also creates a corresponding ".visuals" file which contains all of the data for that Interactions object.
You can, therefore, import Visuals slides into other PowerPoint files, if needed. In order to make several similar Visuals slides, you can copy the file and import a copy to another slide.
Once the Interaction object is on your slide, it will look like this, with a small preview of your Interaction.
The actual Visuals editor is easy to learn if you know PowerPoint, because the controls use a similar layout. On the left side, rather than slides, you have whatever subpage type applies to the specific Interaction you're using.
Each Interaction type has its own subpage type, but it's nonetheless intuitive; the button is always in the same place.
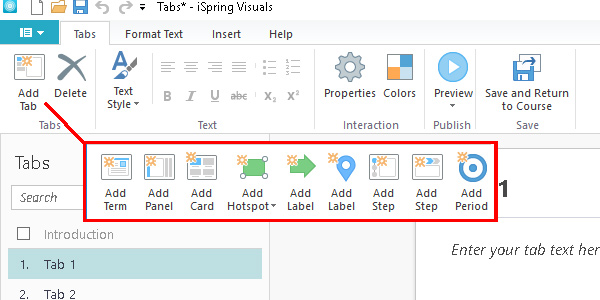
Once you've chosen your Interaction Type, it's quite simple to start adding tabs, panels, hotspots, and get started! So, let's take a look at how you build these subpages.
Text Editing
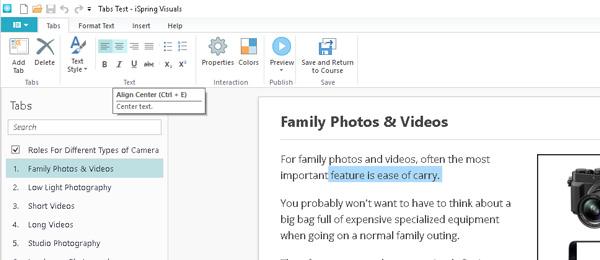
Above, you can see the text editing interface, which works similarly to something like Microsoft Word. Rather than text boxes which you can move around freely like in PowerPoint, the content automatically aligns and wraps.
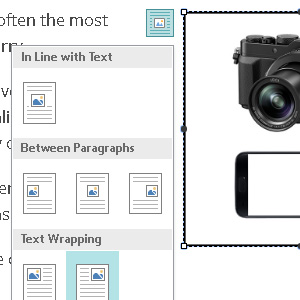 Therefore, inserting images is also similar to Word, where you can align images with paragraphs, selecting how they wrap.
This may be somewhat restrictive, but it's for a good reason; making these pages is very fast and streamlined.
Standard text formatting options are available, such as paragraph alignments and justification, as well as customizable default text styles. Specifically, with the latter, you can set font, size, and use of bold or italic in four different styles.
These styles determine the subpage's title, that is, Item Title, two types of heading, and normal body text.
However, note that these are unique to each Visuals file, not each course or PowerPoint file. In order to re-use styles, you'll need to make a copy of the Visuals file to use as a template.
How Does Paginated Content Appear In Courses?
When you're making an eLearning course, it already has pages and, most likely, plenty of them! Therefore, you may be wondering, "how does pagination within pagination work—won't it be confusing?"
Inside the published course, the main "Next" and "Previous" buttons operate both main slides and subpages of Interaction slides. Therefore, it can work quite seamlessly, eliminating the risk of readers clicking the wrong button.
However, you can change navigation options in the main iSpring PowerPoint plugin. In order to do this, you need to go to the "Player" options on the ribbon.
Here, in case you need learners to easily access other course pages, you can enable Outline navigation. This allows movement from one slide to any other at any time, unless a restriction is present.
Of course, you'll need such a restriction for most courses, as you won't want users intentionally or accidentally skipping content. In order to do this, you can change navigation options in the aforementioned Player window.
 By default, iSpring will add an Outline sidebar to your course, which then allows users to go to any page. However, you have the option to prevent them from accessing pages in the Outline which they haven't visited.
You can see an example of the Outline feature in the demo included in this article.
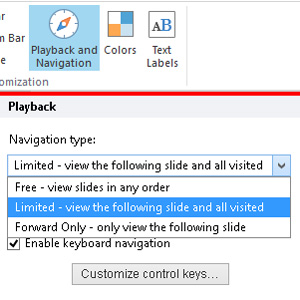
Access these with the "Playback and Navigation" button, where you can then change the navigation type. This will affect both the Outline feature and the main Next and Back buttons.
Concluding Thoughts
Firstly, for more info on this handy tool and details about its features, check out the in-depth webinar by iSpring themselves!
iSpring Visuals is, similarly to many of the Suite's features, an effort to make interesting and varied content accessible. eLearning pieces are oftentimes a dull affair, as we all know, but not without reason.
Making a course stimulating and interesting to look at takes time, resources, and people, more than many training departments have. Therefore, generously-featured authoring tools like iSpring which emphasize ease and efficiency of use are a potential godsend.
All in all, iSpring Suite is a ambitious and rapidly-growing authoring tool. We at RELATE are quite interested to see where it will go next.
In order to read about other features of the Suite, visit our iSpring articles category. Otherwise, check out the official site.
No comments:
Post a Comment