Monday, May 7, 2018

SCORM Cloud: What Is It & Why Should You Use It?

SCORM Cloud has been our go-to testing environment for LMS deploys into Taleo, Cornerstone (CSOD), Sum Total, SAP, and Plateau, among others.


Why We Use SCORM Cloud


Sometimes implementing eLearning courses into an LMS is time-consuming and yet you get only a few attempts. Using SCORM Cloud makes these few attempts go smoothly.


You can use it at your convenience, and quickly and easily load many different test scenarios.


Essential Features


With SCORM Cloud, you can verify your course runs, scores, and display information like the title and description.


We also use it to test multi-sco implementations, heavy media implementations, and to invite users to test their courses in an LMS environment.


How to Get Started: SCORM Cloud Pricing


Pricing for SCORM Cloud ranges from free to a monthly subscription. Subscription costs increase based on the number of new user registrations you need to accommodate each month.


Here is the official website if you're ready to learn more: https://scorm.com/scorm-solved/scorm-cloud-features/


Need Help?


If you need help with any steps in LMS implementation, contact us today at Relate Corporation. We have over 20 years of solid experience in the training industry and we are confident that we can help make your project a success! To schedule a consultation, call us at 1-800-428-3708, send us an e-mail at connect@relate.com, or fill out our contact form. We'd love to hear from you!


5 Things Needed to Manage a Remote Team

As it becomes increasingly more difficult to find competent resources where you are, it has become imperative to work with people or vendors that are remotely located. This can be good or bad as there are many factors that influence the success of those remote individuals and yourself. How does one effectively manage a remote team?


Following are five important things to implement or, at least, keep in mind when embarking on remote resources...


1. Establish Rules of Communication


Remote Workers Close CommunicationThis may be the most critical thing of all, the ability to communicate clearly and as often as needed for you and your remote workers.


While this sounds simple, many factors can come into play which cause you to overlook the remote worker mostly because out of sight usually means out of mind.


Daily communications, or at worst, weekly touch-bases, are critical for success.


I've managed groups of remote workers for almost 20 years now and have learned that these steps are crucial to letting me sleep better at night:


a. Daily check-ins by e-mail or by phone. That sounds easy, right? And it is... until you're really busy or firefighting problems. If your remote worker is out of your mind, then you are probably out of their minds as well...


b. Make each remote worker submit a Weekly Status report. It doesn't have to be huge or super-detailed, but it has to be there. It is an important touch-point that also makes the remote worker accountable for what they are doing.


c. Use tools like Zoom Meetings, WebEx, Skype or others to communicate with your remote workers when needed if they have a webcam. If no webcam is available then the sound of your voice will have to do.


Communications between you and the remote staff cannot be under-estimated. It is a very powerful way to build a communicative team that values the dialogue between a home base and the remote tundras...


2. Provide Tools to Chat or Share with


Using Tools To Chat And Share InterconnectionWhile this sounds a little like the first point, it's really quite different.


You want your remote workers to feel a "part of the team," to feel like they are valuable team players that contribute to the success of what your company is trying to accomplish.


Not only do you want your remote workers to communicate with you, but also to their co-workers and other team members.


Often remote workers feel isolated, apart from the team and not included in what's happening in the "real" office. These feelings of alienation won't affect all remote workers, but it could affect a lot of them and it will depend on what kind of jobs they are doing and how social they are.


Making a remote worker feel part of a team will greatly affect the productivity and performance of that individual. When all else fails, go back to Point 1, communicate often...


Recording And Taking Notes3. Document Everything!


Talking with someone remotely is important, and so is documenting what you talked about either before or immediately after a talk.


Verbal talks are great and build camaraderie. But if you don't document what was discussed, there's a good chance that within minutes the talk will be gone along with what was required of your remote worker.


Don't assume that what was discussed will be acted upon.


Part of the documentation process is to establish the following:


a. Tasks
b. Due dates
c. Final deliverables


If you have an on-line project management system, that will go a long way to communication and making clear what is required of everyone, including inter-dependencies between tasks and deliverables. There are many great simple project management tools like:


a. Smartsheets


b. ProProfs Project (formerly called Project Bubble)


c. Asana


d. Basecamp


4. Understand that Not all Remote Workers Should Be Remote


Separated Worker Remote WorkerWhile many workers can successfully work remotely, it's not appropriate for ALL workers to be remote. In fact, in some cases, working remotely can actually be a detriment.


If you run a Learning and Development group which develops media-rich digital learning courses, do you think every one of these team team members could work remotely?


a. Project leaders
b., Instructional Designers
c. Graphic artists
d. Voice-over talents
e. Video editors
f. Quality control reviewers
g. Social Media posters


Did you answer, "Yes", to everyone one of these?


Did you say, "No remote work..." for some of them?


In both cases you would be right!


Every job listed could work remotely. What would change with each of these is the amount of extra effort it would take to make each worker successful.


In my experience, those workers having the most to do with media, like graphics creation, are better kept in-house.


It's not that they cannot work remotely, it's that the amount of communication required to make this type of worker successful may make it very difficult to achieve quick turnaround times when the person is remote. The more creative the individual, the more it's like herding cats when they are remote and not understanding your vision...


If a particular worker is part of a vendor providing services to you , then anyone can work externally because the vendor should have the necessary staff to manage and ensure completion of tasks and designs.


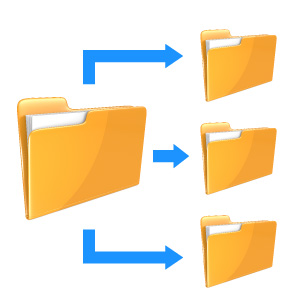
5. Make Sure You Have Adequate File Sharing


file-sharingIt is often amazing to see how many remote workers don't have a sense of Risk Management and how crucial it is to make backups of the work they do.


This often causes millions of dollars in wasted time and lack of productivity because things can and will go badly (that old Murphy guy always shows up).


To ensure that your remote workers, especially if they are developing things that are not necessarily on-line, provide them with tools like Dropbox and SharePoint.


There are many other online services that will allow teams to work well together remotely. In my case I use Dropbox and we're about to implement SharePoint.


Make sure the remote workers are saving their work often and definitely at the end of the day. If a remote worker often loses the work they did, forgets to save it, or simply doesn't follow your guidelines, then maybe that's the wrong person for you...


I would also recommend that remote workers not have 'Delete' rights to anything . We have had people that inadvertently deleted 30 GB or more of information. Not a good thing. And while it can usually be retrieved and restored, it can delay your team for hours.


Summary: How to Best Manage a Remote Team


In closing, using remote workers can be a life-saver. Make sure you interview the remote workers well and try as best you can to ascertain their sincerity and discipline. Not everyone is good at working remotely and not everyone should.


About the Author


Rick Zanotti is the CEO of Relate Corporation, a Training and Development company developing media, corporate video, eLearning, ILT, broadcasting and more.


In Need of Help?


If you need help with training & development, we offer professional development services including corporate video and audio production, as well as management consulting. Feel free to send us a note on our contact form, e-mail us at connect@relate.com or call us at 800-428-3708, and we'll be happy to help you out. Thanks for reading!

Tuesday, May 1, 2018

iSpring 9 Cam Pro Quick Look: Fast And Easy Integrated Video Editor

If you're not familiar with iSpring, it's essentially a full-featured eLearning authoring tool that integrates with Microsoft PowerPoint. iSpring Suite 9 Cam Pro's new video studio is the forefront new feature of Suite 9, released on April 24, 2018.

We were eager to see what iSpring's team came up with, so we've done some tests of the editor.

This is separate from both the "Record Audio" and "Record Video" features for presentation narration, and their corresponding editors. Cam Pro, accessed from "Screen Recording," lets you create and edit videos and save them as .mp4 or other video formats.

iSpring 9 Menu Ribbon Recording Options

The video studio is a new addition to iSpring Cam, the screen recorder tool available since Suite 8. Similar to something like Camtasia or OBS, Cam Pro chiefly focuses on eLearning and instructional presentations.

Keep reading for our first impressions on this handy new feature of iSpring Suite 9. You can also check out article sections with the links below.

Interactive Canvas
Video Editing in Cam Pro
Cursor Recording
Performance
Conclusion

Capabilities of iSpring 9 Cam Pro's Video Editor


Continue reading for our quick look at the abilities of this powerful new feature.

Interactive Canvas


Cam Pro has the ability to insert shapes, text, images, audio, and video with ease. These then go into your video timeline, where you can adjust volume, transparency, add transitions, or split them into segmenmts.

All of these elements can be overlaid above each other, moved around, resized, and made more or less transparent. This is the Interactive Canvas.

Cam Pro accepts most image and video formats. Similarly to PowerPoint, it accepts PNG transparency. However, animated GIFs will not play.

If you'd like to see an example of this, please watch the video we made to demonstrate these features:


Double-click the video for fullscreen.


Video Editing in Cam Pro


Because the editor is a new addition, many of the features feel like they have room for expansion.

For example, the noise reduction feature in the Narration section's Video Editor is not available in the Cam Pro editor. However, the options you do get already greatly improve iSpring Cam's usefulness.

Although the available transitions are similar to PowerPoint's, they are all animated on a whole-frame basis. This is unlike PowerPoint, where transitions are scaled to the size of the animated element.

For example, watch the following animations:

iSpring 9 Cam Transition Test Big FaceiSpring 9 Cam Transition Test Small Face

Both animations were made with the same transition settings and timing.

Overall, I think the transitions work very well, and I like their smooth appearance. However, the entire-frame nature of the transitions means they're less suited to animating discrete lines of text or small images.

Cursor Recording


Cam Pro has good functionality for showing and emphasizing the mouse cursor during a presentation:

iSpring 9 Cam Pro Cursor Options

You can show or hide the cursor in a presentation, which takes effect in all screen recordings in a project. Also, you can highlight the cursor for easier visiblity, with different colors shown for left and right clicks.

Screen recording in Cam Pro always captures mouse movements and actions, therefore, they can be shown or hidden easily.

Another thing I noticed, though minor, was that the tool cannot record itself. UPDATE: I was mistaken. In fact, you can have multiple copies of iSpring Cam Pro open at once, able to record each other if needed!

Certainly, the ability to record multiple screen regions at once opens some interesting possibilities, especially for computers with multiple displays. See video below for a demonstration of recording Cam Pro with another instance of Cam Pro:


Performance


I did notice that, when recording 4K video from a camera, the program chugs a bit and records at a lower framerate. Hence, the video above is 800x600, since the webcam I used only records at those two resolutions.

Therefore, for best performance and quality, I'd recommend an HD, not 4K, webcam. At any rate, 4K video is not particularly essential for the talking-head-type videos that most users will record with this.

Even though it's lower, the framerate in 4K was still good enough for a presentation. To illustrate, I'm including an image below:

iSpring Cam Pro Framerate Test 4K Webcam

Aside from recording, I didn't observe any performance slowdown, so far. I was able to play back several 1920x1080 videos in a project simultaneously and the program still ran smoothly.

Conclusion


So far, iSpring 9 Cam Pro's video editor is shaping up to be a very useful and convenient editing tool.

I did have one PowerPoint crash over several days of testing, however I'm not sure if Cam Pro caused it. I haven't been able to reproduce the crash so far.

Overall, it's performed well and the videos I've made with it have come out nicely.

Therefore, this video editing tool promises the same high level of quality we've come to expect from iSpring. I'm looking forward to see how iSpring will continue to develop and improve this function.

Tuesday, April 17, 2018

Leslie's Findings: Adobe Captivate 2017

This post is the second in my series of blog posts on authoring system findings. My first post dealt with various issues encountered while publishing to an LMS using Articulate Storyline 360. This time, we will look at Adobe Captivate 2017.

The following are findings on publishing in Adobe Captivate and text entry in HTML5.

1. Publishing in Adobe Captivate 2017: Choose One Output Format


The Publish window seemingly allows you to select both Flash and HTML5 output at the same time. However, when I tried doing this, the published content didn’t load using Scorm Cloud or Litmos.

The publish has to be only for Flash, or only for HTML5 to load successfully. The screenshot below shows publish options in Adobe Captivate:


Here is the SCORM Cloud error message you will see if you attempt to publish for Flash and HTML5 simultaneously:

Scorm Cloud Error Publishing From Adobe Captivate 2017

2. Text Entry with a Tab Key: Tablet Hard Keyboard Only


From my experience using a Samsung Galaxy Note Pro Android tablet, I've found that text entry with a tab key does not work in HTML5 on tablet soft keyboards. It doesn't work on desktop, either.

However, it did work when using a physical keyboard for the tablet.

This is because seamless tabbing, where the selected area moves throughout the screen and is not focused on the text entry object, is turned on for the tablet soft keyboard and for the desktop.

Still Having Trouble with Authoring Tools? We Can Help!


Thanks for reading — I hope my Captivate findings were useful to you. Keep an eye on this post and the Relate blog for updates, as I will be posting more helpful findings.

If you're struggling with any steps in LMS implementation, contact us today at Relate Corporation. With our 20+ years of solid experience in the training industry, we can assist in making your project a success. Feel free to call us at 1-800-428-3708, send us an e-mail at connect@relate.com, or fill out our contact form. We'd love to hear from you!

Tuesday, April 10, 2018

Some Findings Using Articulate Storyline 360 when Publishing to an LMS

I've been working with learning management systems for over 20 years. I have run into both the good and the bad of an LMS. In this series of blog posts, I will discuss some of my findings for current authoring systems. In this blog, we will talk about Articulate Storyline 360.

Publishing to LMS


This section was updated with a new subsection on 5/1/2018.

Publish Format: Flash or HTML?


The LMS environment used was Scorm Cloud and Cornerstone (CSOD).

You can publish for Flash with HTML5 fallback, or HTML5 with Flash fallback and both ways will load successfully in an LMS:

publishing flash and html5

Both publish methods work superficially. Once in a while a trigger will not work with this combination. When a trigger doesn’t work, it isn’t the same trigger type.

The solution is to publish for only one: Flash or HTML5.

Workaround for the "Jump to the Back" Issue


LMS environment used was Scorm Cloud, Litmos, iSpring Learn and Cornerstone (CSOD).

Using Internet Explorer, when the first slide is an .mp4 video, the course will start in the front on your desktop in your browser, but on an automatic jump to the next slide, it will wind up in the back on the desktop in your browser.

This issue does not occur when using Chrome or Firefox.

Below is a web link showing the .mp4 as the first slide. Note that because it is not in the LMS, you will not see the jump to the back.

www.relatecasts.net/blogsamples/Avinger_MP4Before/story.html

This problem can be fixed by simply putting an extra slide for about .25 of a second in the front with an automatic jump to the next slide.

This web link shows the static slide just before the .mp4:

www.relatecasts.net/blogsamples/Avinger_MP4After/story.html

This is an issue with both Storyline 360 and in this case with the LMS, Cornerstone.

It doesn’t happen with Storyline 360 in Scrom Cloud, Litmos, or iSpring Learn.

Nor does it happen with Captivate 2017 in Scorm Cloud, Litmos, iSpring Learn, or Cornerstone.

This issue used to occur in Captivate, and we had to use the same first slide workaround, but now it is fixed as we use Captivate 2017.

I've also written a separate blog article on my findings in Captivate 2017.


Triggers and Objects when Published for the LMS


As new versions of Storyline 360 are released, triggers and objects that were working may not work.

For example, the trigger for Media Completes was broken in Version 12. It worked in Version 11 and now in Version 13.

For the scroll area in Flash, the mouse scrolling doesn’t work for Internet Explorer 11. Don’t be mislead when it works in preview. It used to work in Storyline 360 Version 10. It no longer works for Version 11, 12, or 13.

The scroll bar in the scroll area has one look published, another look in preview, and another look in development:

Articulate Storyline 360 Scrollbar Development View

Articulate Storyline 360 Scrollbar Preview View

Articulate Storyline 360 Scrollbar Published View


Graphics


When you export a graphic, in our case a .png, your size will be a few pixels off from the original size. For example, if the original .png was 434x434, when saving this picture in Storyline it changes to 432x432. If you try to do a change picture after exporting this, it will blur.

Converting from Storyline 1 to Articulate Storyline 360


This section was added as an update to this blog article on 4/23/2018.

We needed to make changes to a Storyline 1 .story, using Storyline 360. We had player navigation buttons for Next, Prev. When we converted straight to 360, the navigation buttons no longer displayed, however, the button area was still active.

Two-Step Conversion


So we tried something different – converting from Storyline 1 to Storyline 2, then to Storyline 360. Using this two-step conversion method, the buttons were correctly retained.

Importing instead of Converting


However, to be more efficient, we tried importing to a new 360 project straight from Storyline 1. It worked! We had a 24 slide course, and checking everything, the conversion was good!

Example of a Successful Storyline Conversion


Note: The player buttons for the 360 version are gray, and there is an audio button to differentiate between the two versions.

Here is the link before in Storyline 1:

https://www.relatecasts.net/blogsamples/SL1_CardBuddy/story.html

Here is the link after in Storyline 360:

https://www.relatecasts.net/blogsamples/SL360_CardBuddy/story.html

We believe the conversion was accurate. Feel free to let us know if you see any problems in the 360 version!

Word Bank Quiz Question in Storyline 360


In the conversion we also saw that the Word Bank quiz question no longer worked without the Submit button. We were able to use "drag on" triggers in Storyline 1 and 2, but this currently isn’t the case in 360. (The "drag over" trigger, however, does still work in 360.) This is true in Storyline v3.15.15453.0 and in v3.14 as well.

Need Help with Articulate Storyline or other Tools?


If you need any help with LMS implementations, Relate can help. Feel free to write us at connect@relate.com (you can also message us on our contact form) or call us at 1-800-428-3708.

Tuesday, March 13, 2018

IK Multimedia iRig Pre HD Initial Impressions (Pt. 2)

This is a two-part article.Click here for Part 1.


Yesterday, we tested the IK Multimedia iRig Pre HD mobile mic preamp on an iOS device, the iPad Air. They didn't give us the cable to connect to an Android device, that is, a Micro USB or USB 3.1 cable. Therefore, we had to wait until today to do an Android test; we used a Samsung Galaxy Note 8 phone. You can listen to the test recording below.

Monday, March 12, 2018

IK Multimedia iRig Pre HD Initial Impressions (Pt. 1)

This is a two-part article.Click here for Part 2.


Today we tested the IK Multimedia iRig Pre HD, which we plan to use for some mobile recording.
This is a compact mic preamp built for audio recording with mobile devices, but it also works on desktop or laptop computers. Below is our test recording using an iPad Air.


The iRig hooks up to your device using a USB cable, and has a micro USB port. The preamp comes with a cable to connect itself to a USB 2.0 A port, which you probably have on your computer. It also has a Lightning cable, but nothing for Micro USB or USB 3.1 Type C, which Android devices use.
The iRig Pre HD has a 3.5mm headphone jack for its direct monitoring feature, which allows you to monitor the recording with no audio delay. From my test, that feature works very well, and offers a volume dial.

The microphone we used for this test was a RODE NT1000 condenser mic, which we used to test the 48V Phantom Power feature. The device comes with 2 alkaline AA batteries, and it seems to have handled the phantom power well. This is just an initial test, so we don't yet know how long the iRig can run on these batteries.

The device has two LED indicators, one to show you whether the phantom power is on, and one to show the levels. The levels indicator is very basic, so my expectations were low, but it works pretty well. It stays blue with no audio, it turns green when picking audio up, orange when it's louder, and red when it clips.

One thing to note if you're using this on desktop: I tested it briefly with Adobe Audition, and noticed it made my voice very high-pitched. Therefore, if you try the iRig out, make sure your Master Clock in your audio hardware settings is set to the iRig and not your sound card.

As for mobile apps, I used iRig Recorder Free with the iPad, and it has okay functions offered for free. Basically, you get to record, listen, and export as .m4a for free. All other features require micro-transactions to unlock. I assume this device also works with other recording apps, and that is something we may test in the future.